Can you believe that Christmas is just around the corner?! It’s such an exciting, yet busy time of year. Now, I don’t know about you, but I still have a bit of decorating to do. Ok, I still actually have a lot of decorating to do. It’s been a busy couple of weeks! So, if you still have a little decorating to do, or even if you don’t, you might enjoy this quick and easy Christmas DIY!
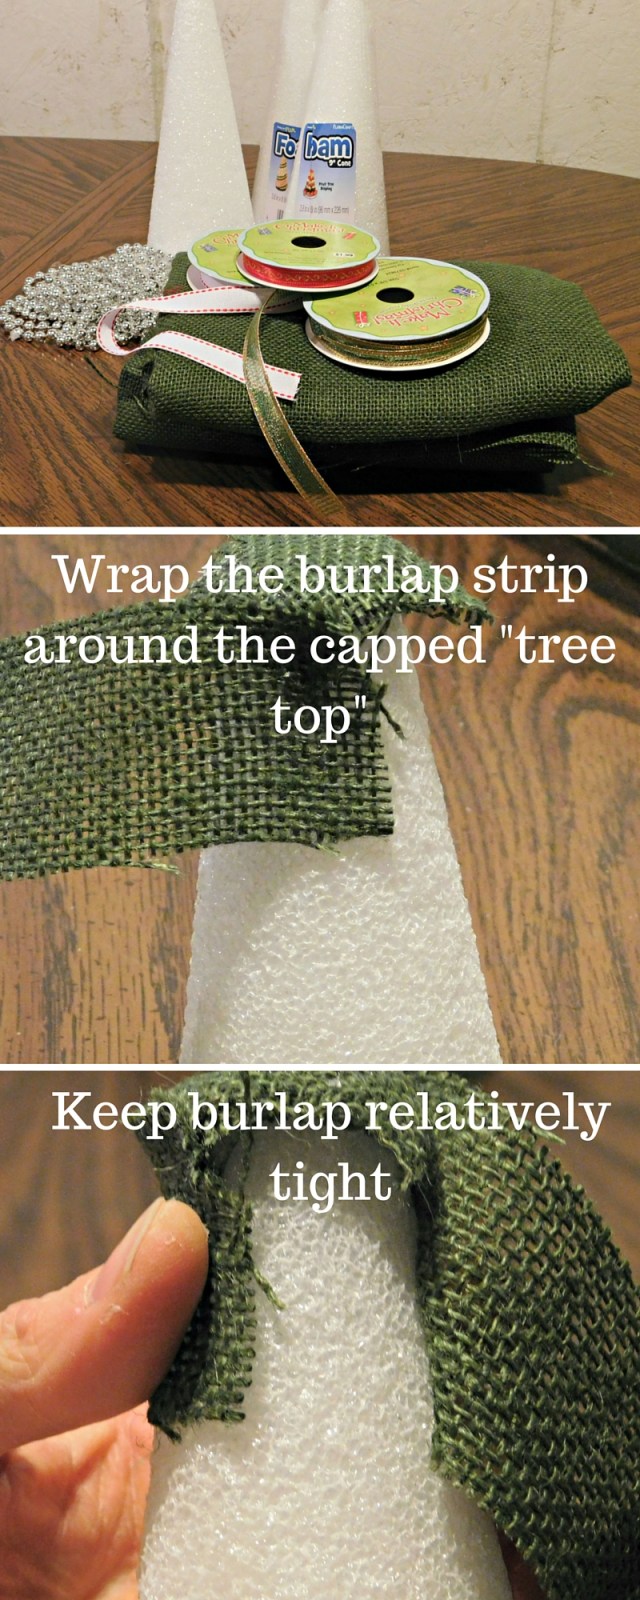
Materials not shown in the picture:
hot glue gun
scissors
red beads (or other decorations you may want to use)
Steps not show:
I cut down two of the cones with a serrated kitchen knife, so the trees would be 3 different sizes.
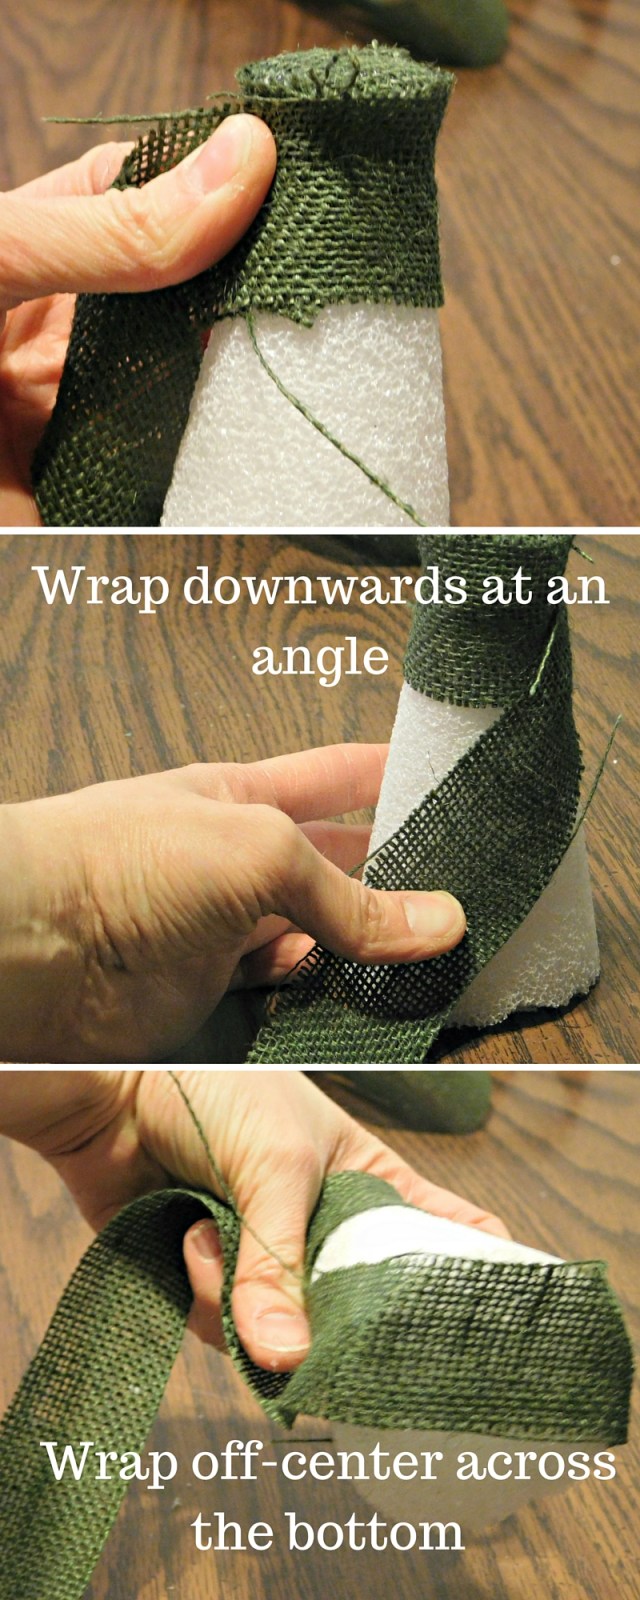
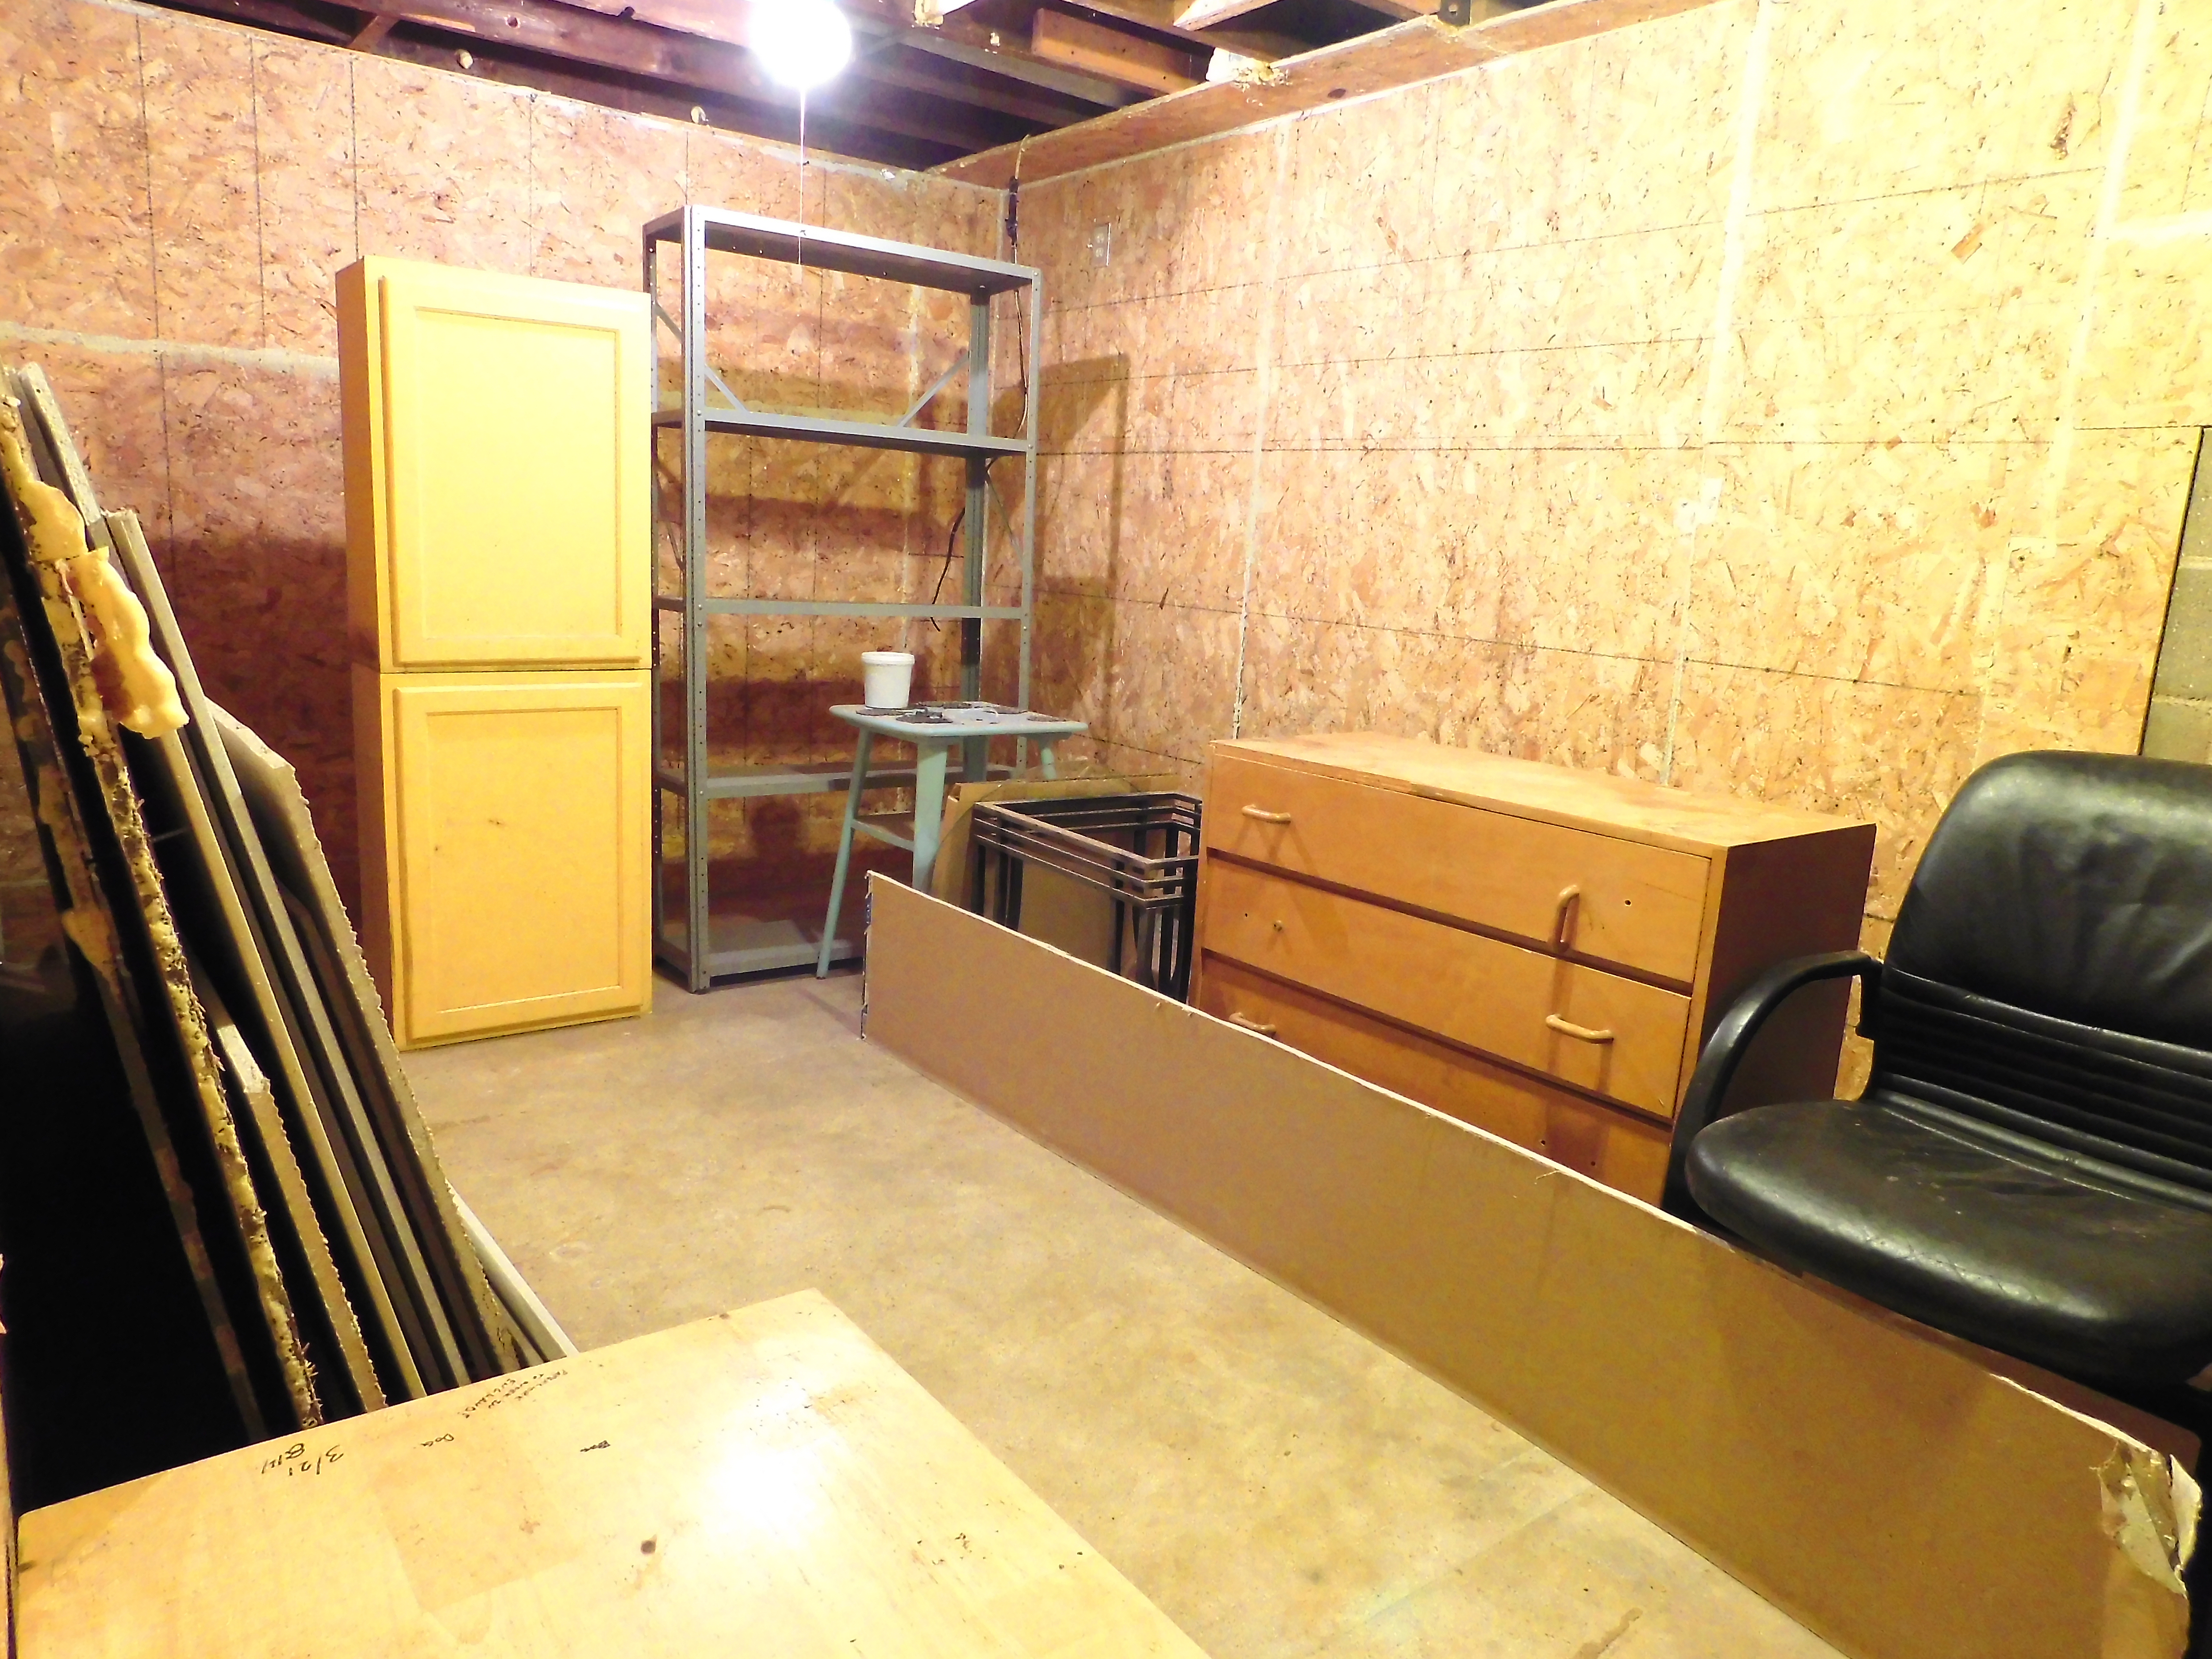
The cap for the tree was two squares of burlap glued on the top, overlapping.
Step not shown: Trim off any frayed parts that are sticking out more than you want them to. It’s burlap, so it’s going to have “unraveled” bits either way, but you can clean it up some once the tree is completely covered.
After I had put on the silver garland, I decided I wasn’t a big fan of the ribbons I had originally thought to use. Instead, I added some red beads to imitate ornaments. I love how this turned out!
And that’s it! This project didn’t take much time at all to finish and is the perfect addition to my snowman collection!
Have you made any new decorations for Christmas? Are you all done decorating, or do you still have some left to do? I’d love to know your thoughts!
I’m sure you have all seen beautiful, light-filled craft rooms on Pinterest and blogs, colorful and just waiting to inspire creativity. I have this dream craft room…second-story room, windows with a beautiful view, waist high island with lots of cubbies for storage, colorful and organized. Sadly that room is still a far off dream, but sometimes you have to make due with what you have!
For years I have hidden away materials, only dragging things out to the living room when I had a project (or five) that I was working on. I had a card table permanently overflowing with those materials…it was an eyesore. Finally, a few months back, I decided that was enough!
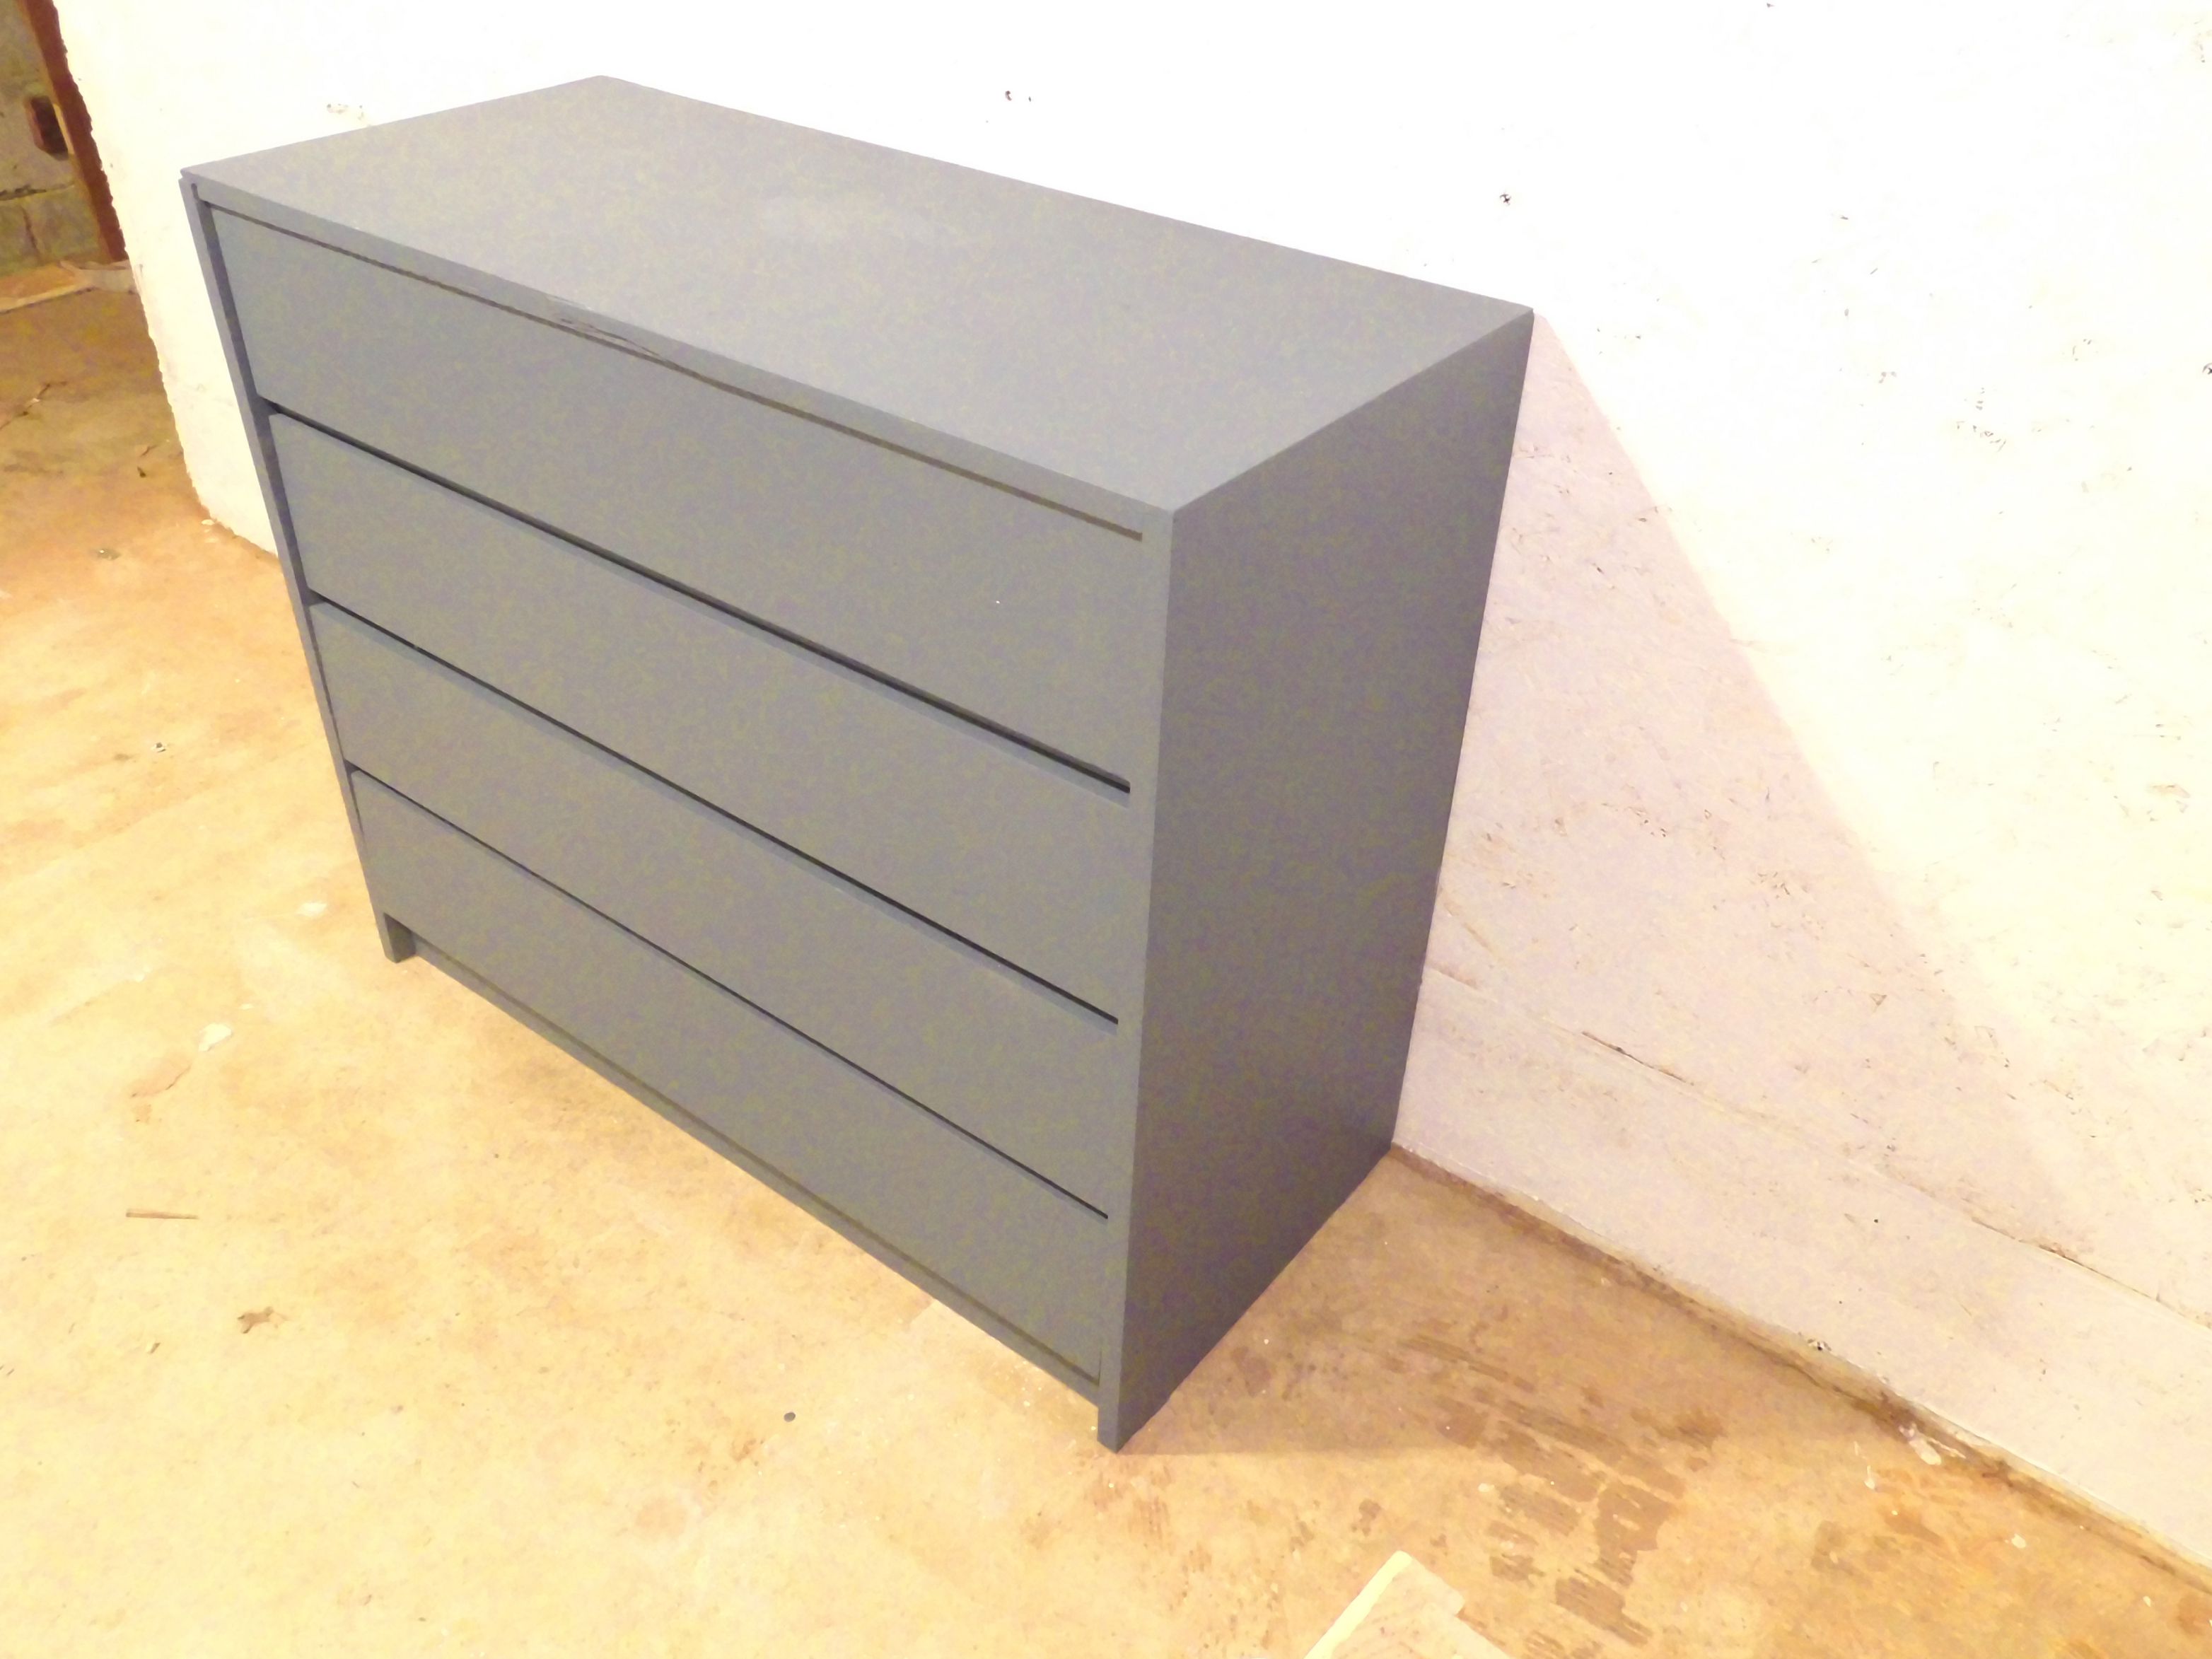
Now, our basement is not nice, or pretty. But it definitely will work for a craft space.
I started off clearing out most of the stuff out of the back room and painting the walls. While these are not drywall or anything, the paint helped a lot! Then I upcycled a dresser for some extra storage. If you are interested in what I did for that and missed it, check out this post.
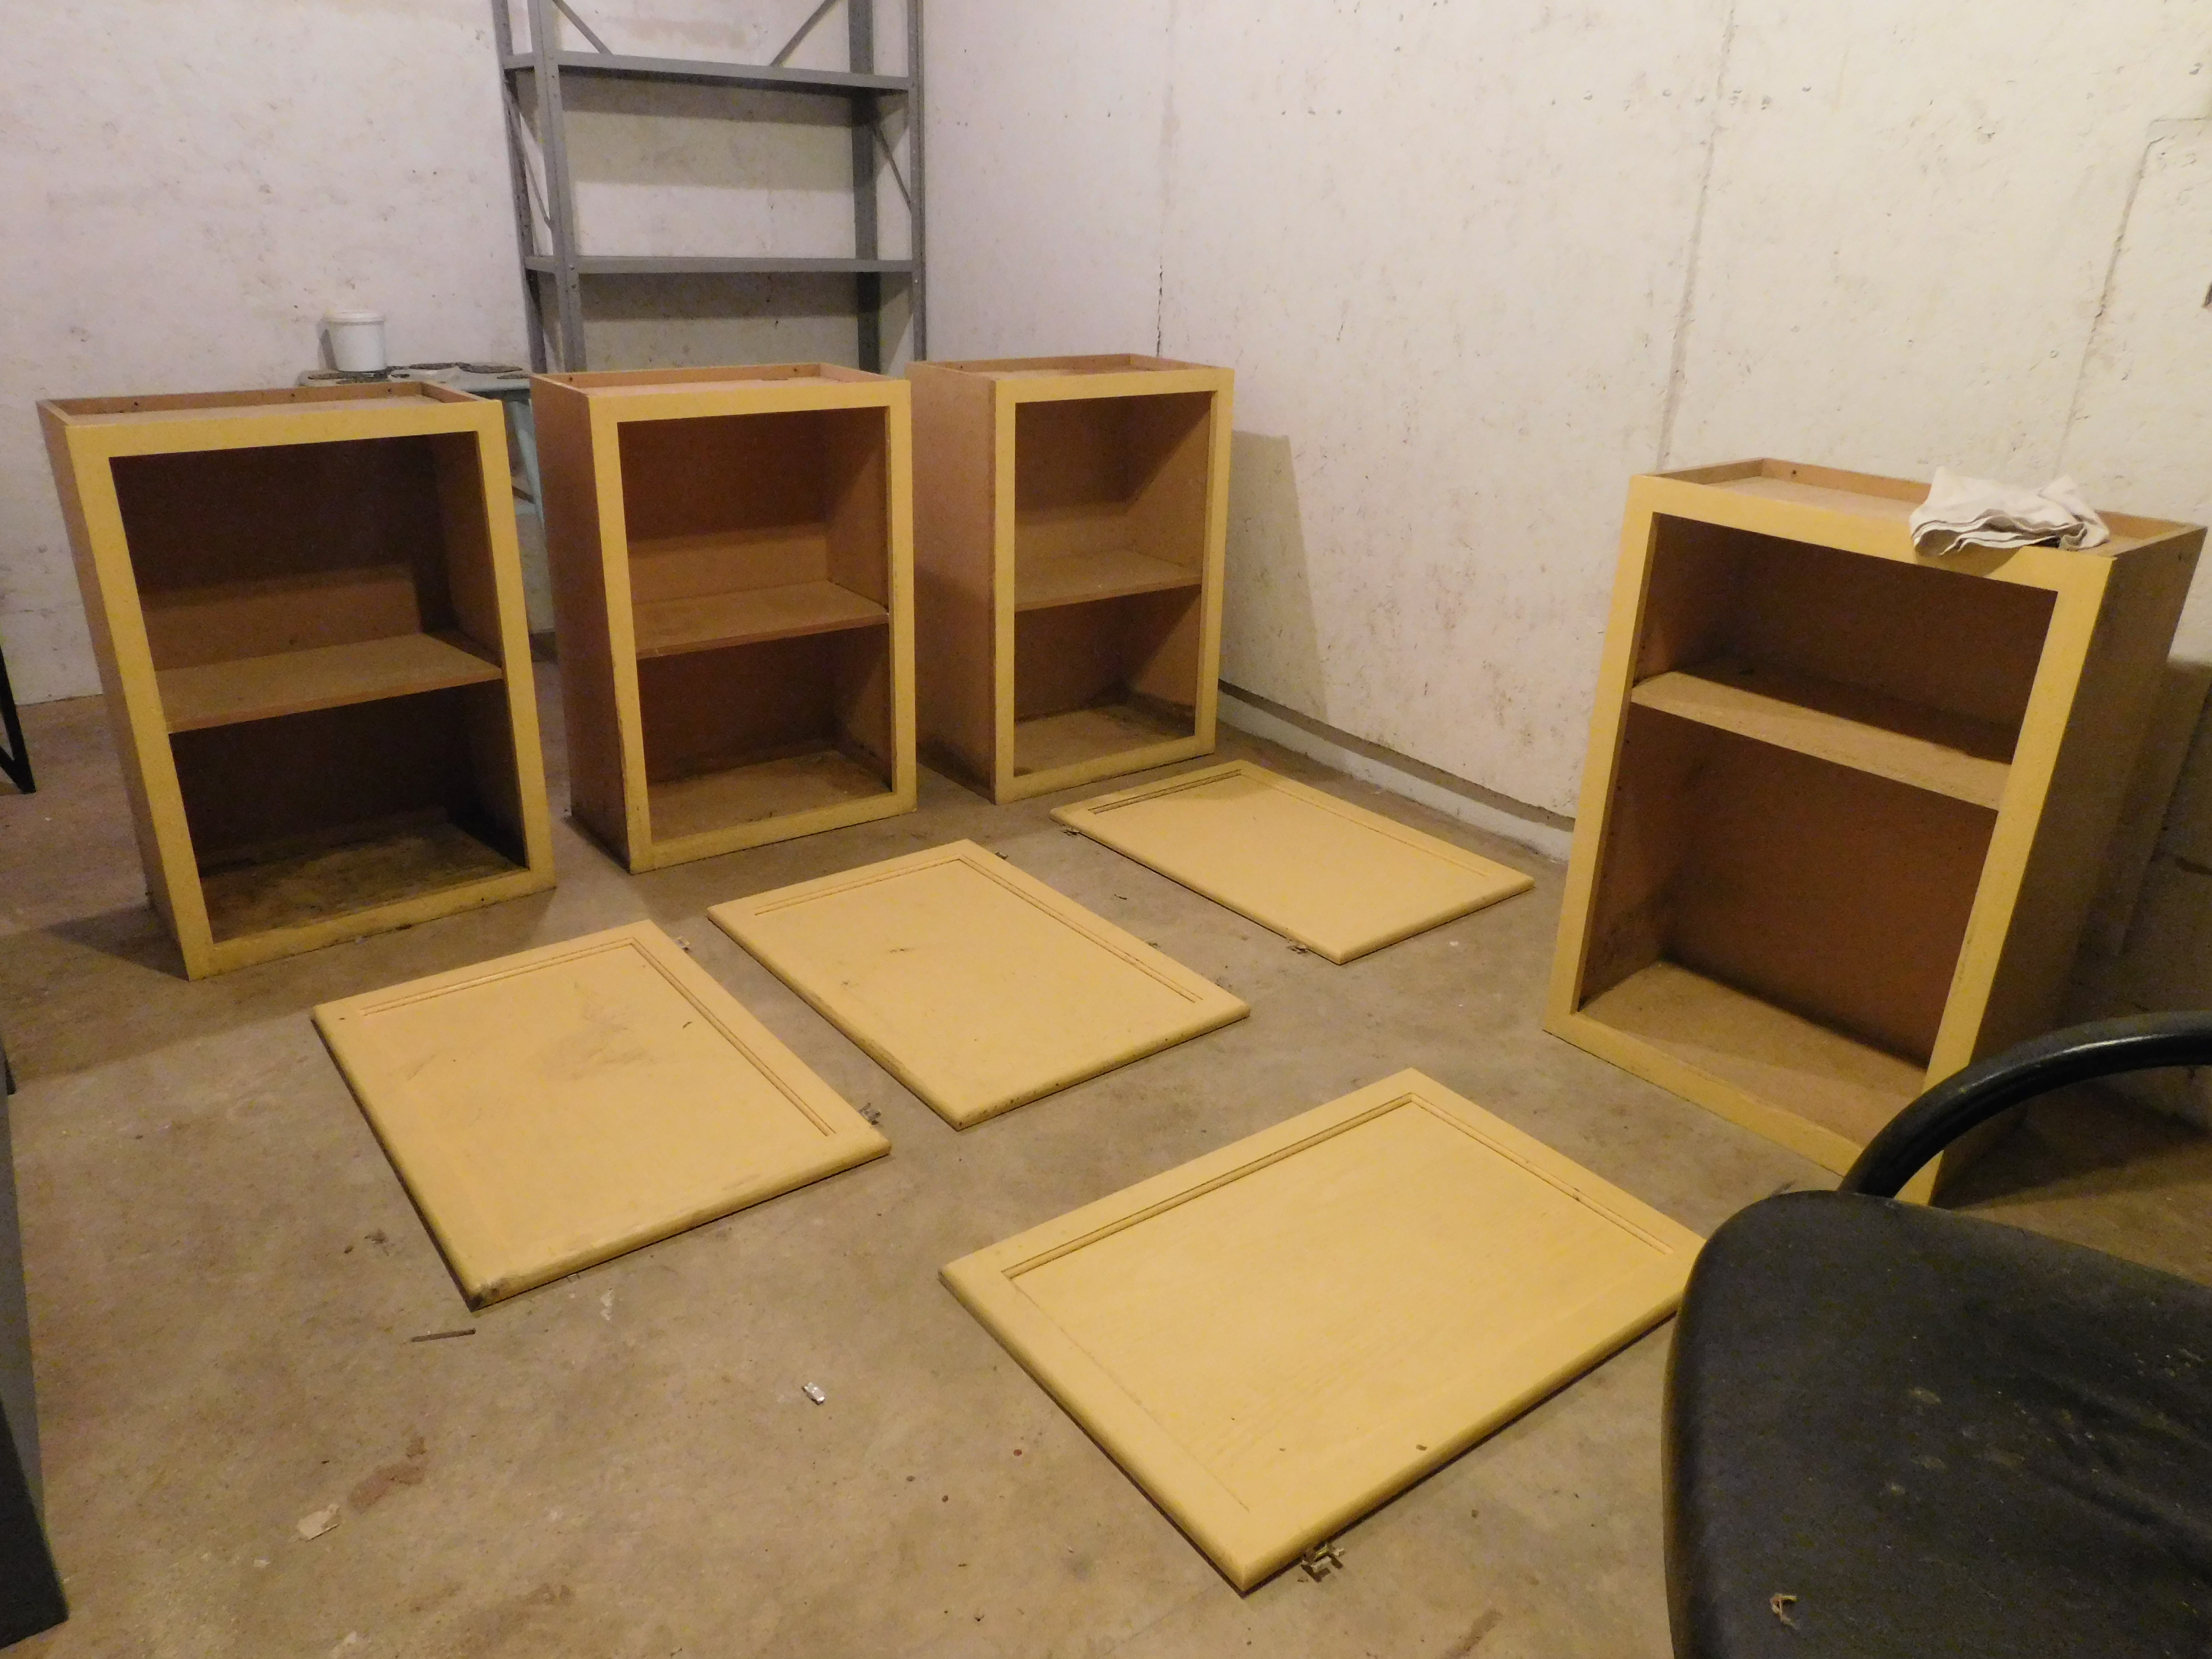
I moved around some of the furniture and then started on these cabinets! My goal for this room was to use storage items that I already had around the house. Saving extra money is definitely something I’m aiming towards!
These cabinets have been hanging around the basement for YEARS….they were an ugly yellow color, beat up, stained and just overall icky.
I wiped them down with a cleaning solution, lightly sanded them and painted them with primer. Then started on the white paint.
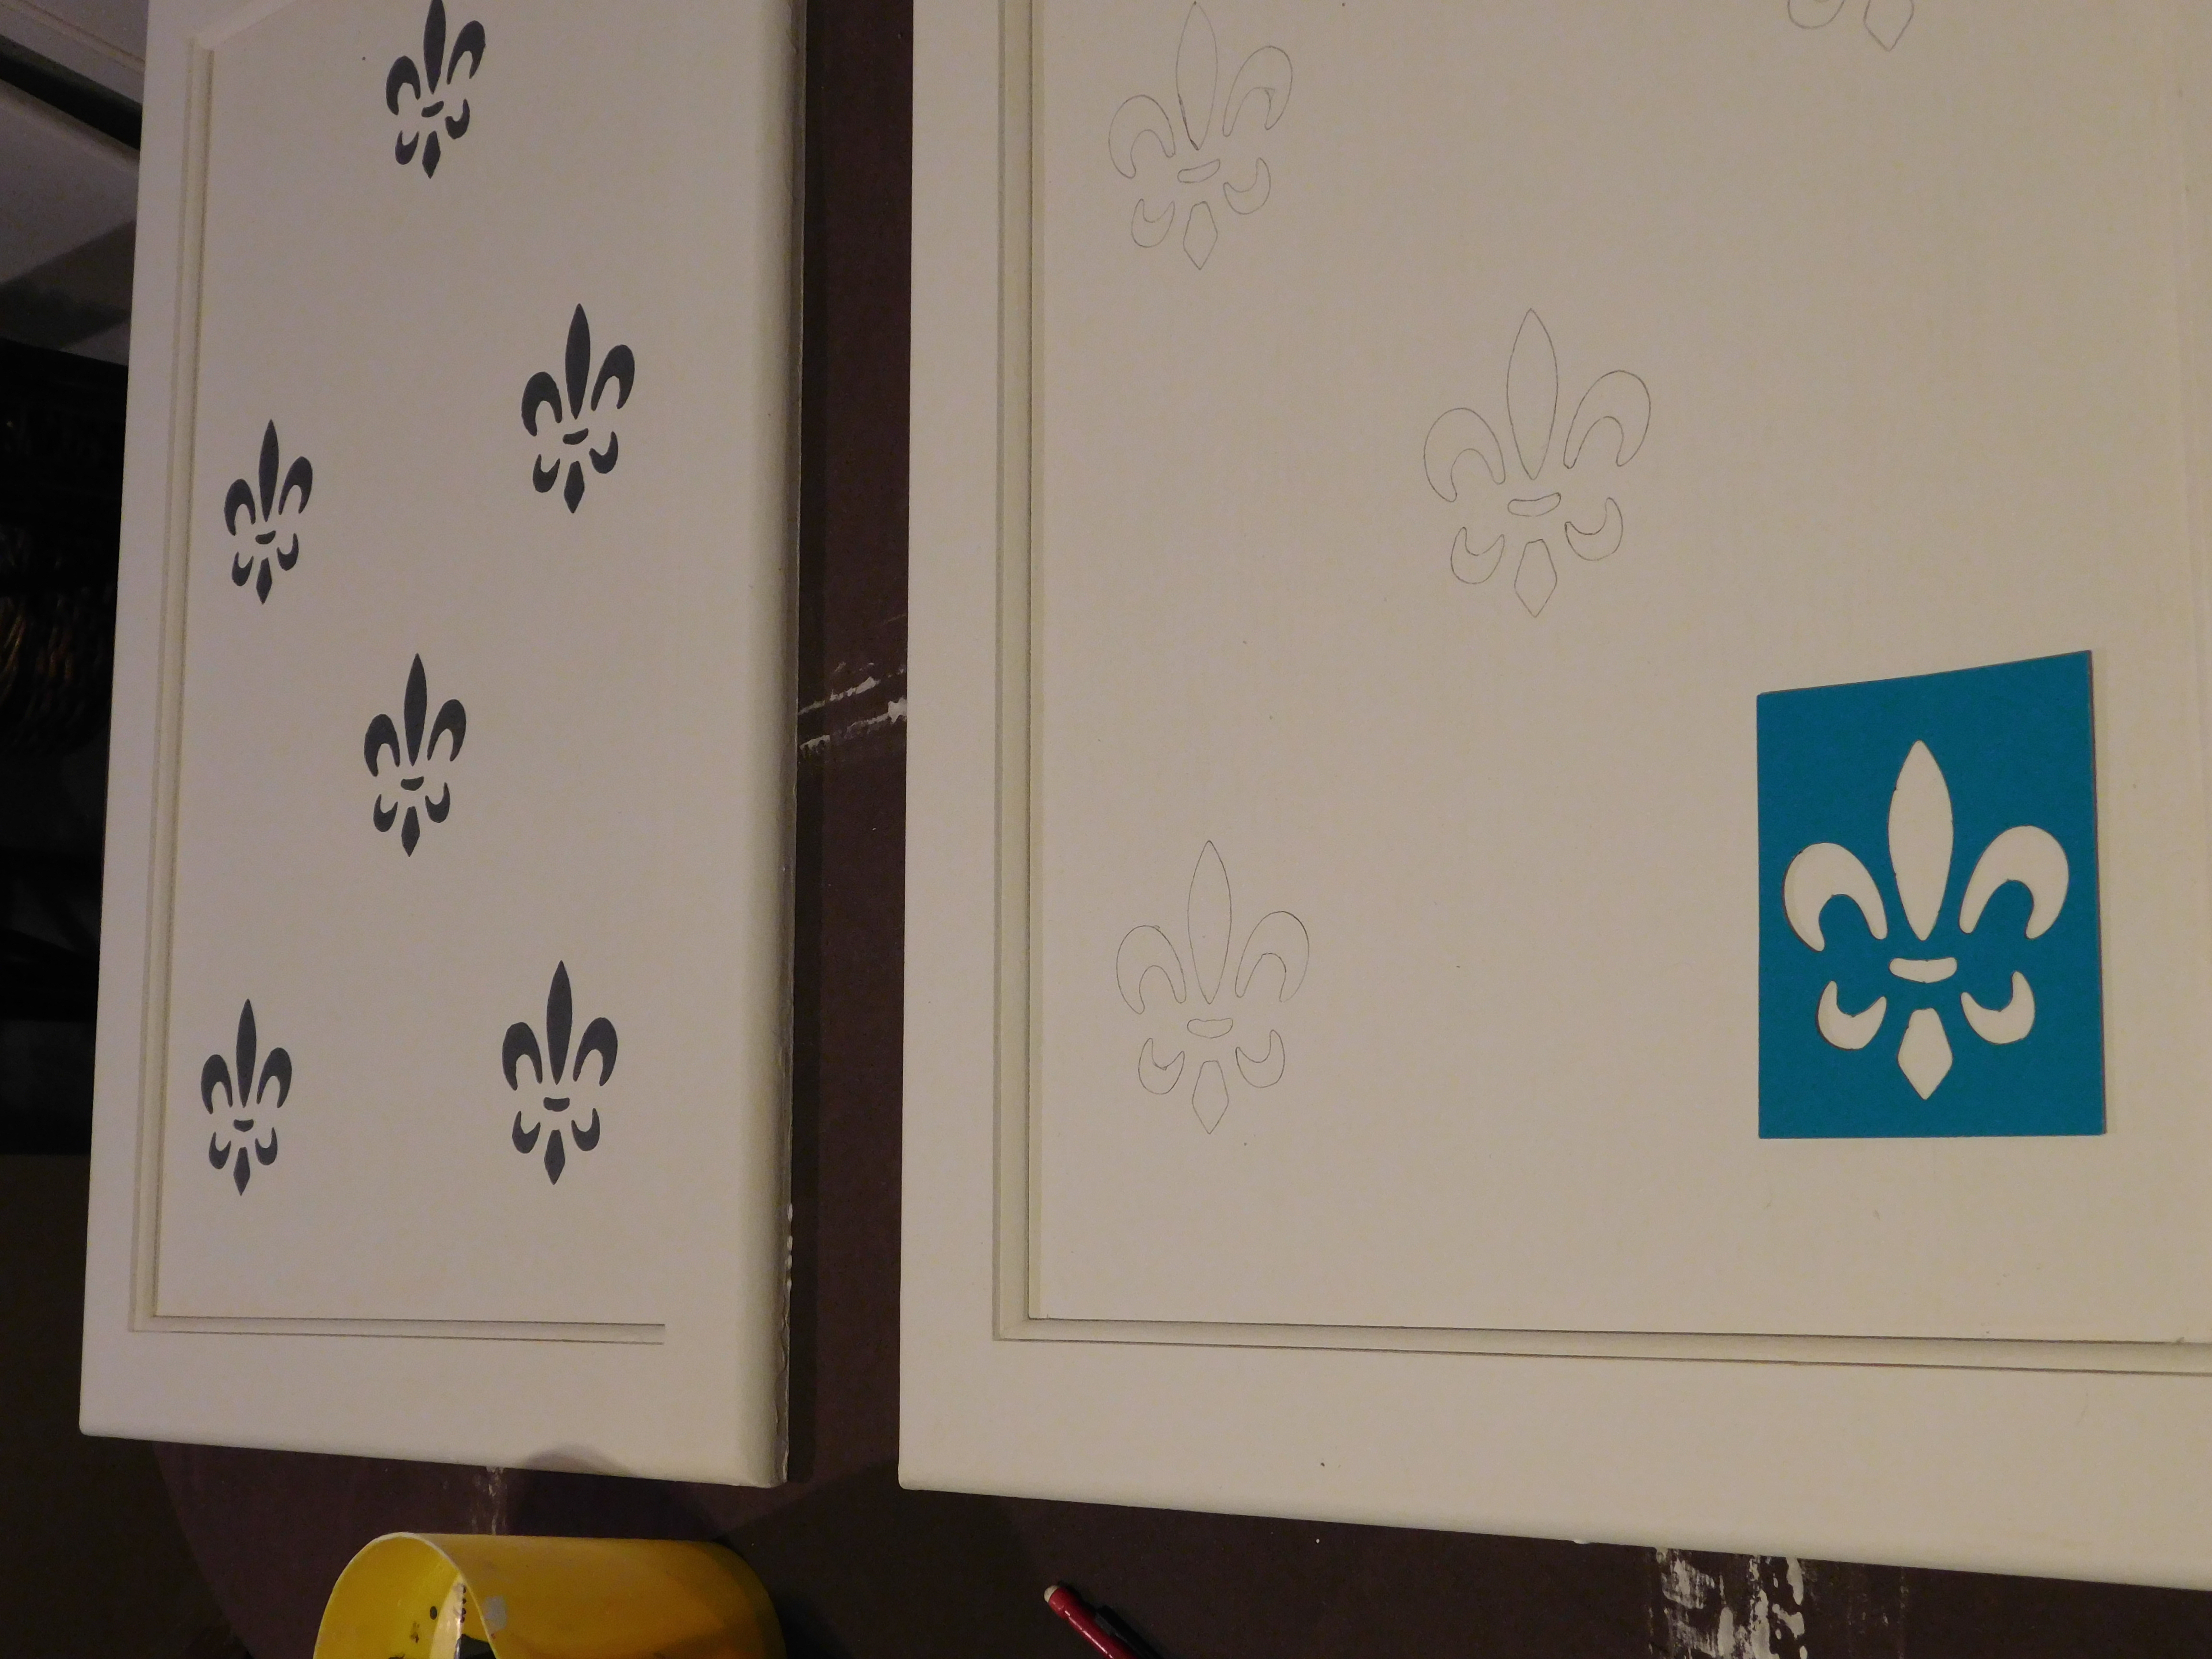
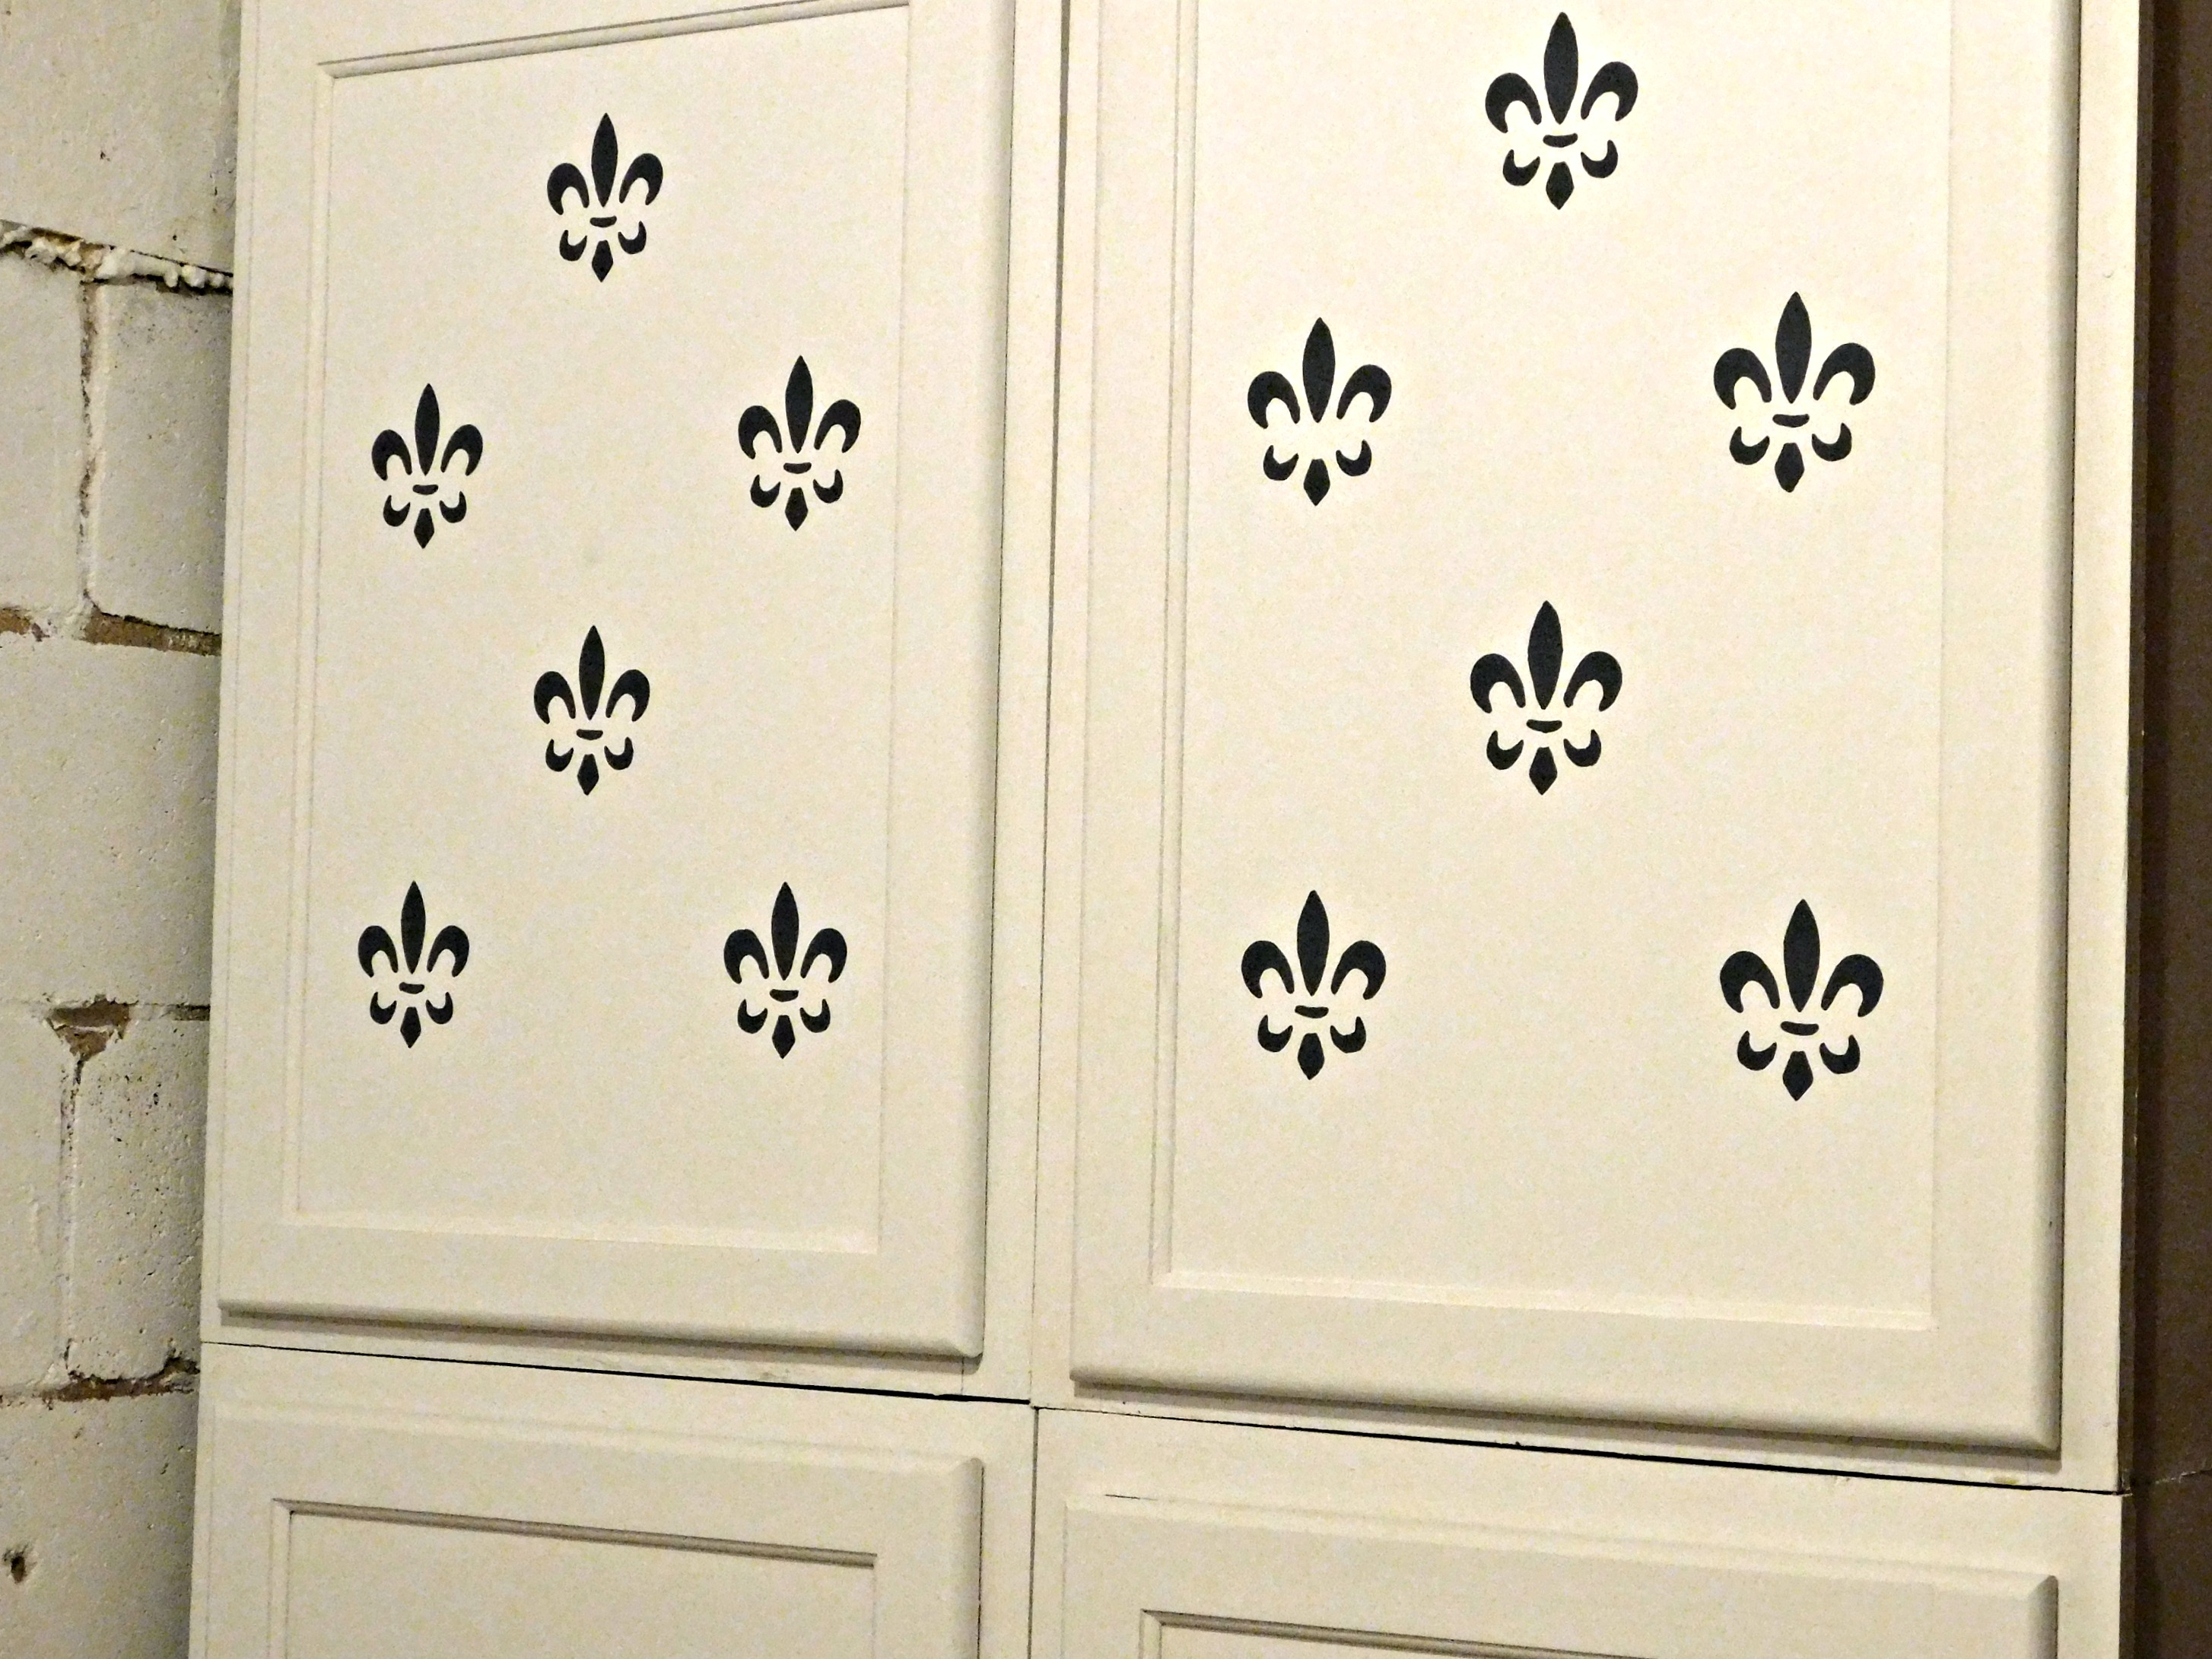
Once these were all painted white, doors included, I started on the design I wanted on the top cabinet doors. This is where I had….a bit of a learning experience.
See these doors? These almost done doors with the pretty fleur de lis? These doors were a learning experience. When painting a design on cabinet doors, it is very important to check which way is up! These doors are upside down. I’m sure you can imagine my disappointment when I went to hang my finished doors and realized I painted them upside down. So on went the primer and the white paint again, followed by repainting the fleur de lis the CORRECT way! I may have triple checked that they were the right way before I started repainting them.
Finally, the cabinets are finished!
As for the rest of the room, here is how the dresser is looking now.
Don’t get me wrong, I still have a lot of work to do in this room. But it is so much better than it was! I have a space that I can work in, all my materials easily accessible, and now that I’m in the basement I don’t have to worry about glass shards and puppy paws!
Where do you do your crafting? Do you have a dedicated space for it? If so, how did you put it together? I would love to hear your thoughts!
Confession time: I love jewelry! Like, seriously love jewelry. It might be a problem….but it’s one I’m okay with. Even more so if it is unique jewelry, and at Grandma’s Attic there is plenty of that!
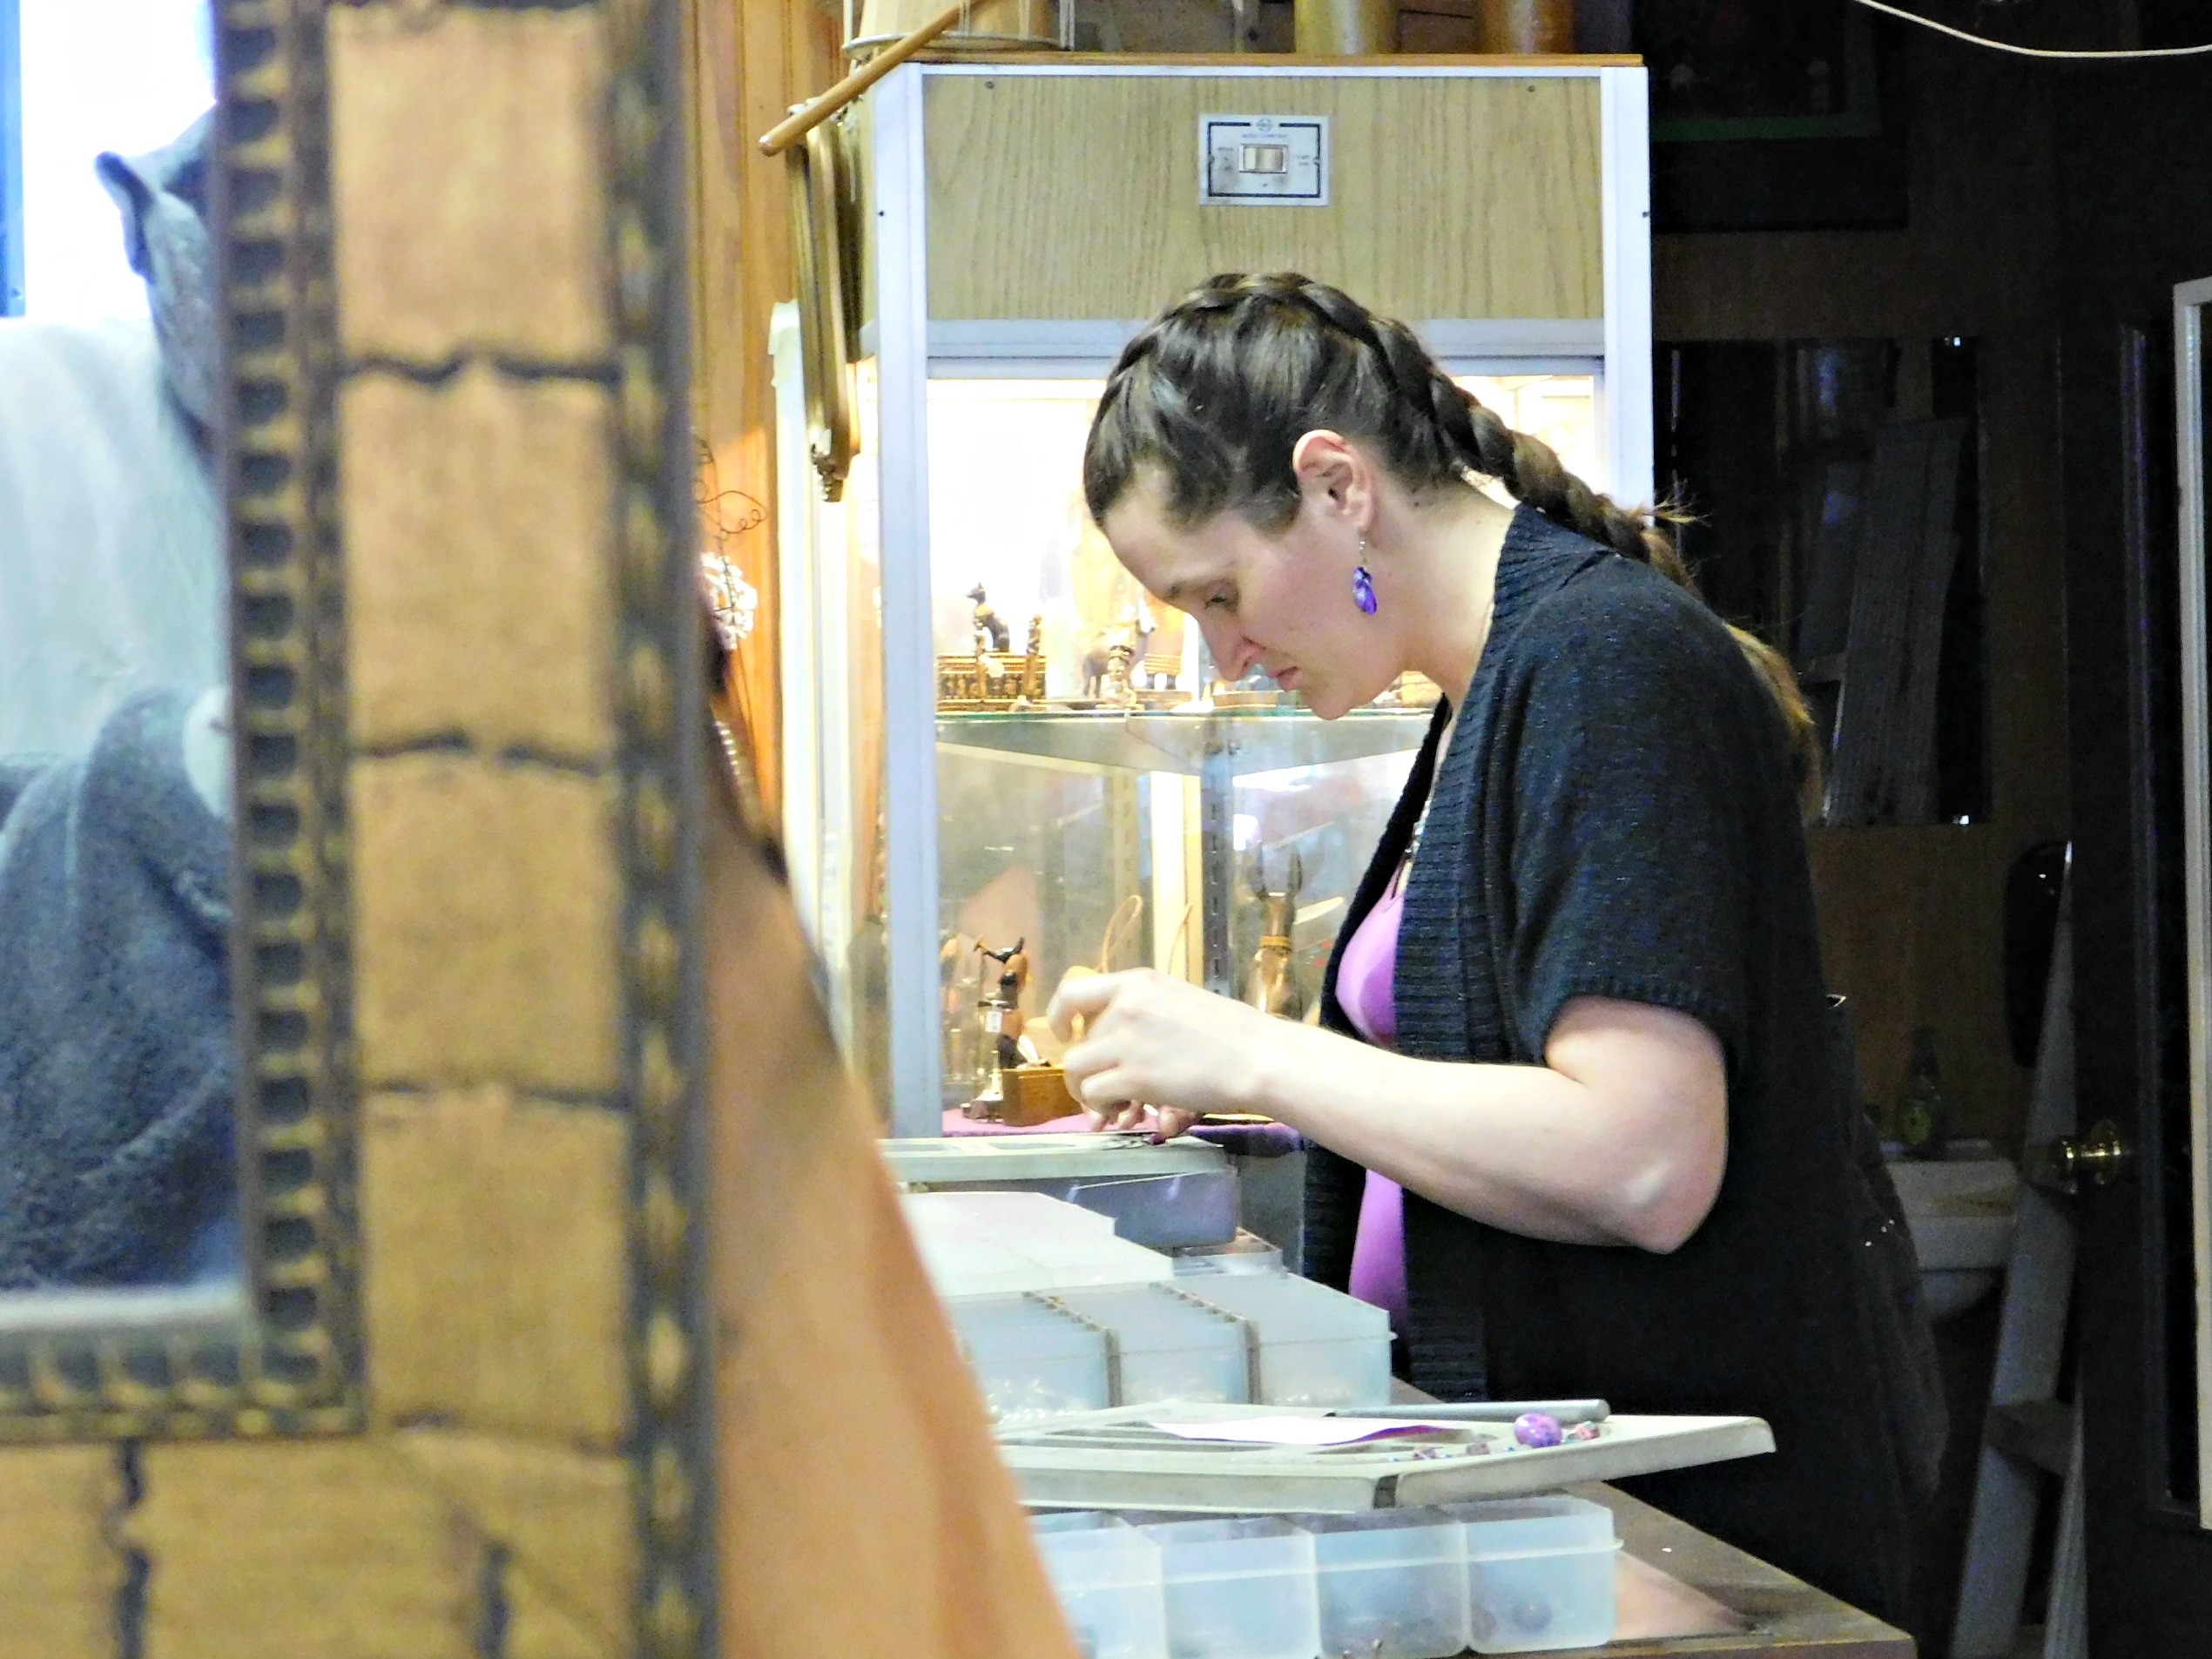
Grandma’s Attic is a store in Ames, Iowa and has so many awesome offerings including handmade jewelry, belly dancing scarves, incense, jewelry repair and custom pieces! This shop is not a new one for me, but instead an old favorite. I’ve only made jewelry here a couple times, though I’ve shopped here many times. Some of my favorite jewelry is from here! This time was especially fun because I got to introduce one of my friends to the joys of jewelry making!
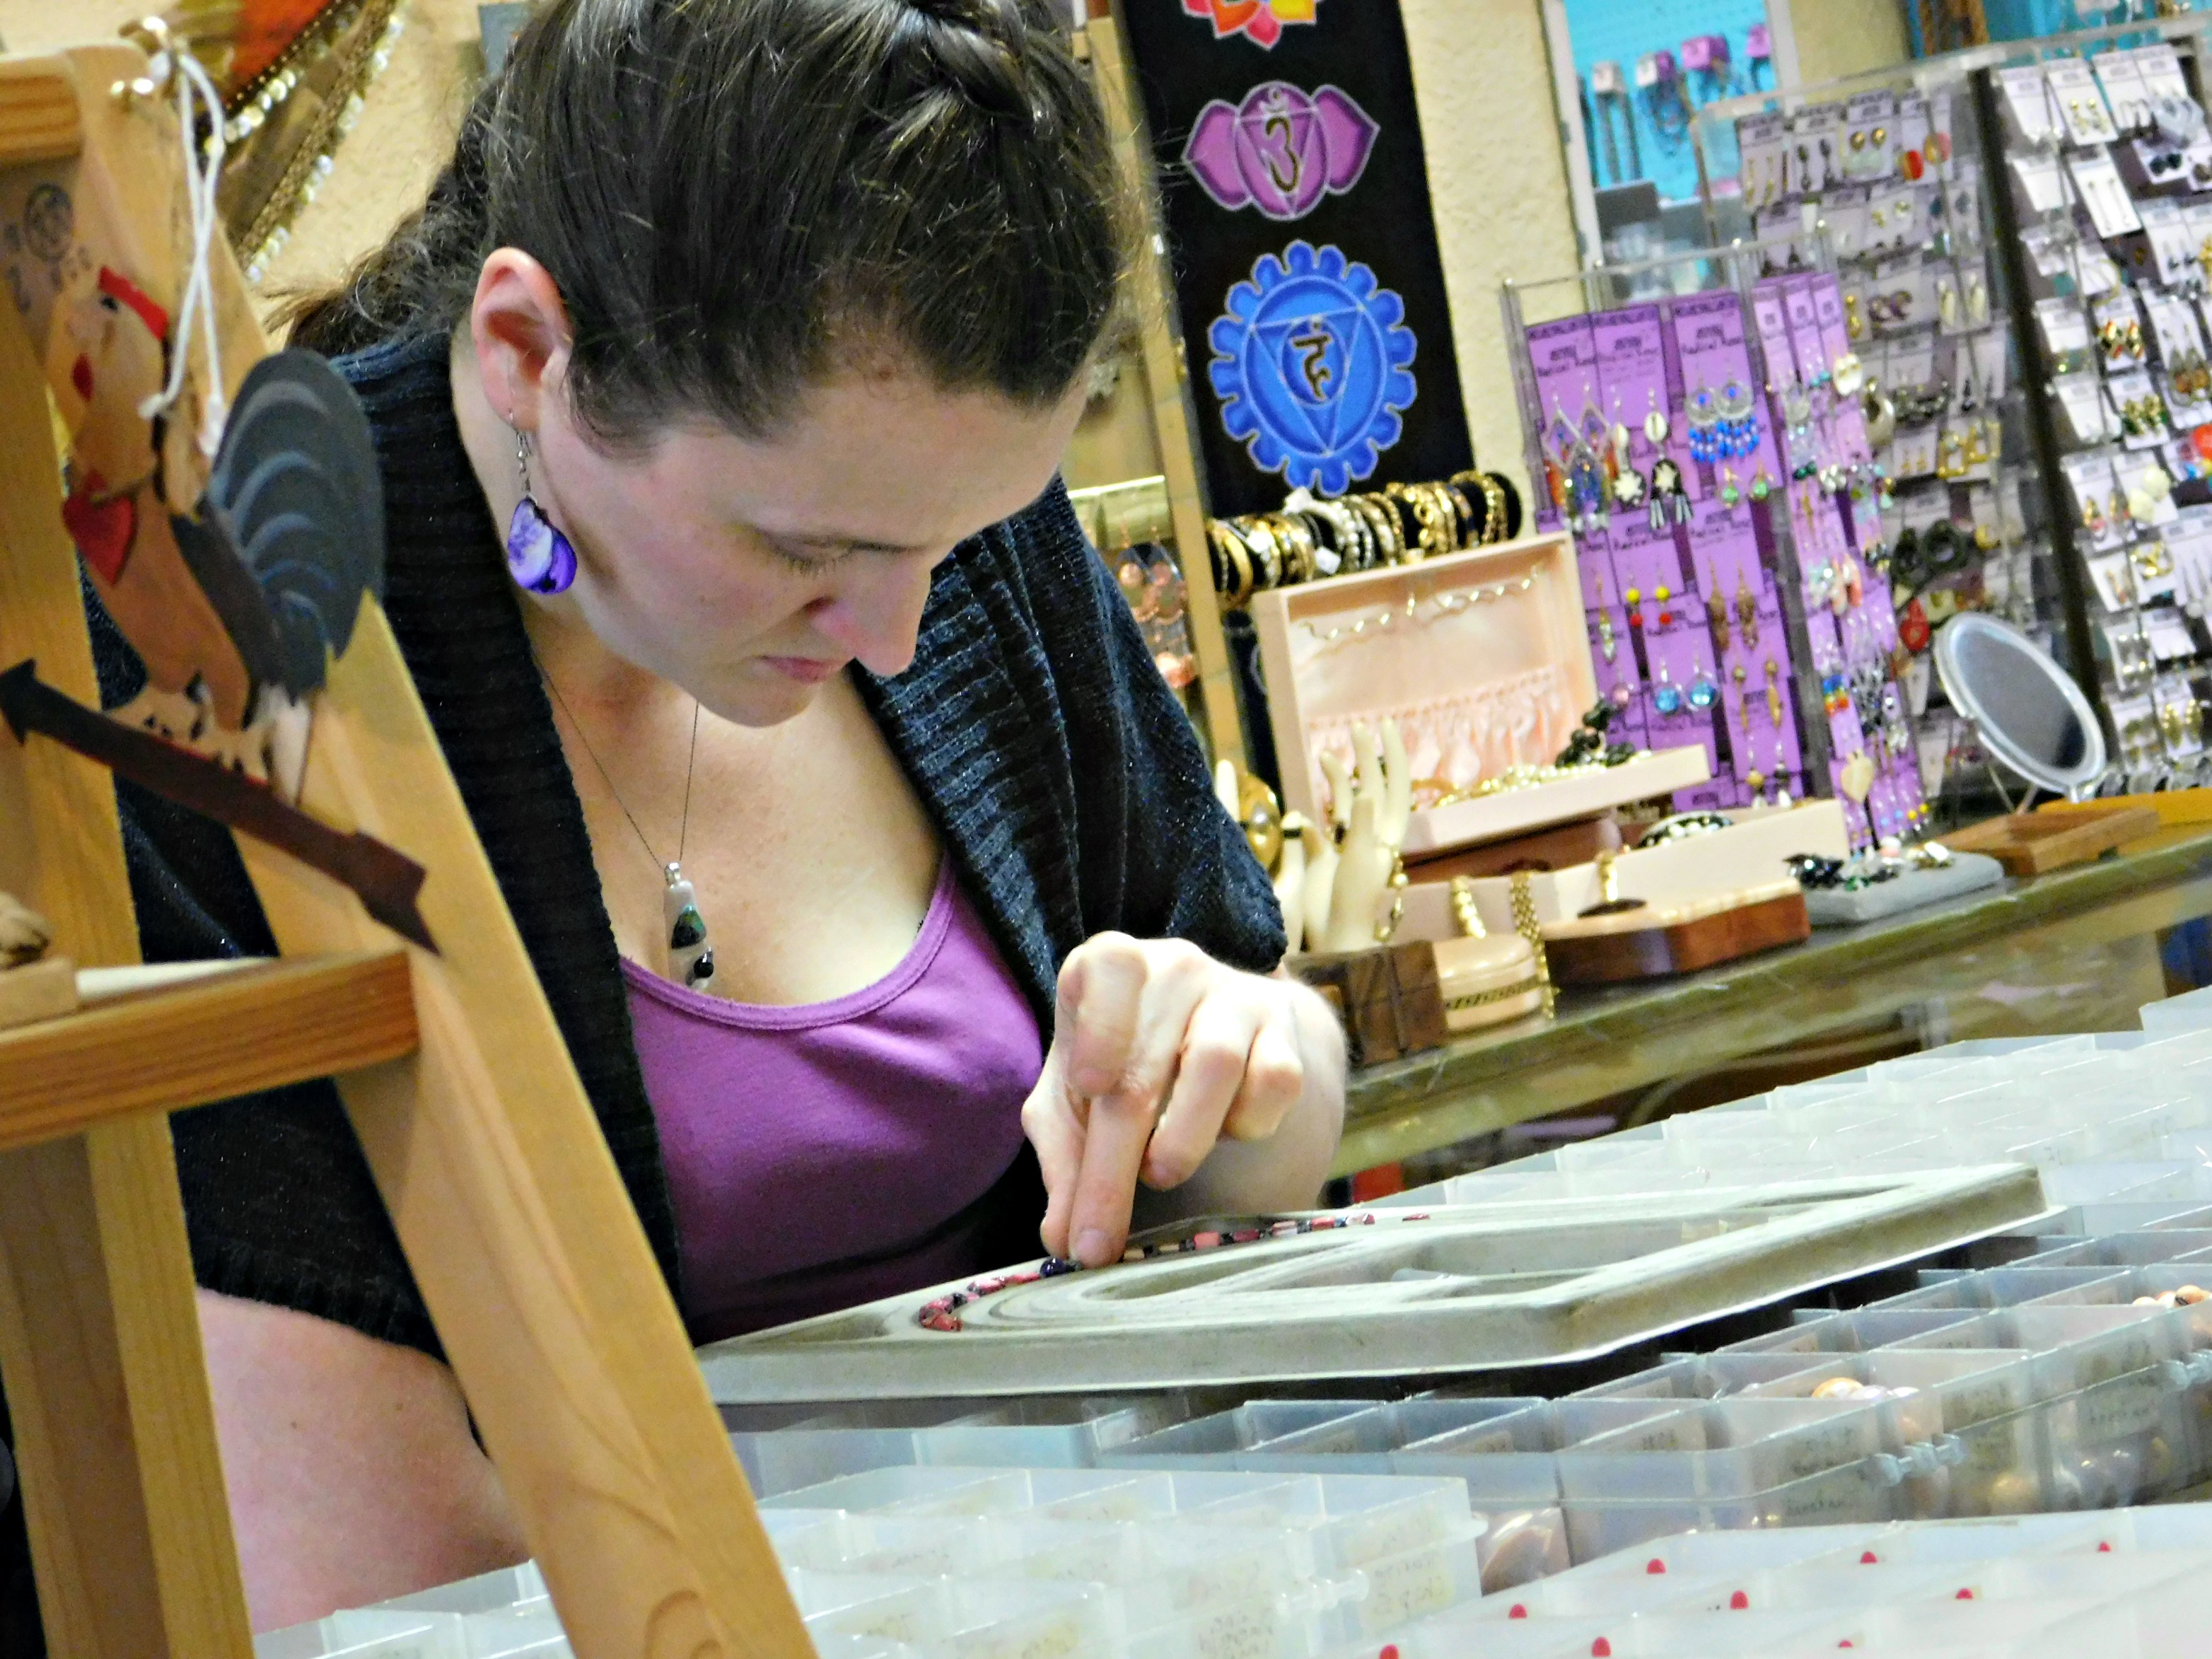
Christy going over the basics of jewelry making with Salina before we got started.
Salina and I decided to spend a Saturday afternoon in the store exploring the beads and making some new jewelry. It was so much fun!
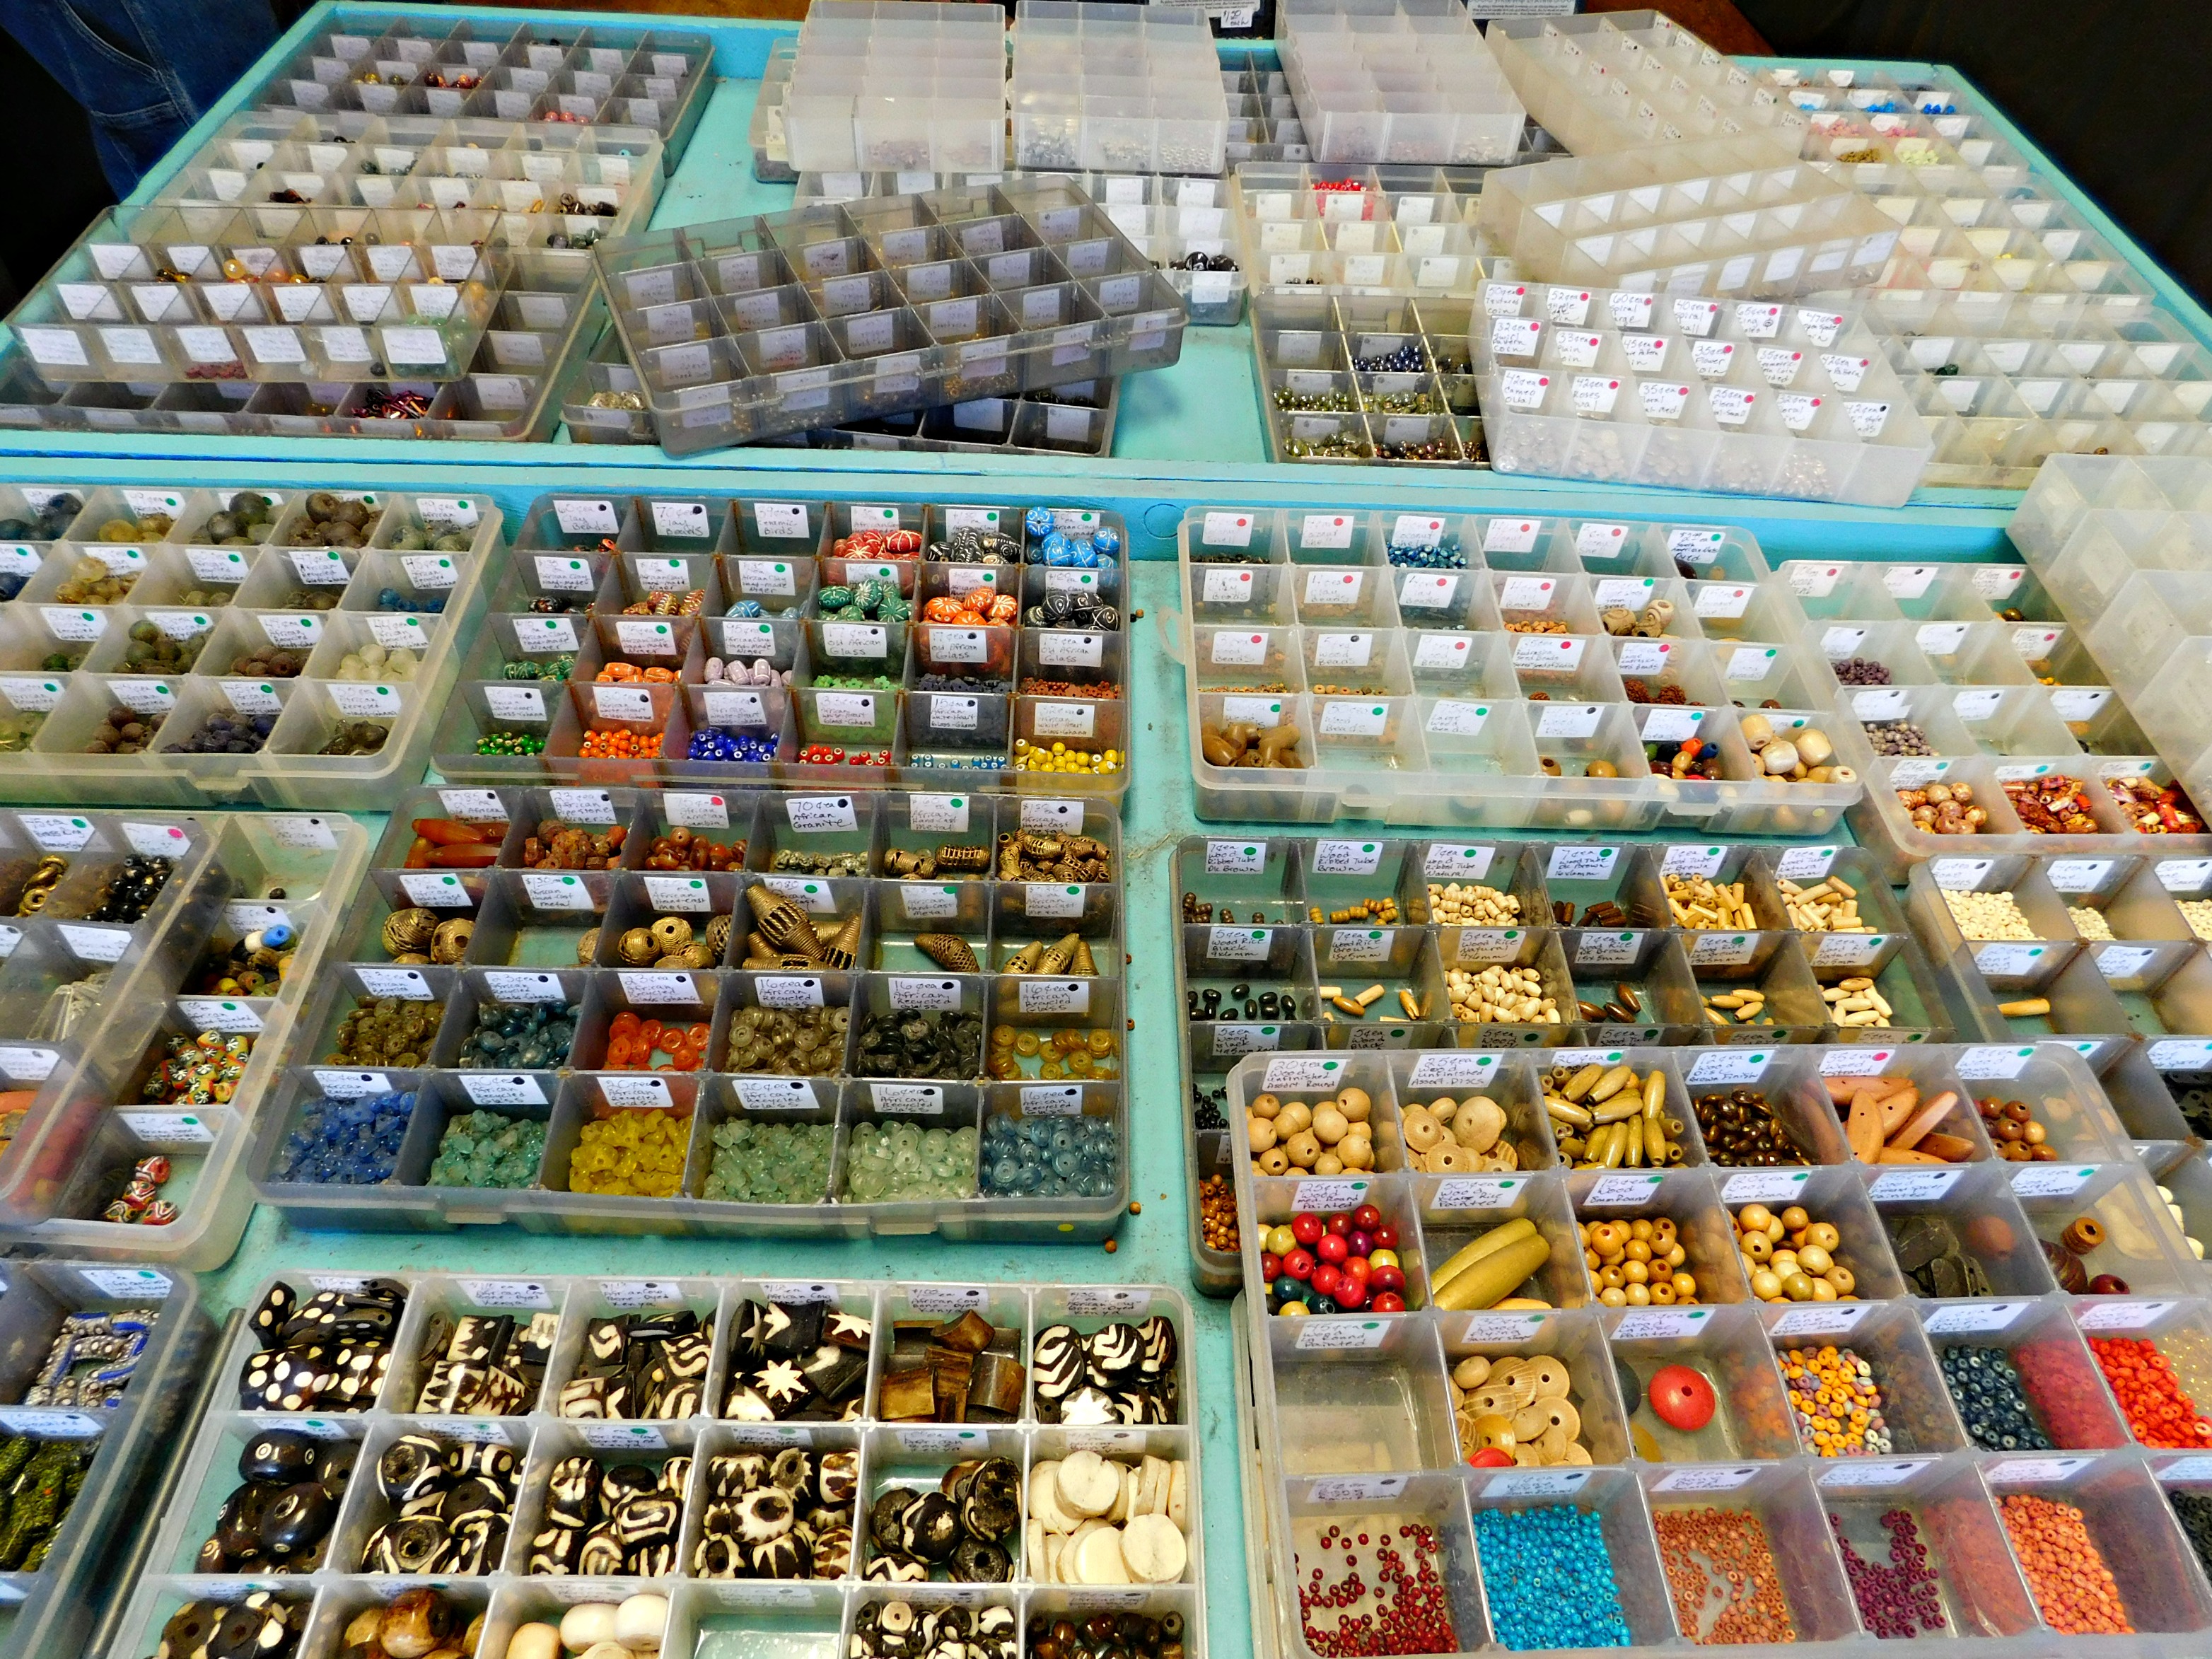
Just a few of the THOUSANDS of beads available! Aren’t they pretty?!
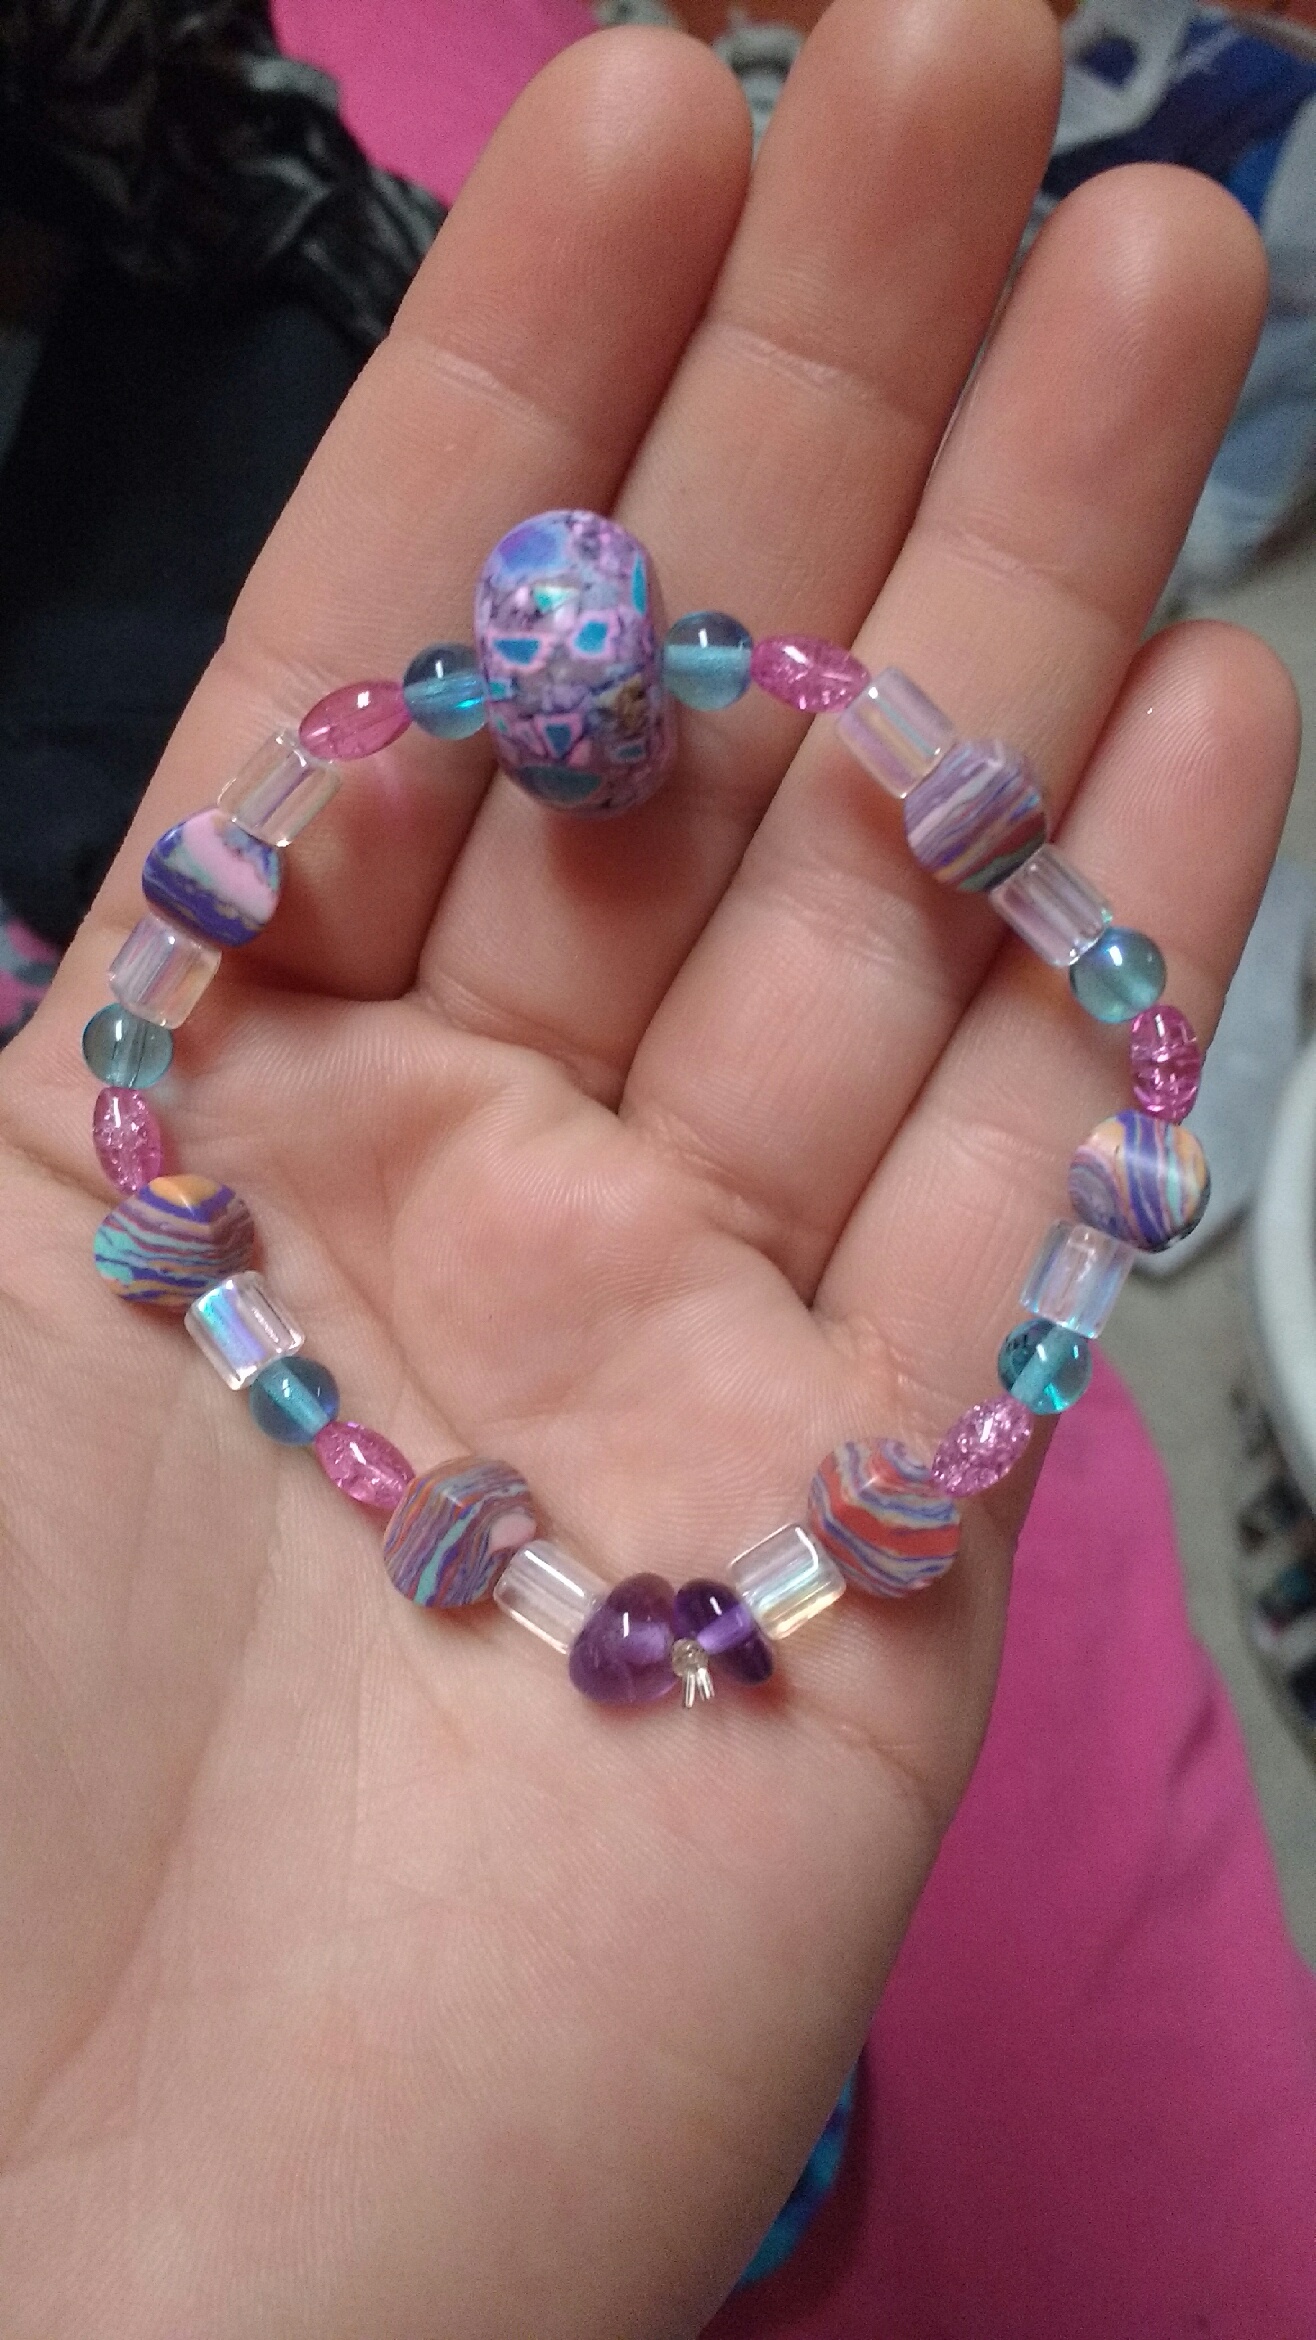
Narrowing down the choices and deciding what style I wanted to make was so hard! I knew I wanted a necklace, but I went in with no idea of what style/colors to put into that necklace. On the other hand, Salina seemed to know right off she wanted to make a bright, colorful bracelet.
Bracelet in progress!
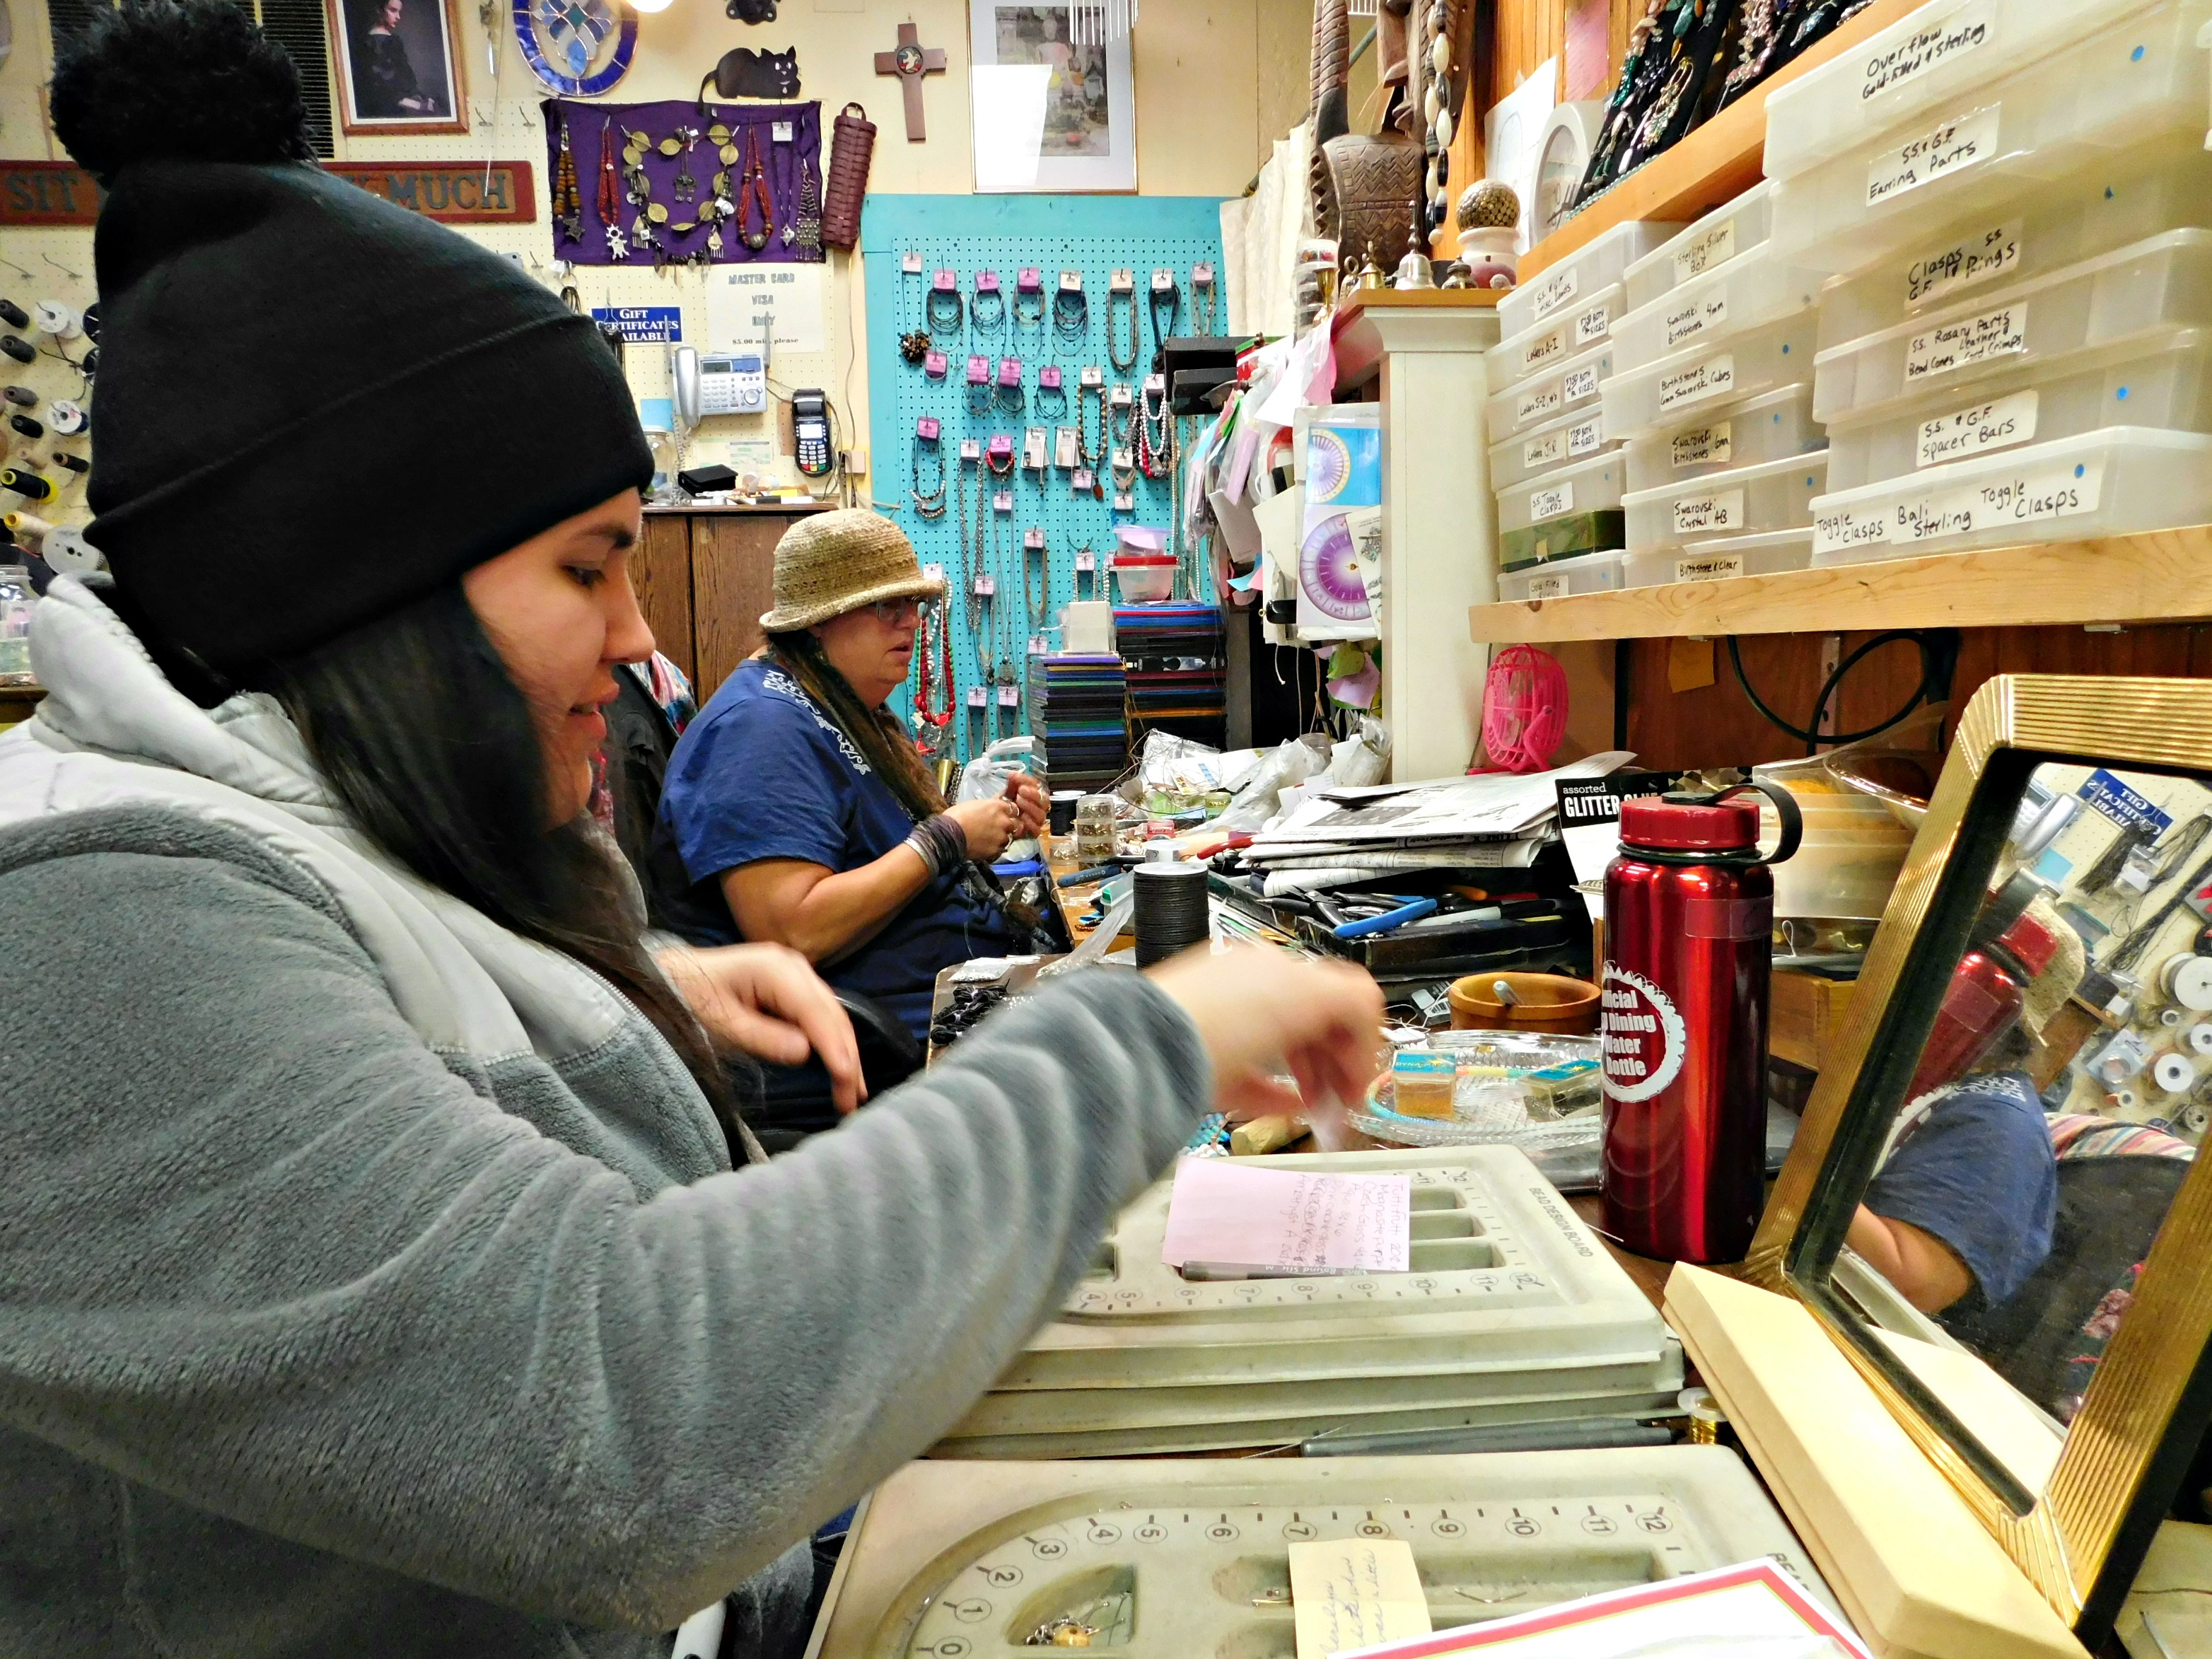
Not only was I apparently very intent on what I was doing, but Salina is very sneaky with the camera!
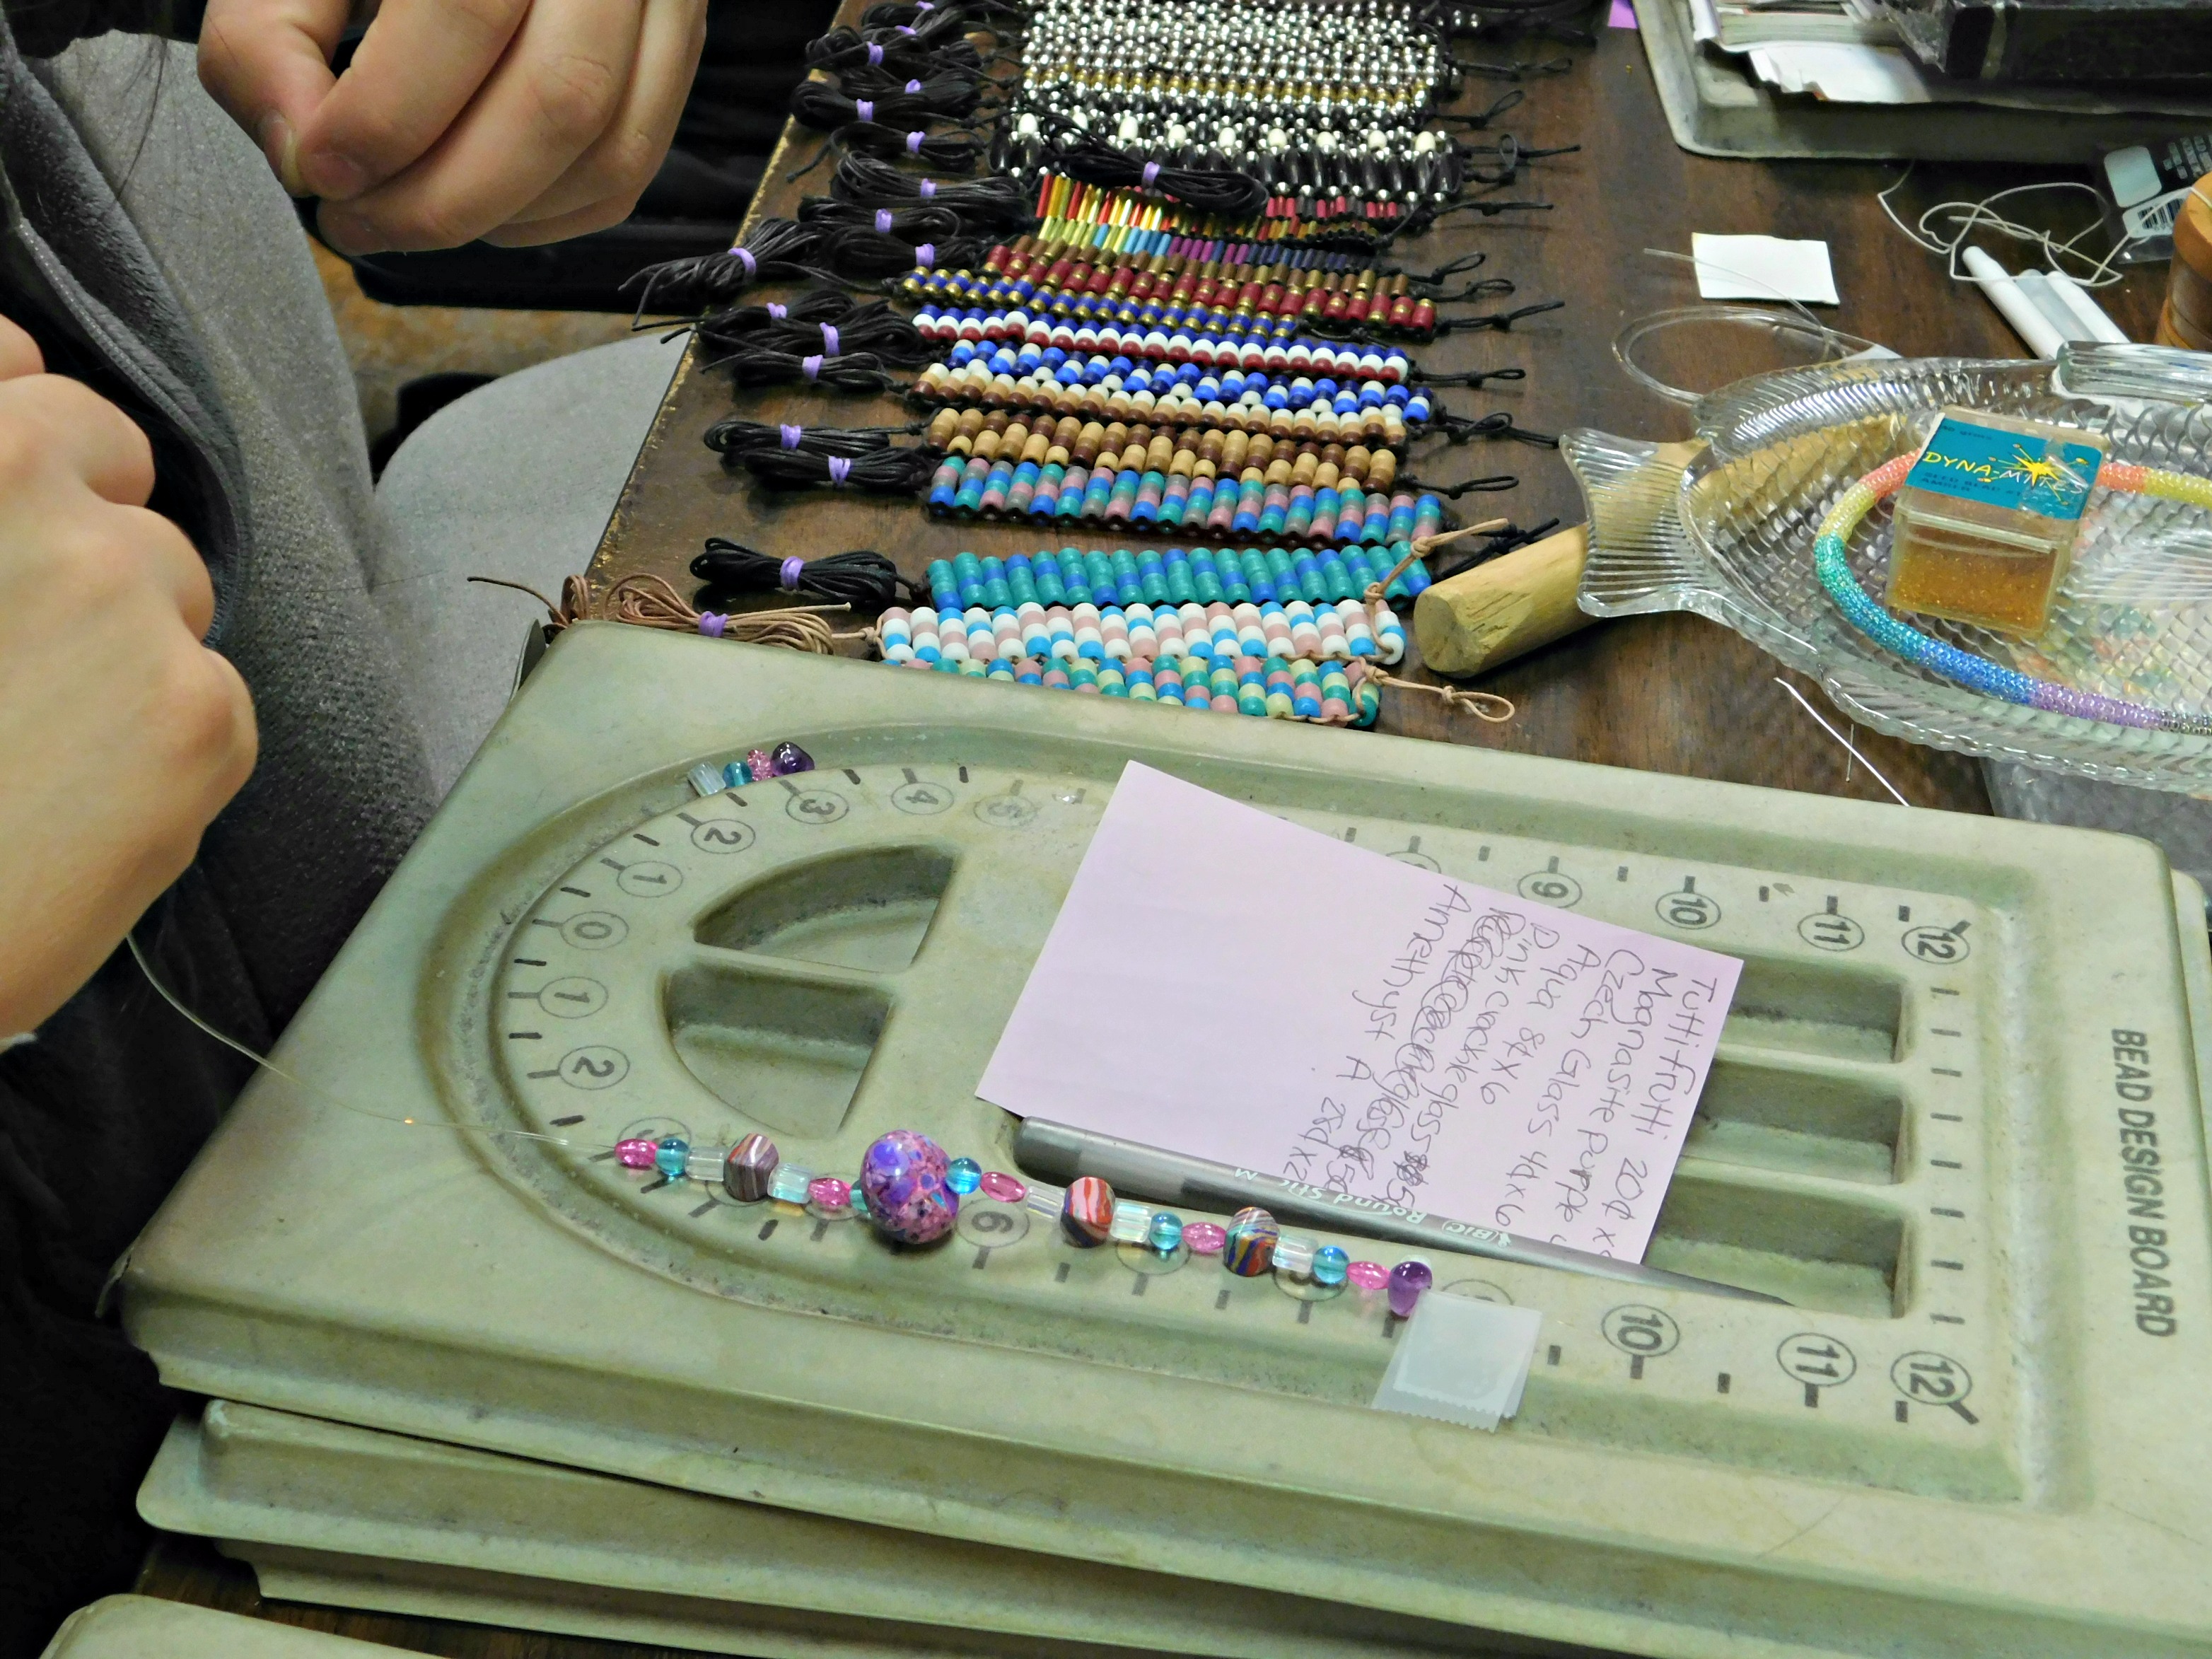
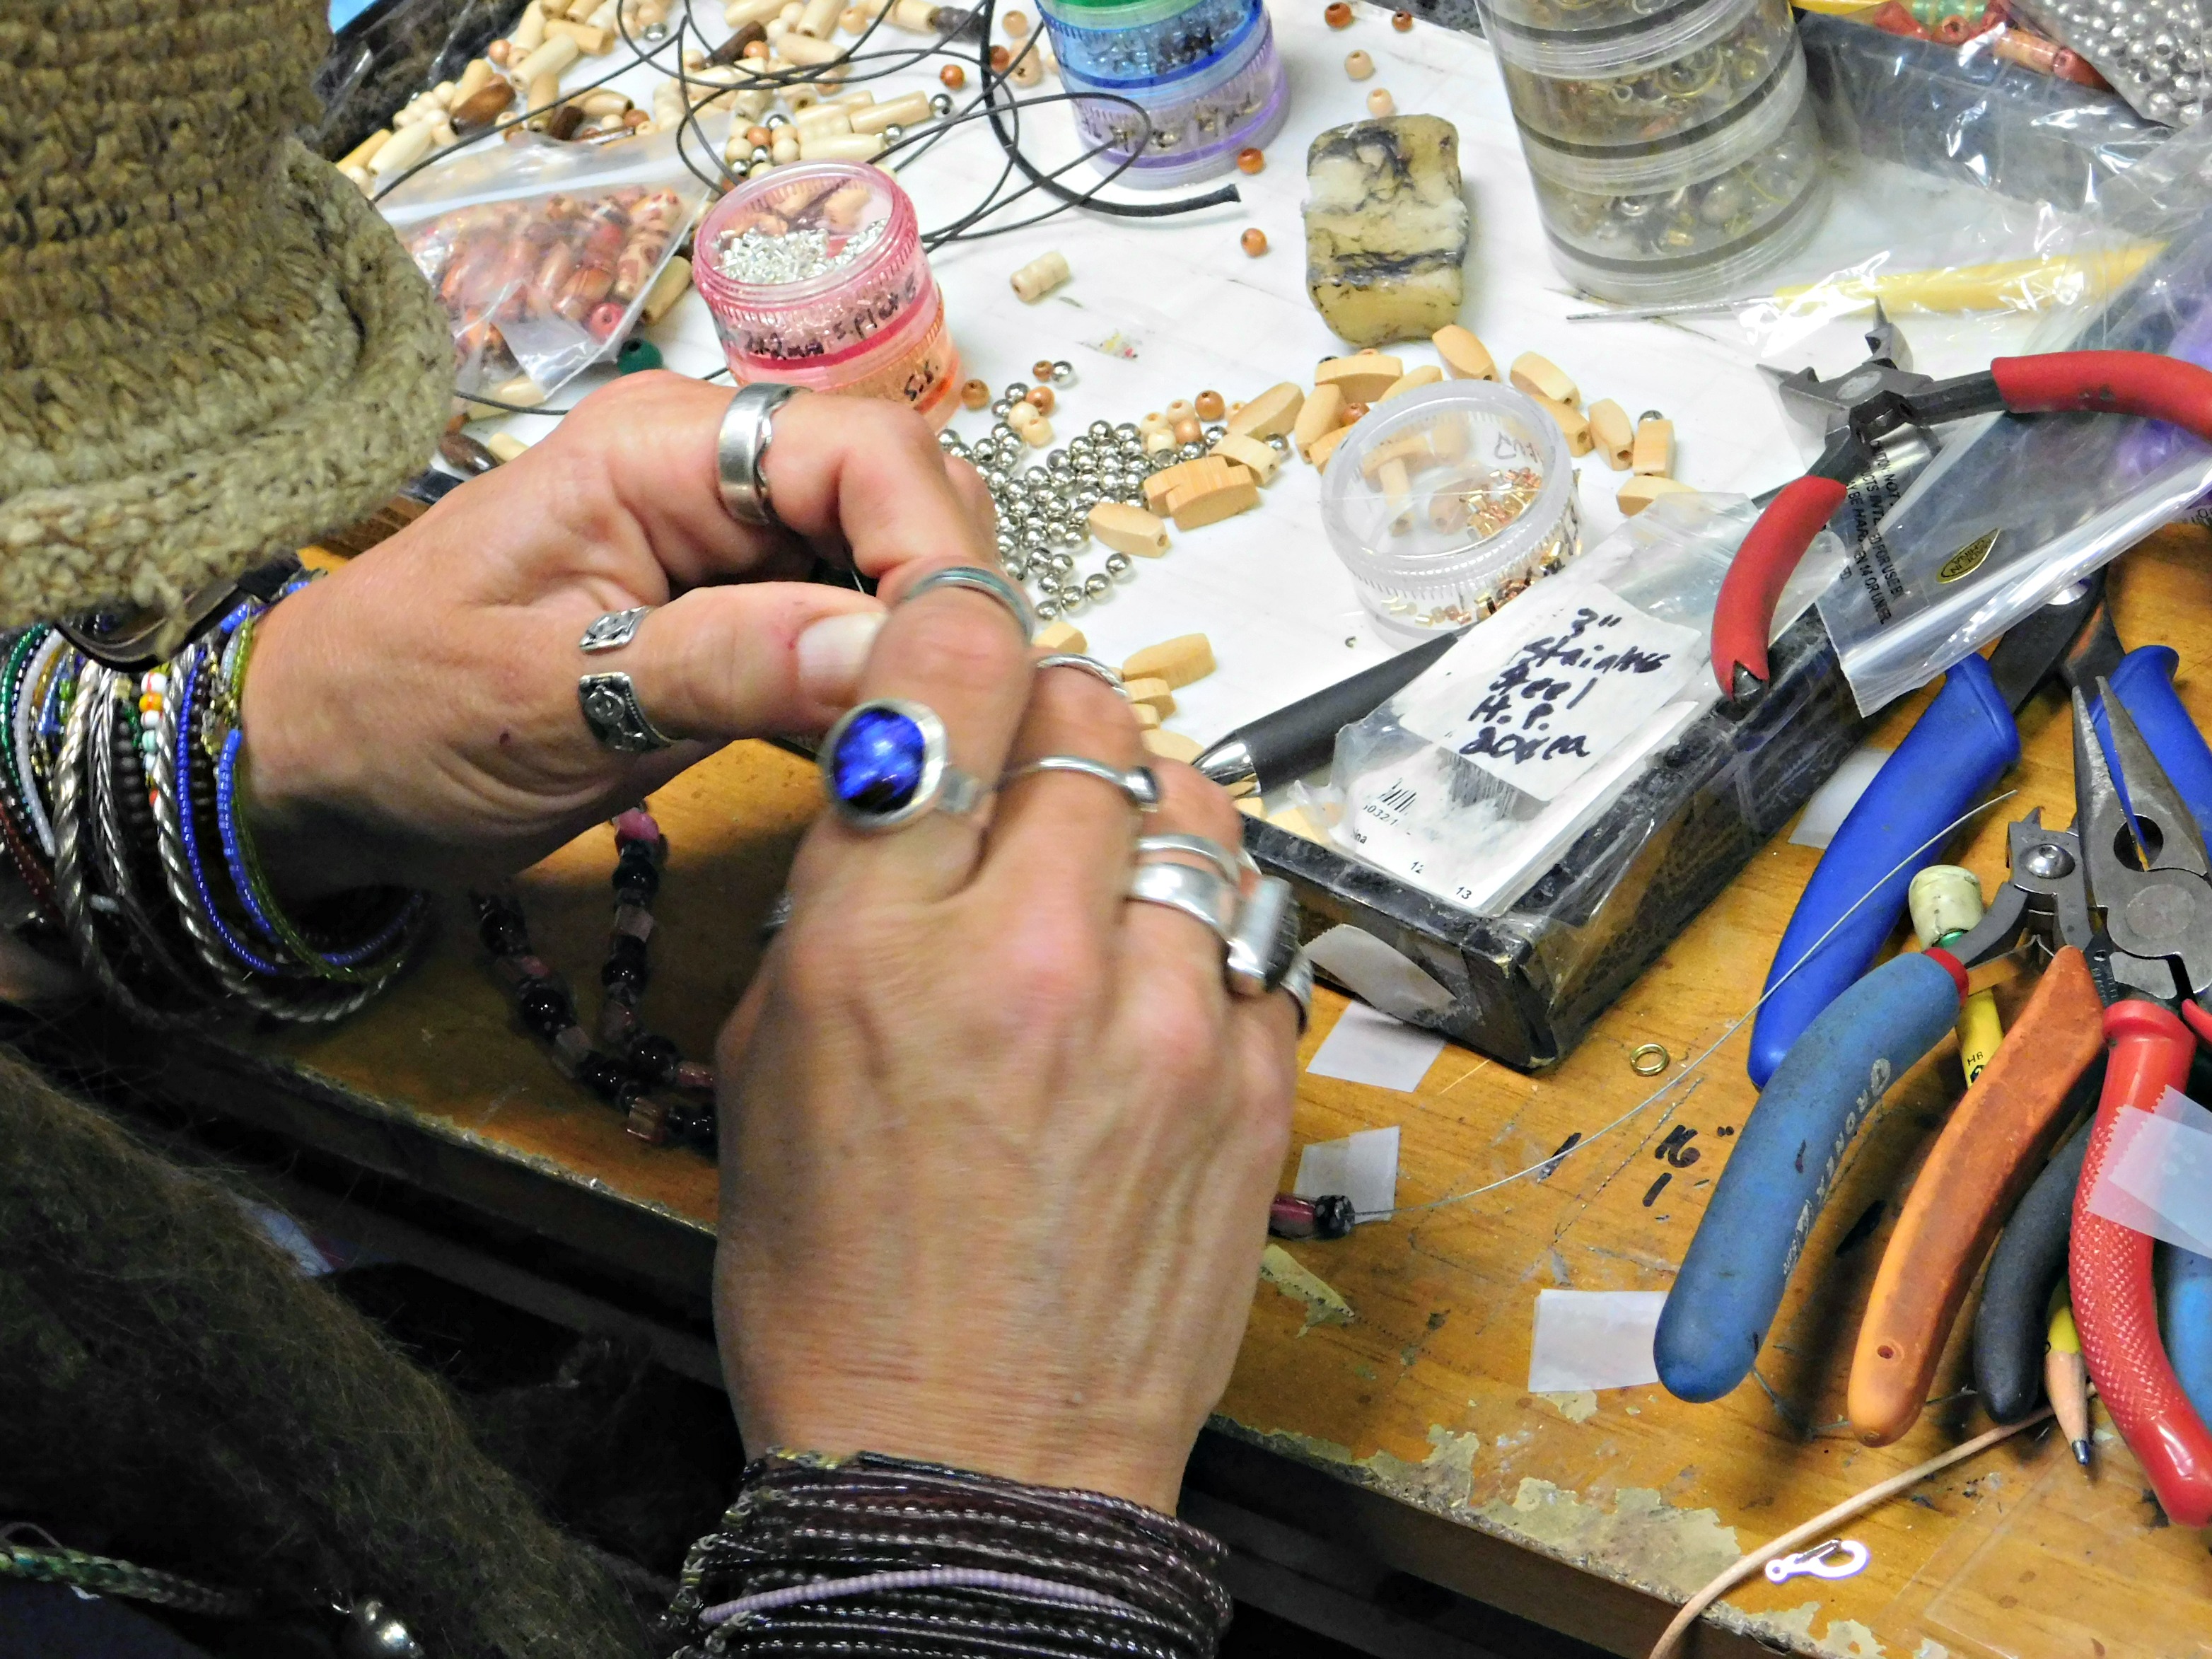
Once we had our beads selected and laid out in the pattern we wanted, it was time to start stringing them!
Starting the beading processAlmost done stringing the beads!Stringing the beads for my necklace.
Once we were done stringing the beads and making sure the fit was what we wanted, Christy would finish off the pieces, adding the clasp and other necessary things to turn it into actual jewelry. And voila! A beautiful piece of jewelry, ready to take home!
Here is how our pieces turned out!
Review of Experience:
This is probably one of my favorite ways to spend some time with a friend! Not only is it fun and relaxing, but you get something unique to take home and wear! Plus I love that unlike going to a movie or something similar, the conversation just flowed all throughout our time at Grandma’s Attic. We had a great time!
Christy is great with both beginners and repeat visitors. Whether someone needs a rundown of how to start, feedback on a design or help when stuck, she’s always there to help!
Approximate Cost:
This is the other great thing about Grandma’s Attic. You pretty much choose the cost. Beads are priced individually and are wide-ranging. You can make something to suit any budget! You saw a few of the beads available above, but here are a few more!
Other Services Offered:
As I mentioned earlier, there are a lot of different offerings at this store! In addition to offering the make-your-own-jewelry, Christy does jewelry repairs, custom designs and her own jewelry is there for sale too. In fact, her jewelry is usually the case I head straight for! All of the pieces I have bought over the years are ones she has made herself, but she also carries a large inventory of other jewelry as well. Some of it is antique, others just unique, but all of them are pretty awesome!
Other items for sale include, but in no way are limited to, belly dance scarves, a few wall tapestries, incense, perfume bottles, Egyptian-themed artwork and statuary, along with wooden boxes. There is more, but it would be impossible to list them all!
Have you ever made your own jewelry? Did you go to a store like this one, or make it at home? Do you have any stores like this near you? Let me know what you think!
How many of you love to decorate for the seasons, but don’t have much extra to spend on decor? Or maybe would just rather add that personal touch and make them yourself? I know I definitely fall into the first category, and usually into the second as well. I would love to have that wonderfully decorated, Pintrest-ready home, but I definitely don’t have the funds for that!
I try to get inspiration from a lot of places, and I’ve seen DIY burlap banners many times. When I wanted to make a fall banner like the ones I had seen, I didn’t have any burlap, but those are definitely what inspired this piece.
Continue on to see how I created a beautiful fall banner with only materials I had on hand!
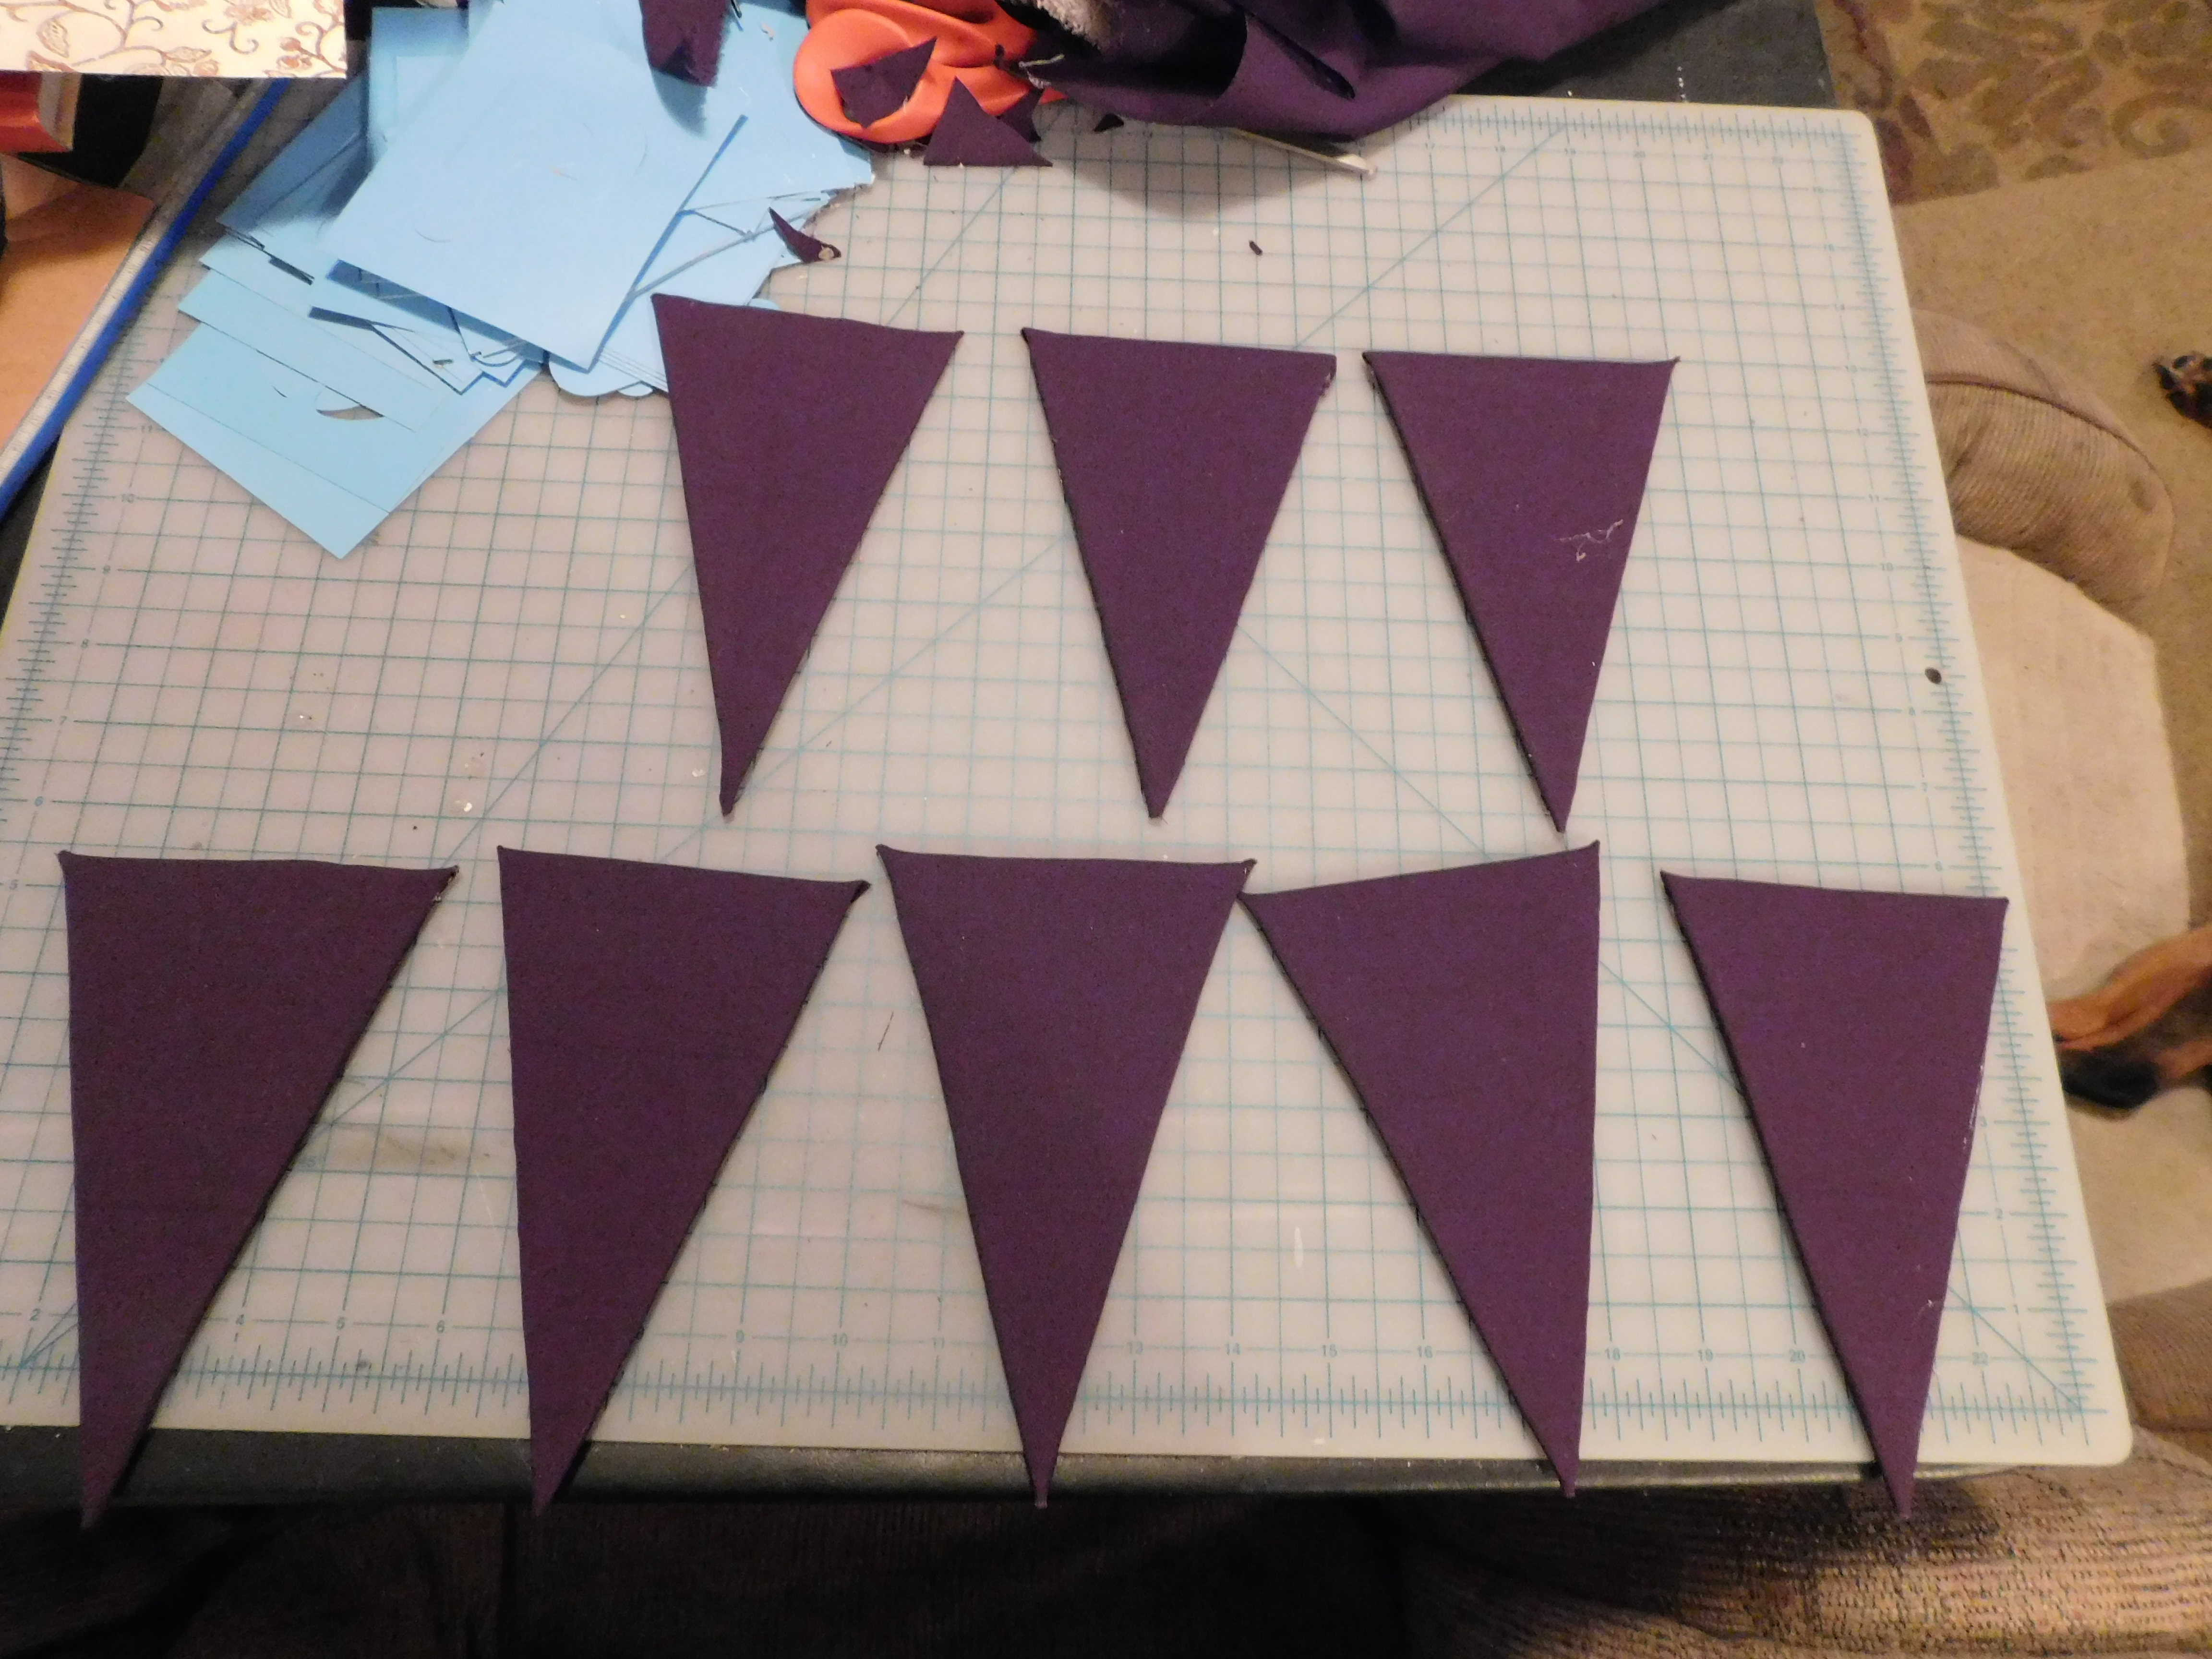
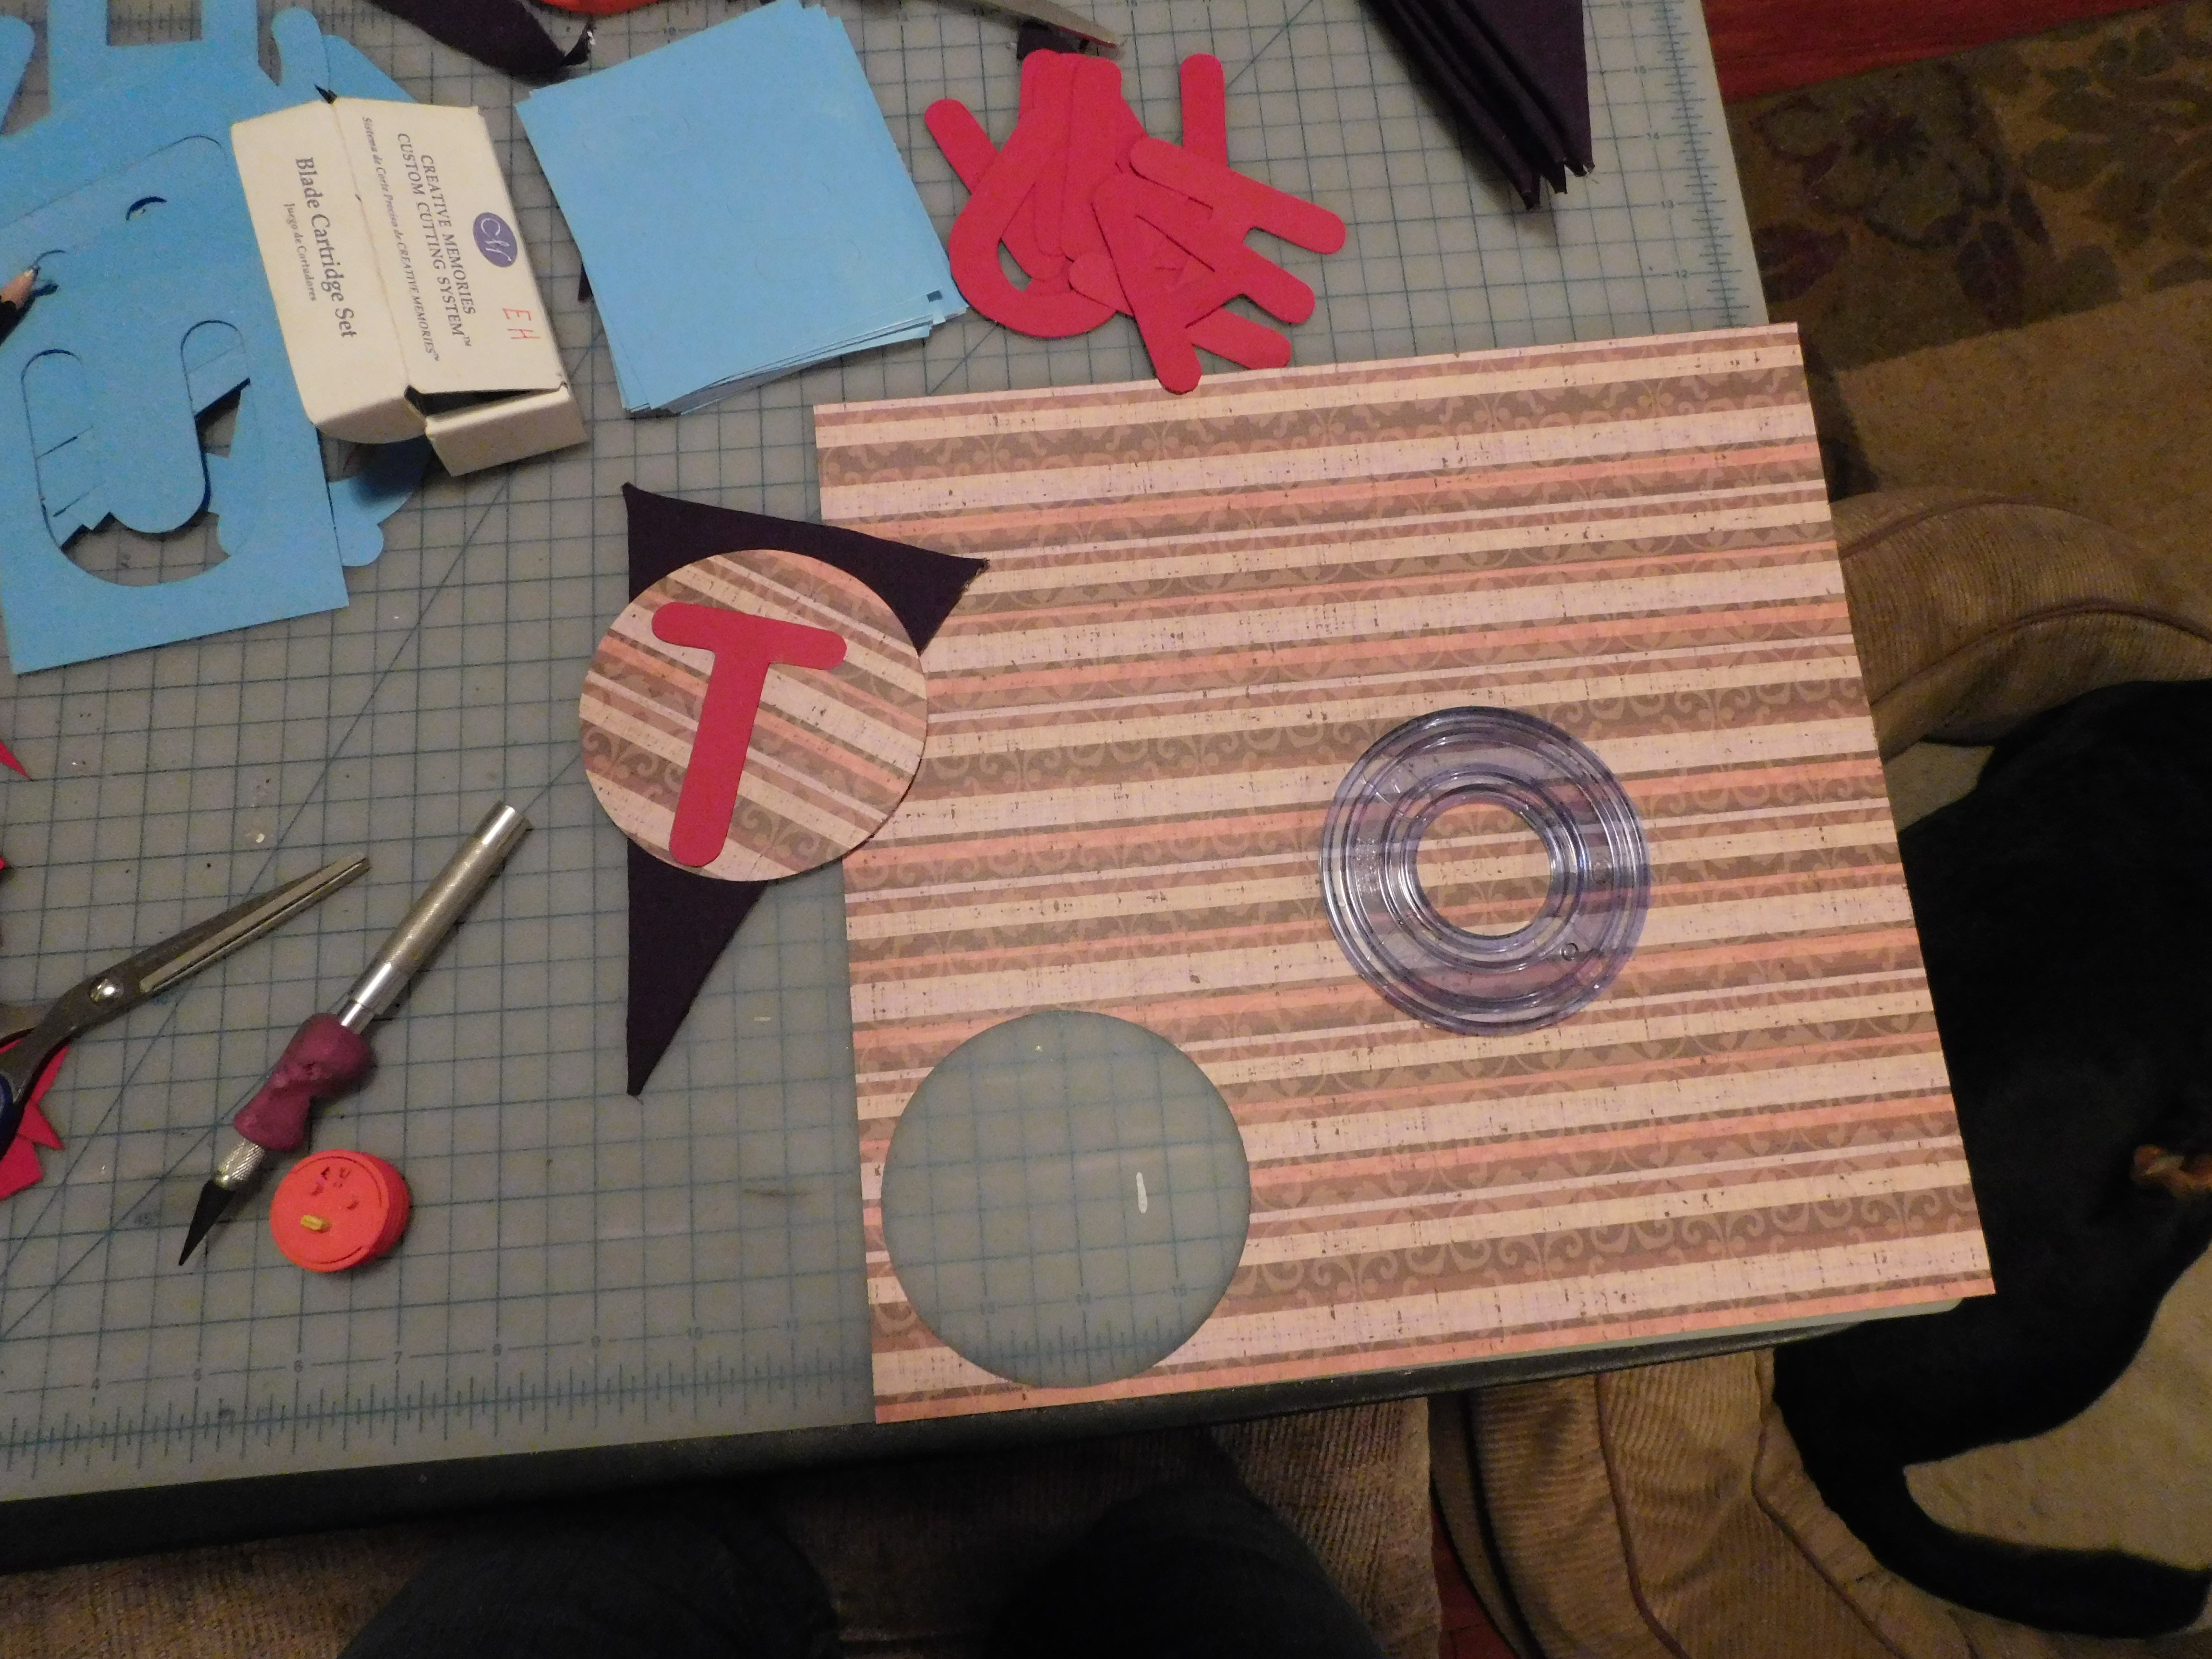
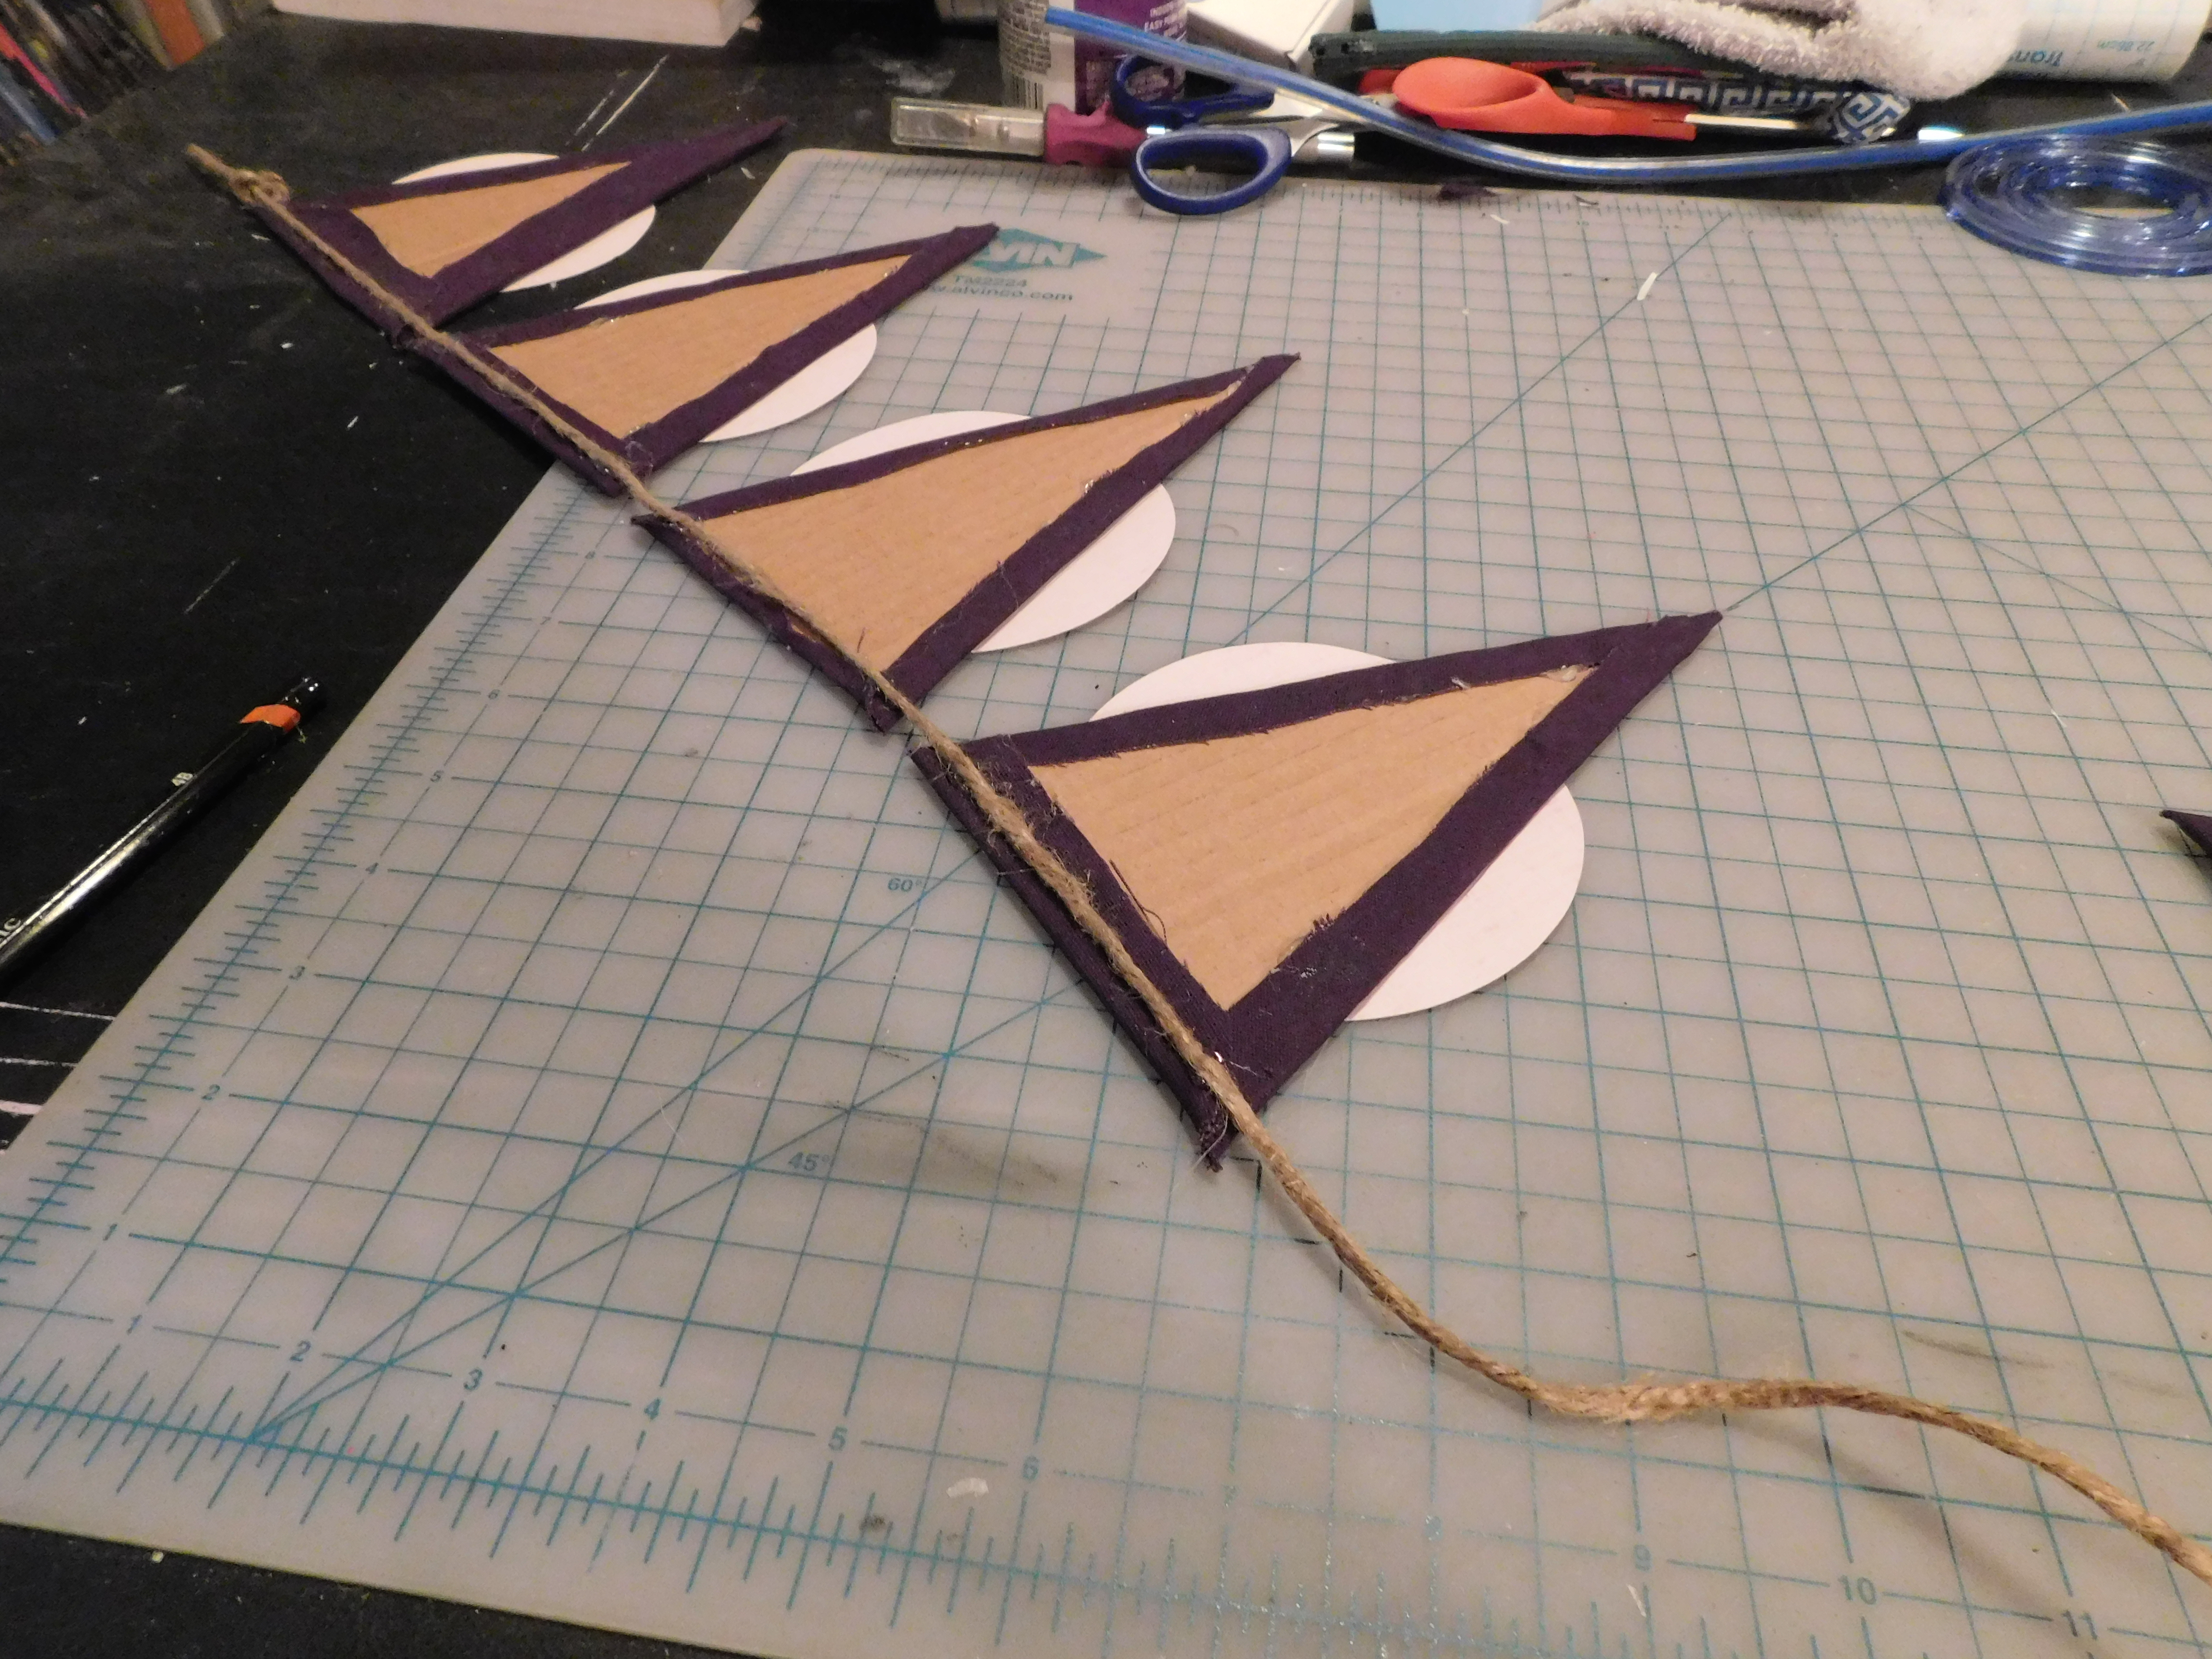
On the top, I measured out a dot every 4 inches. On the bottom, I first measured 2 inches in, then followed by measuring every 4 inches again. This allowed for roughly the same size and nice looking triangles.My 8 triangles after I cut them!Using a hot glue gun, I stretched deep purple fabric over the triangles. I glued down the long sides first and finished with the top. trimming the backs once I was done.Stencils were used to create the letters in bright red scrapbooking paper. I found another piece of scrapping paper that had a fall-colored lined design for the circles. I think they look pretty nice together! I was thrilled when I refound that circle cutter in my scrapbooking supplies too! I had completely forgot about it and it made cutting the circles so much easier!After lining them all up, I glued each set one by one. It took me a bit to figure out how to make sure the lines stayed where I wanted. I ended up holding the paper steady, turning them over and then tracing the triangle on the back of the circle. This allowed me to glue along the drawn lines, which kept the lines where I wanted them on the triangles!After tying a loop on the end of the twine, I glued it on to each corner of the triangle. This was probably the quickest part of this process!
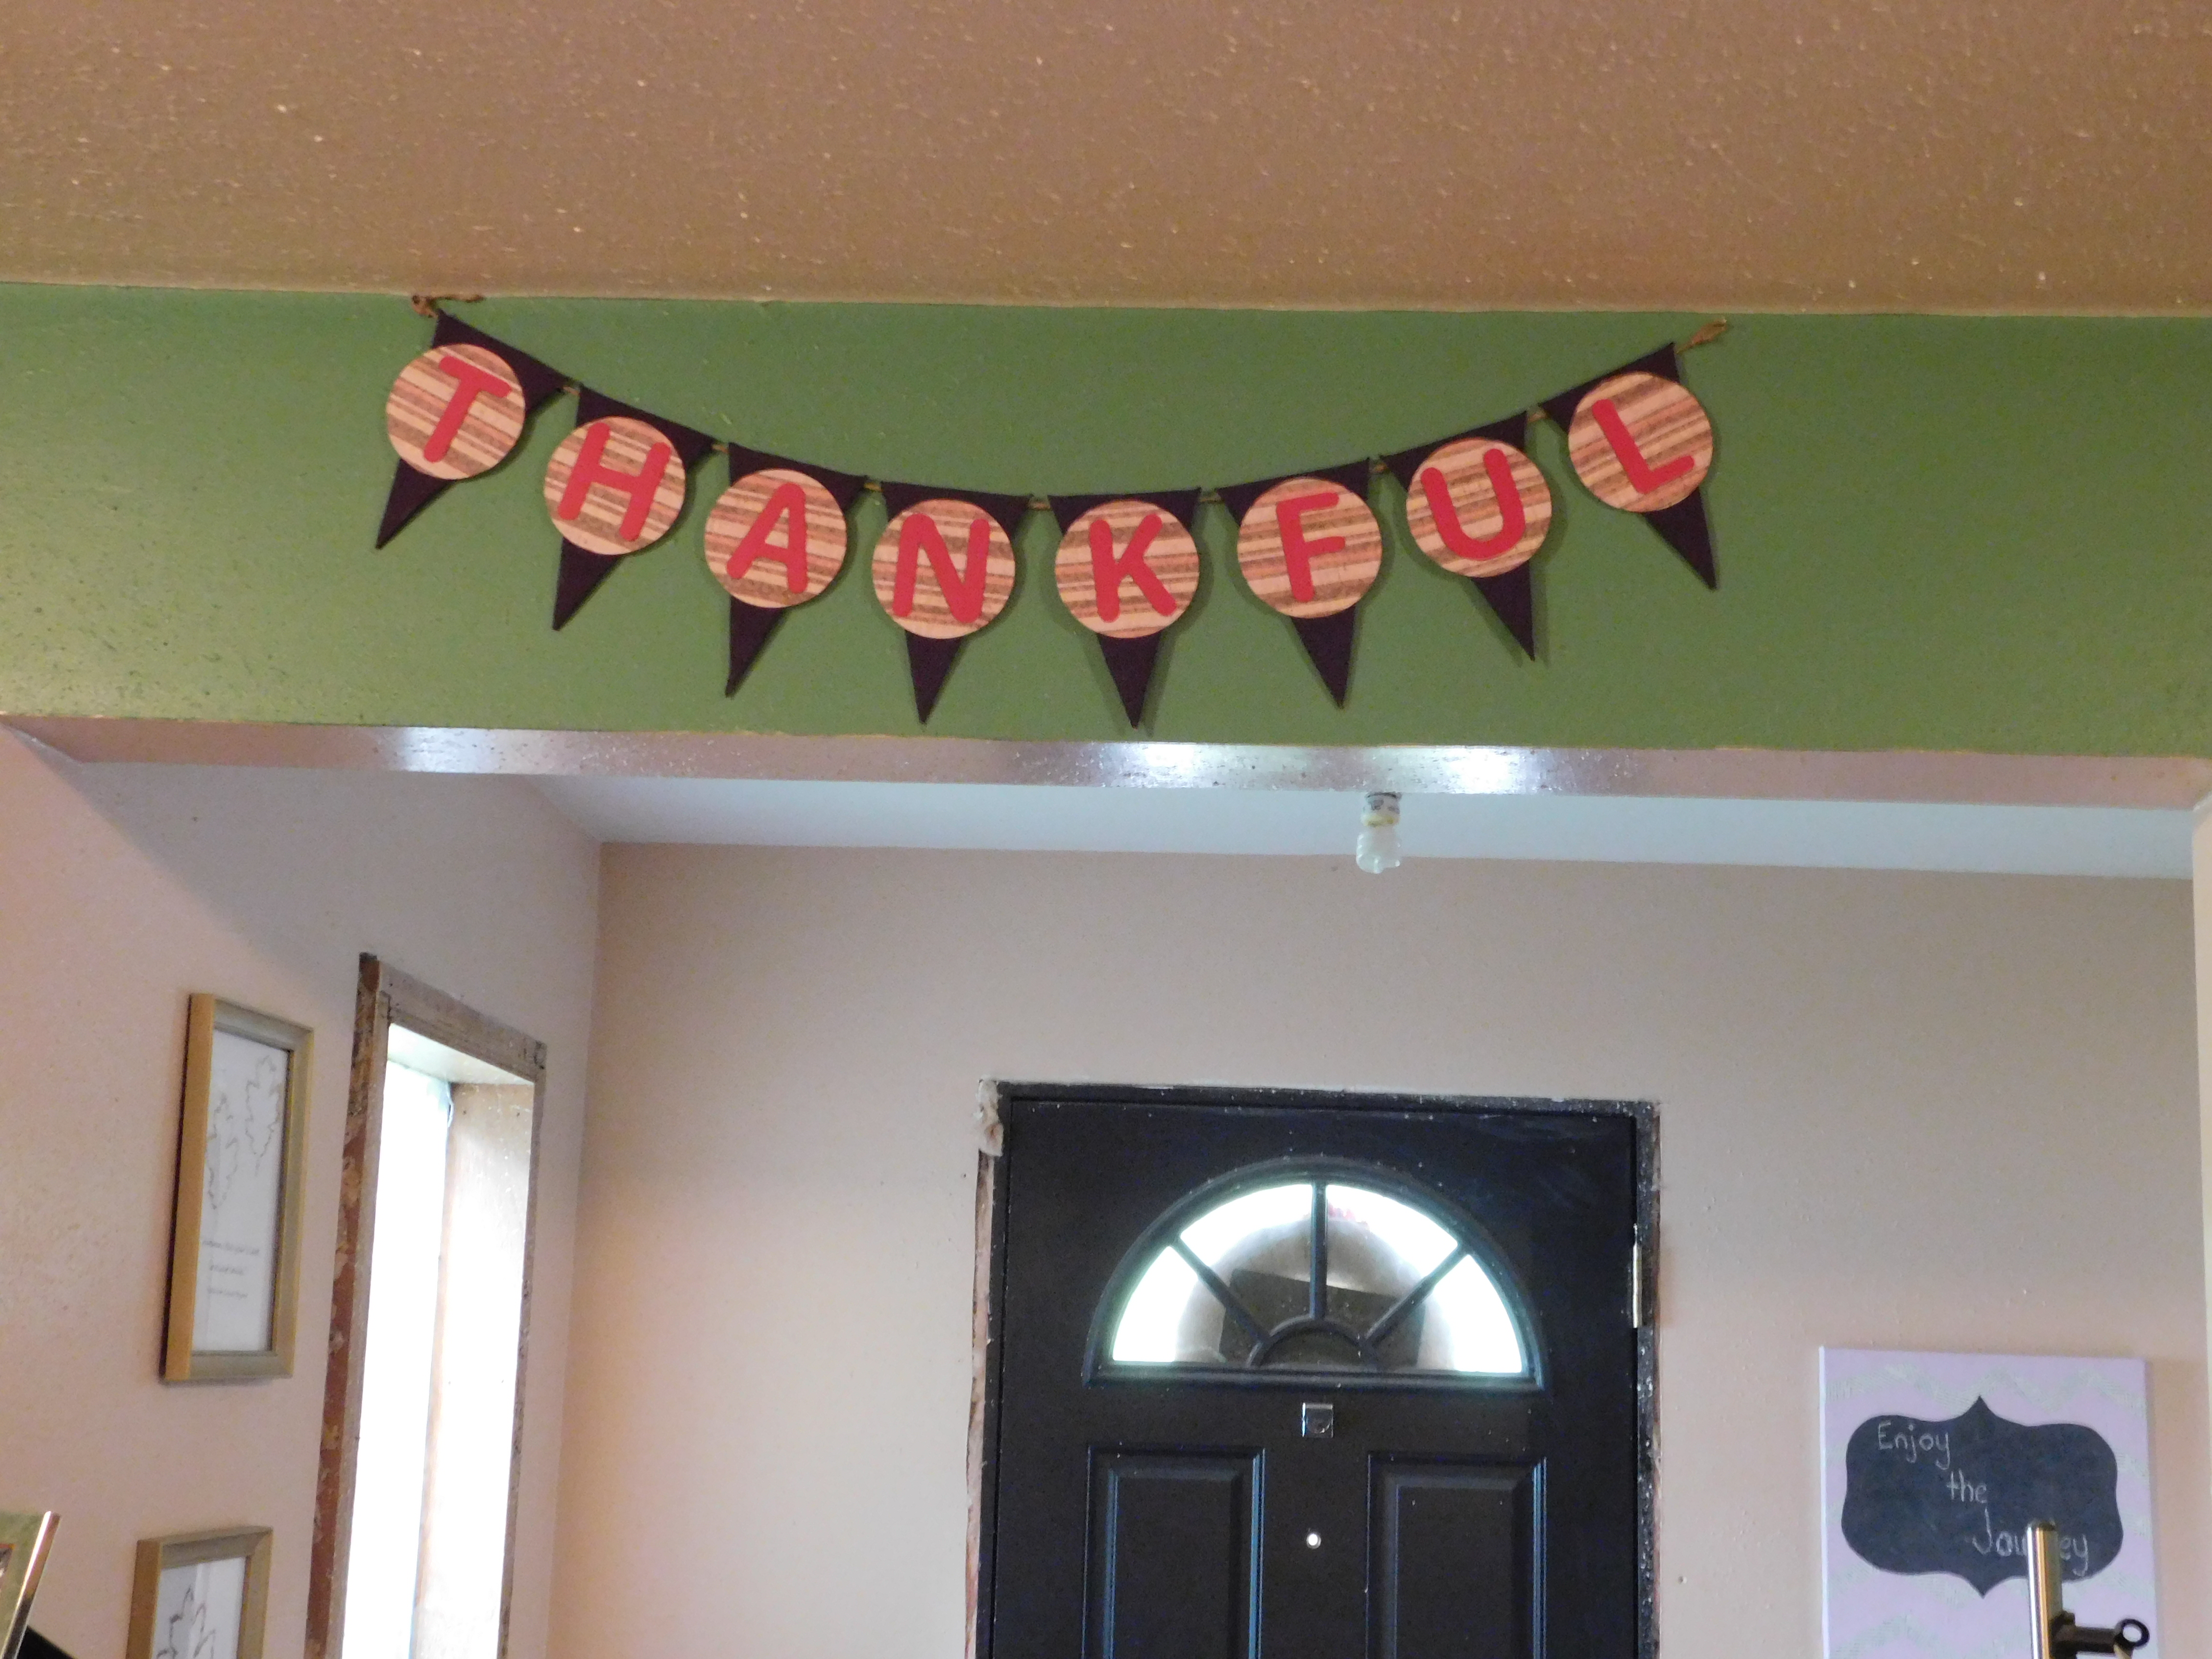
The finished product!
I really like how this turned out! I think I’m going to make a smaller one for the doorway, but I’m not sure what I want it to say yet. Any ideas?
Have you made any of your decor this year? Tried any new projects?
Decorating the home can be difficult, trying to balance between bringing in your own personality and managing costs. One way I have found to do this is buying things that are basic and inexpensive and then adding my own personality to the item.
Now I am by no means a decorating guru! I am still feeling my way through this journey as my dad and I remodel this house, and this project is just one of the many steps on that journey!
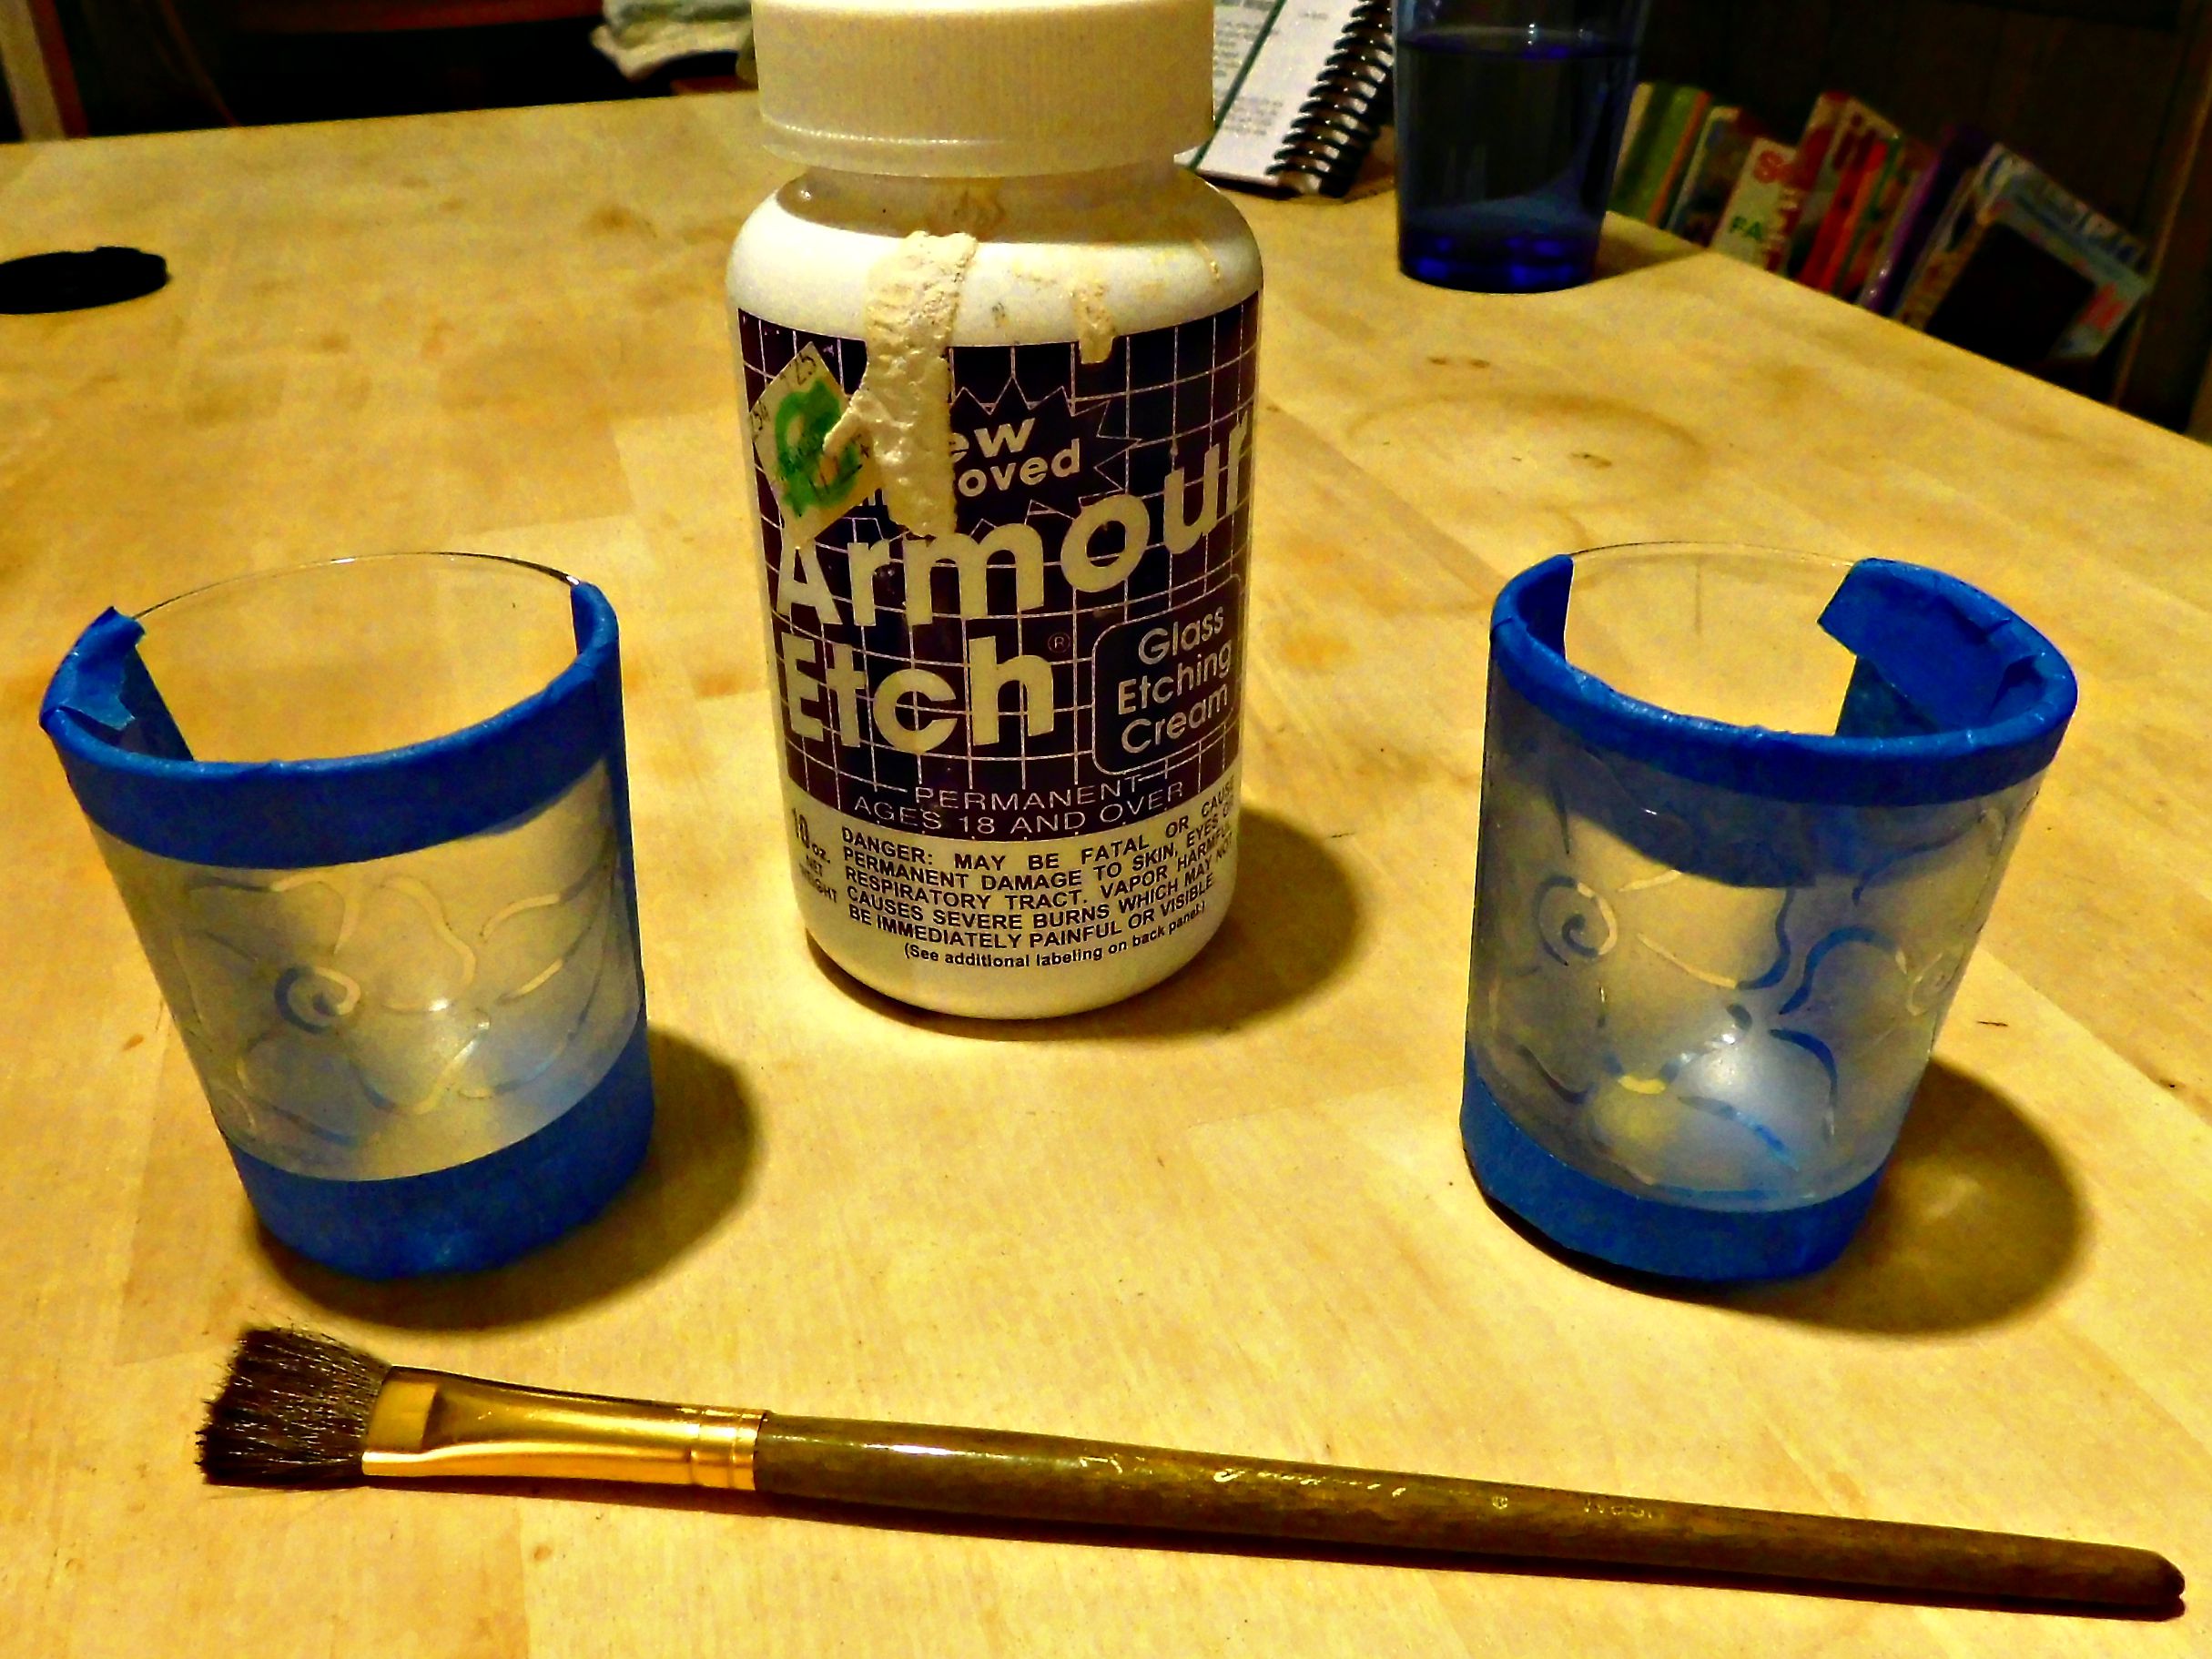
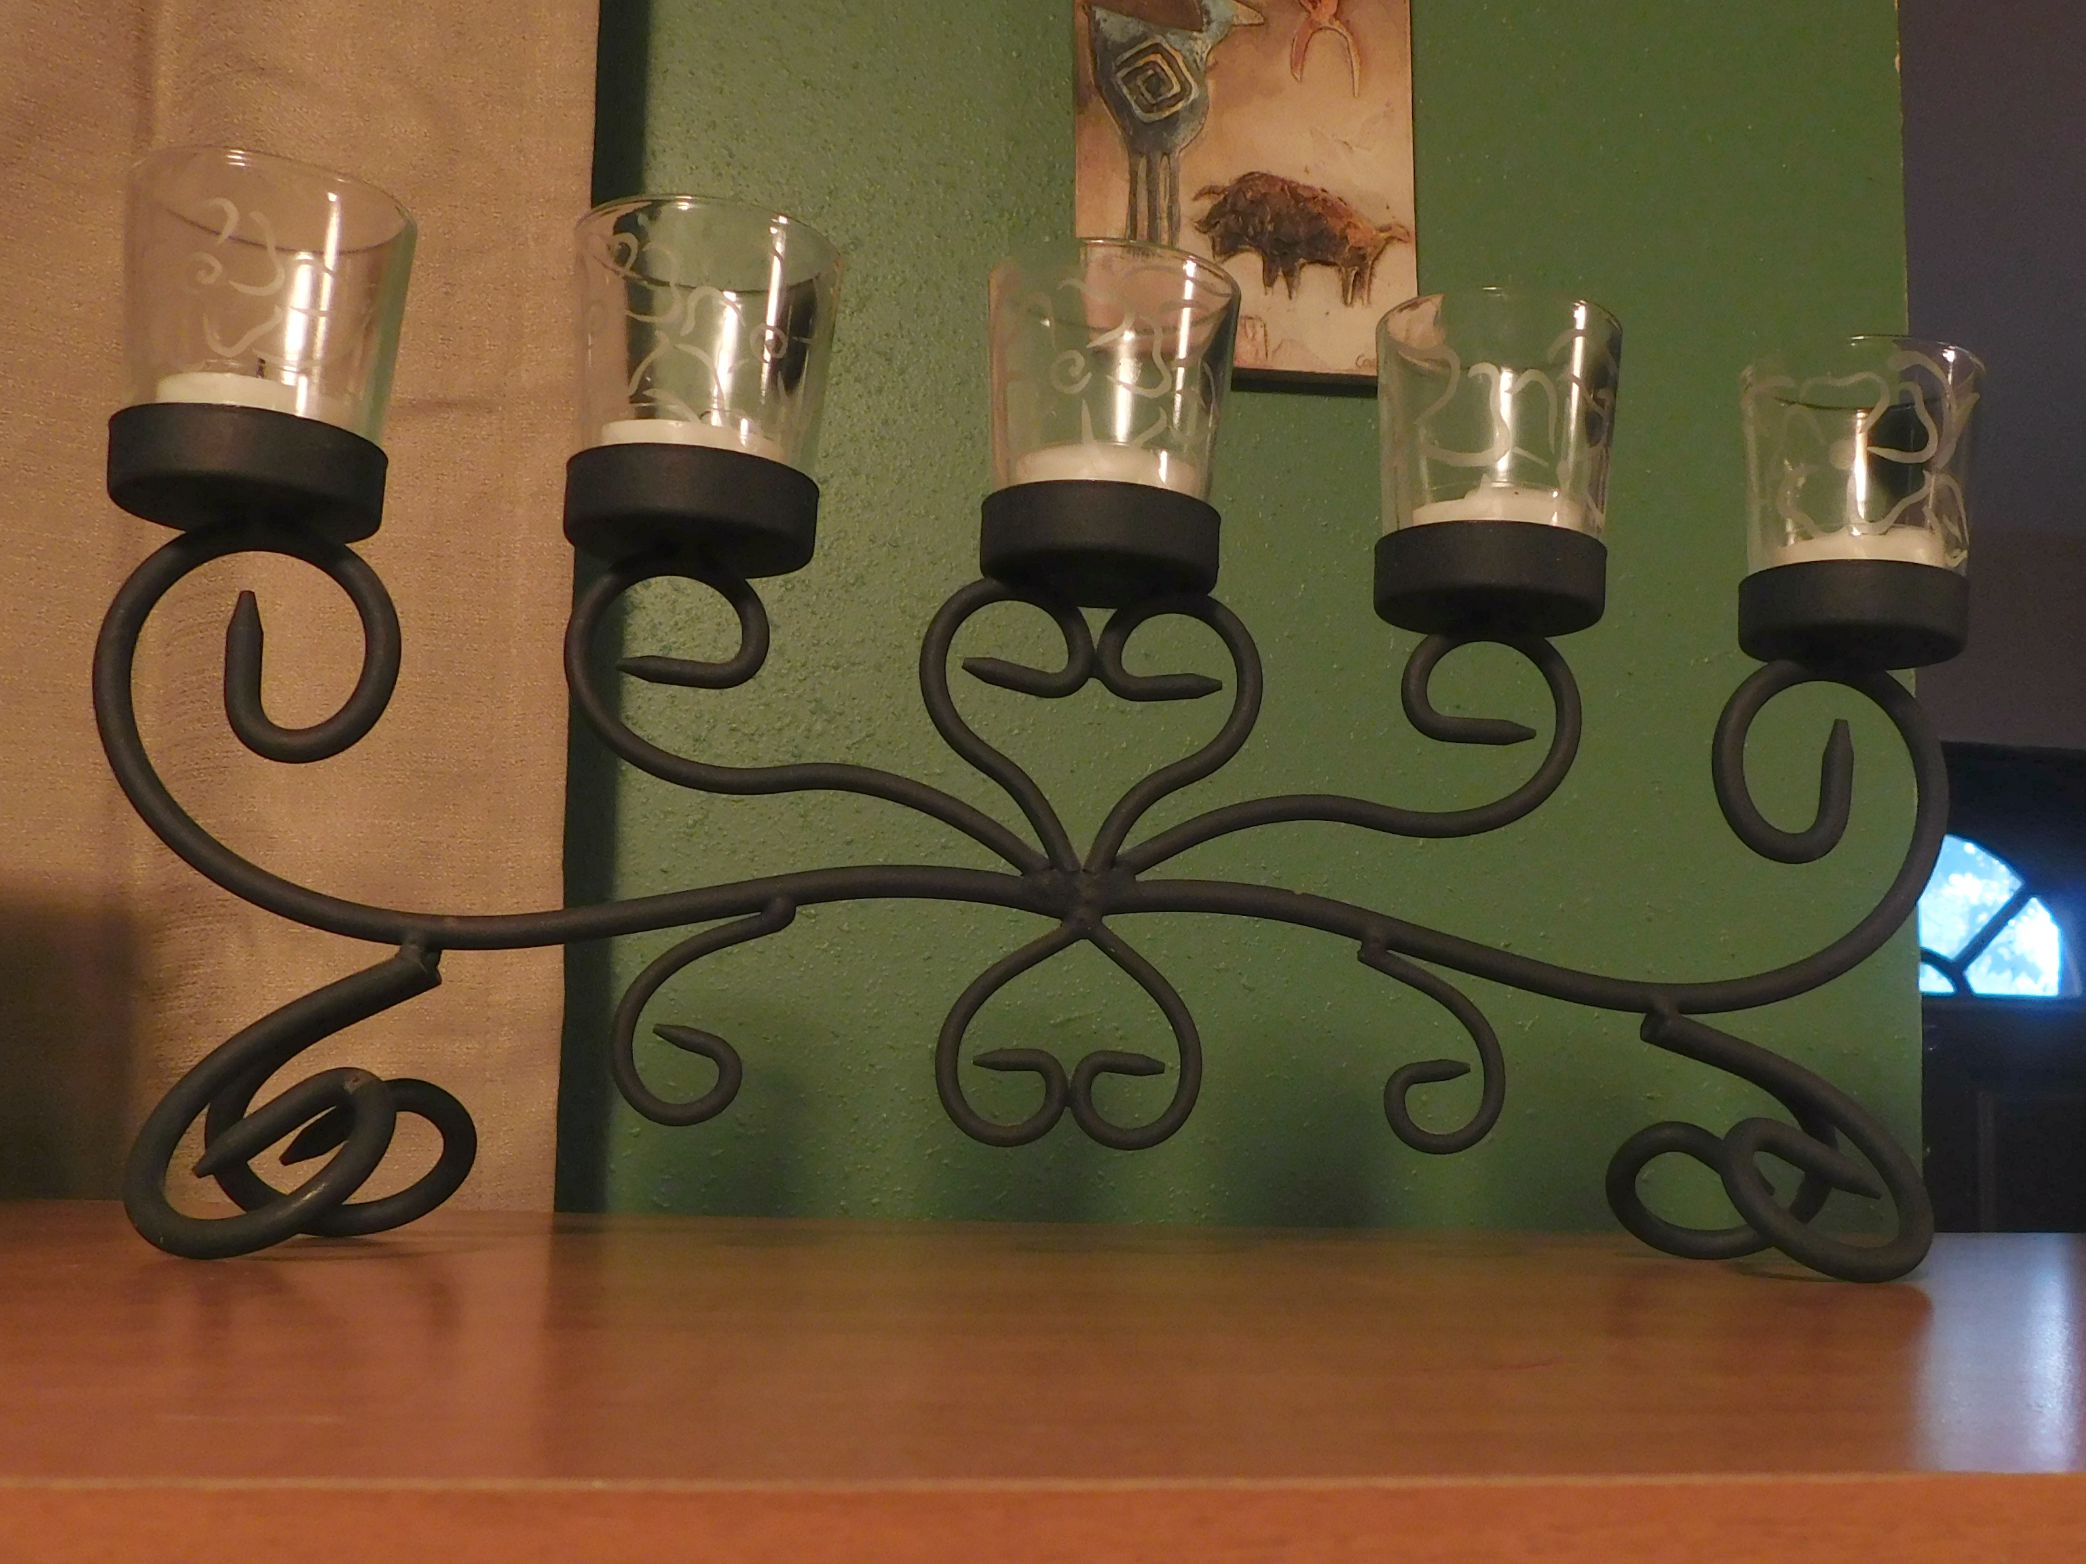
This is not the first time I have done glass etching, but this is the first time that I have made my own stencils for it. At least, it’s the first time I have made them successfully 🙂 I am thrilled with the results!
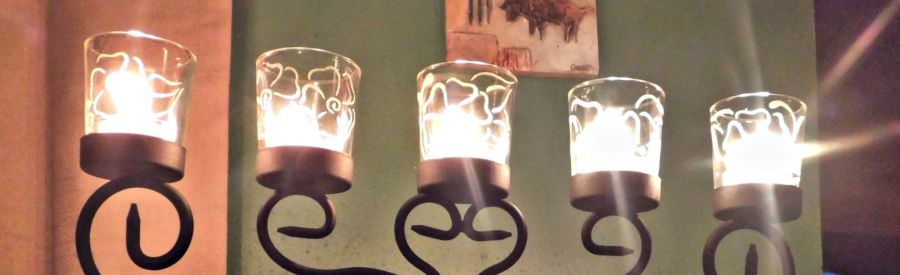
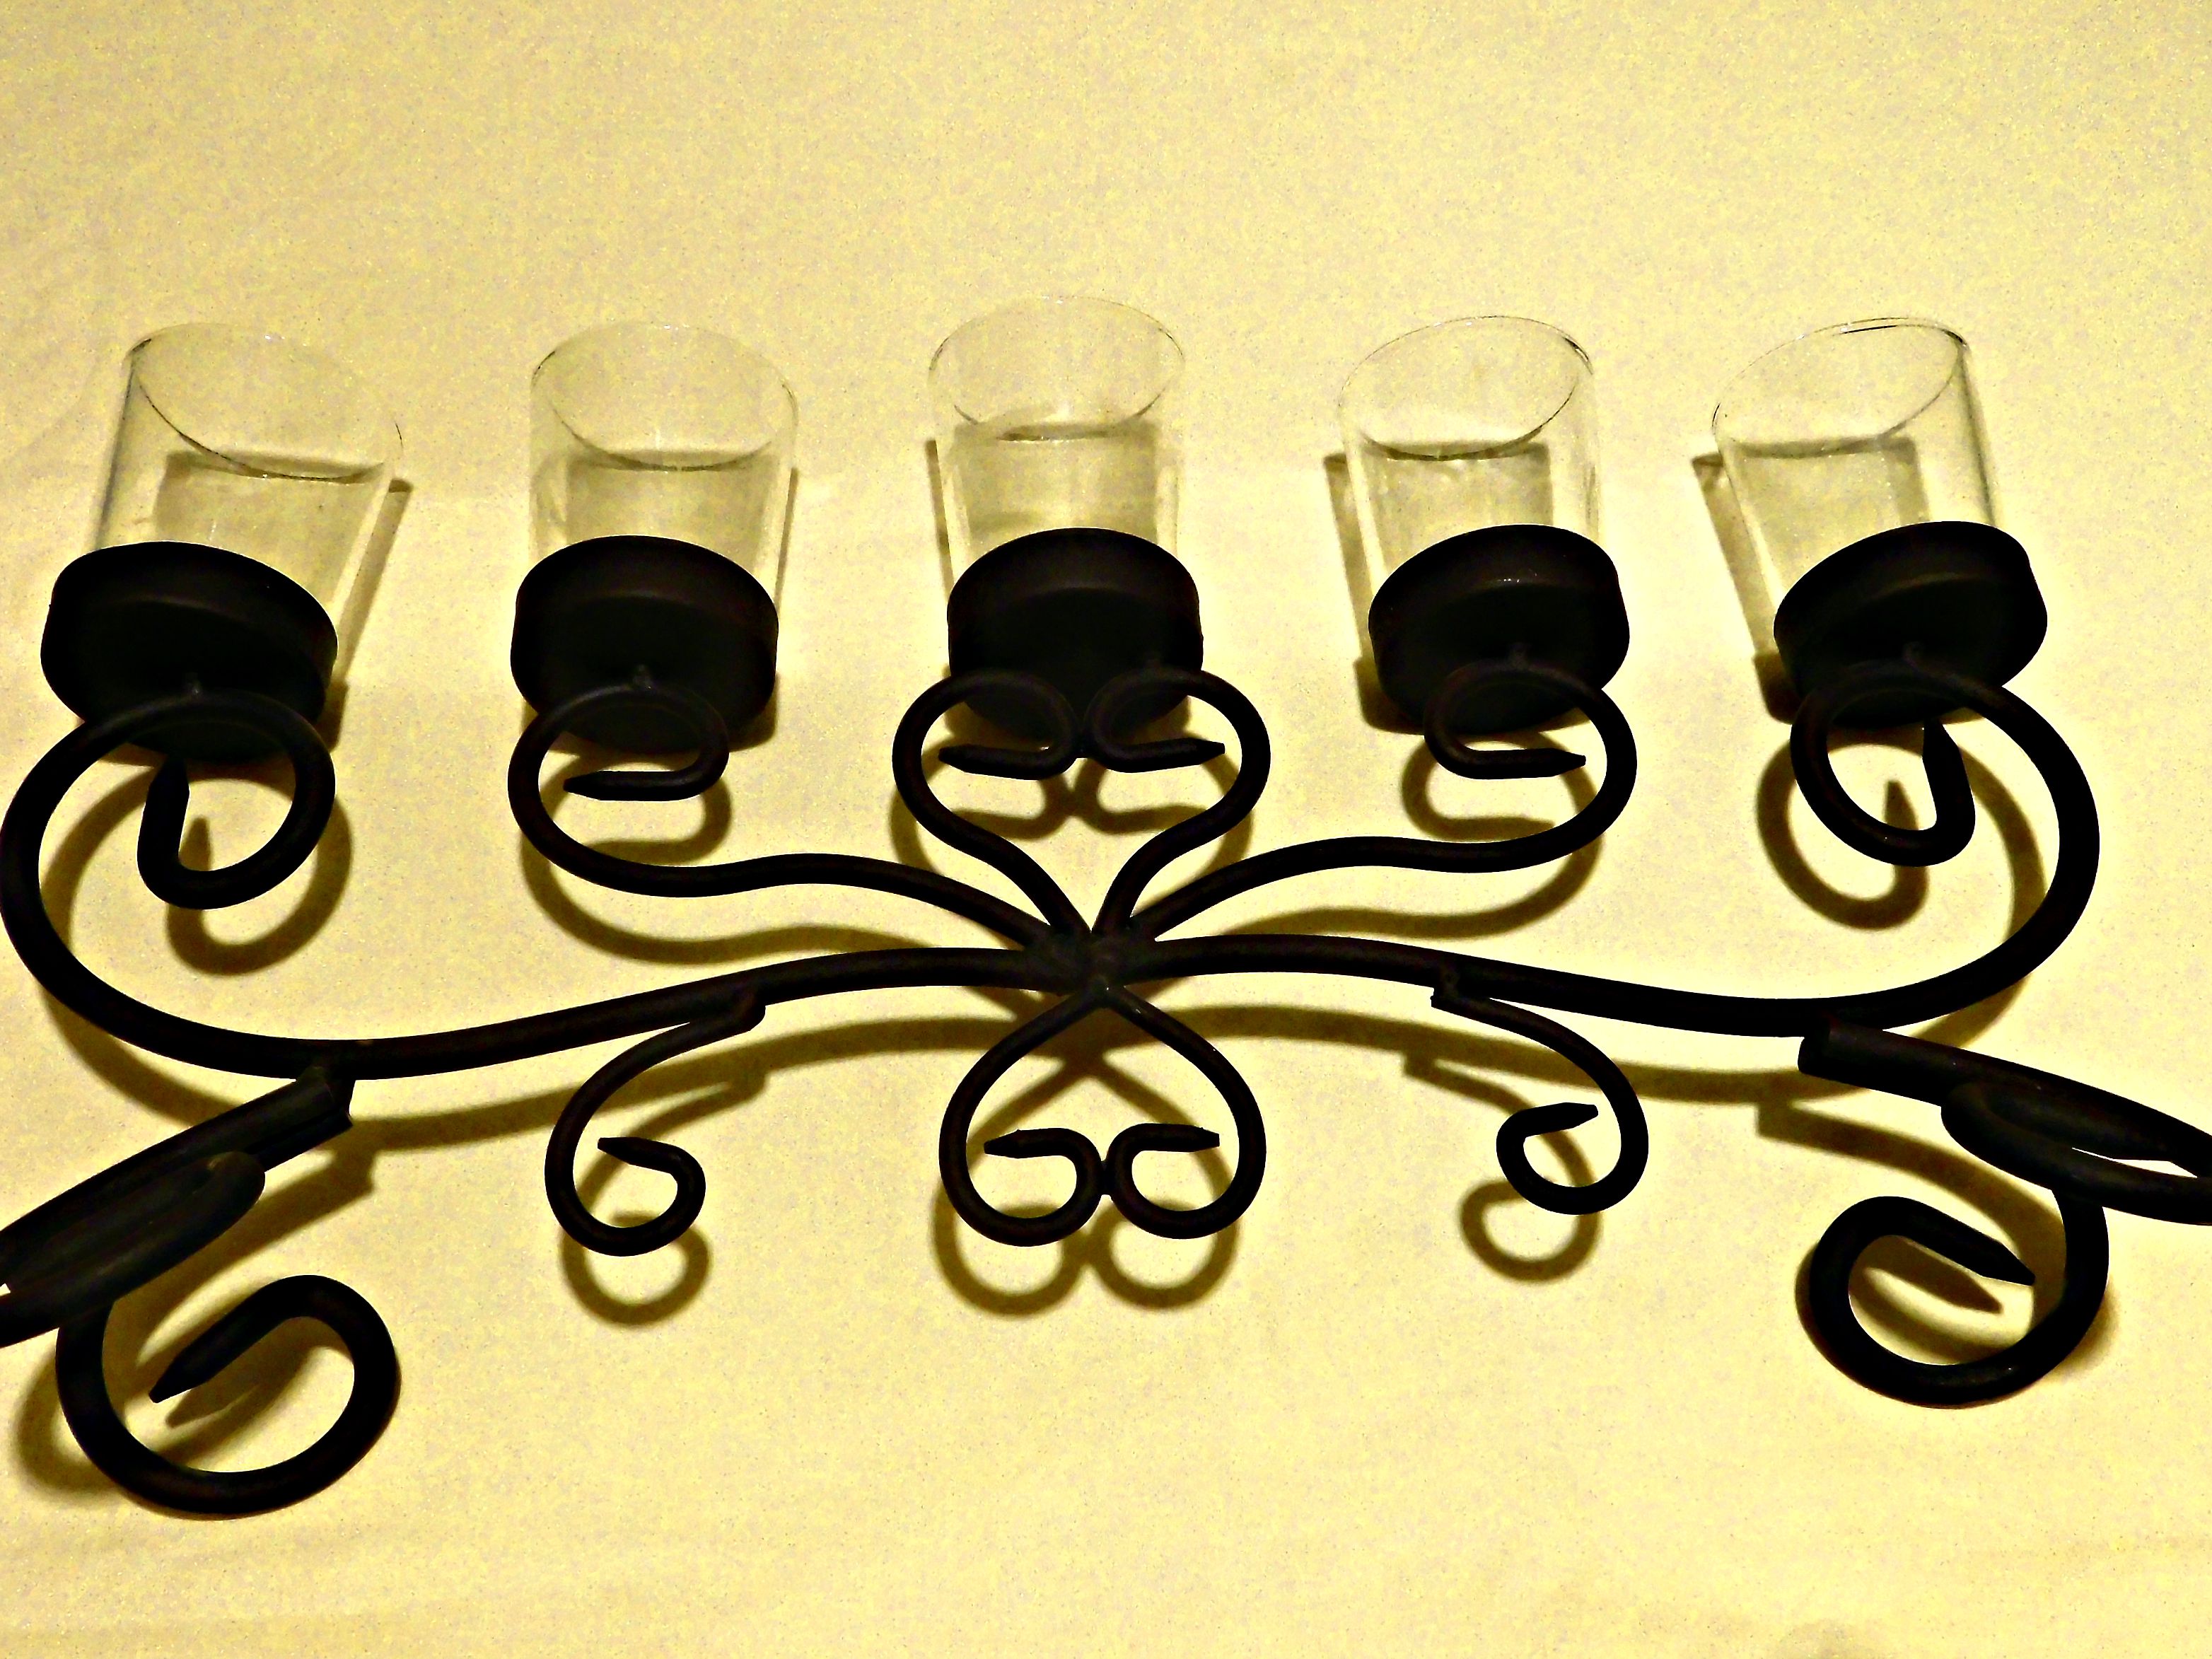
I couldn’t seem to get a very good picture of this, but hopefully you get the idea! I have actually had this candle holder for quite a long time, but I finally decided to play with it some and make it my own. I knew I wanted to do glass etching, but there are very few style options in pre-made stencils. So I decided to make my own! Using a roll of Magic Cover Clear Transparent vinyl (like this one), I sketched out a few designs. It took a few practice attempts before I had any success at transferring a stencil to glass, but it’s all part of the learning process! I will detail out some of the difficulties as we go.
As for the designs, I really like the flowing feeling of the scrollwork and wanted to mimic that in my designs for the glass holders. And you may have noticed that I enjoy floral, henna-inspired designs.
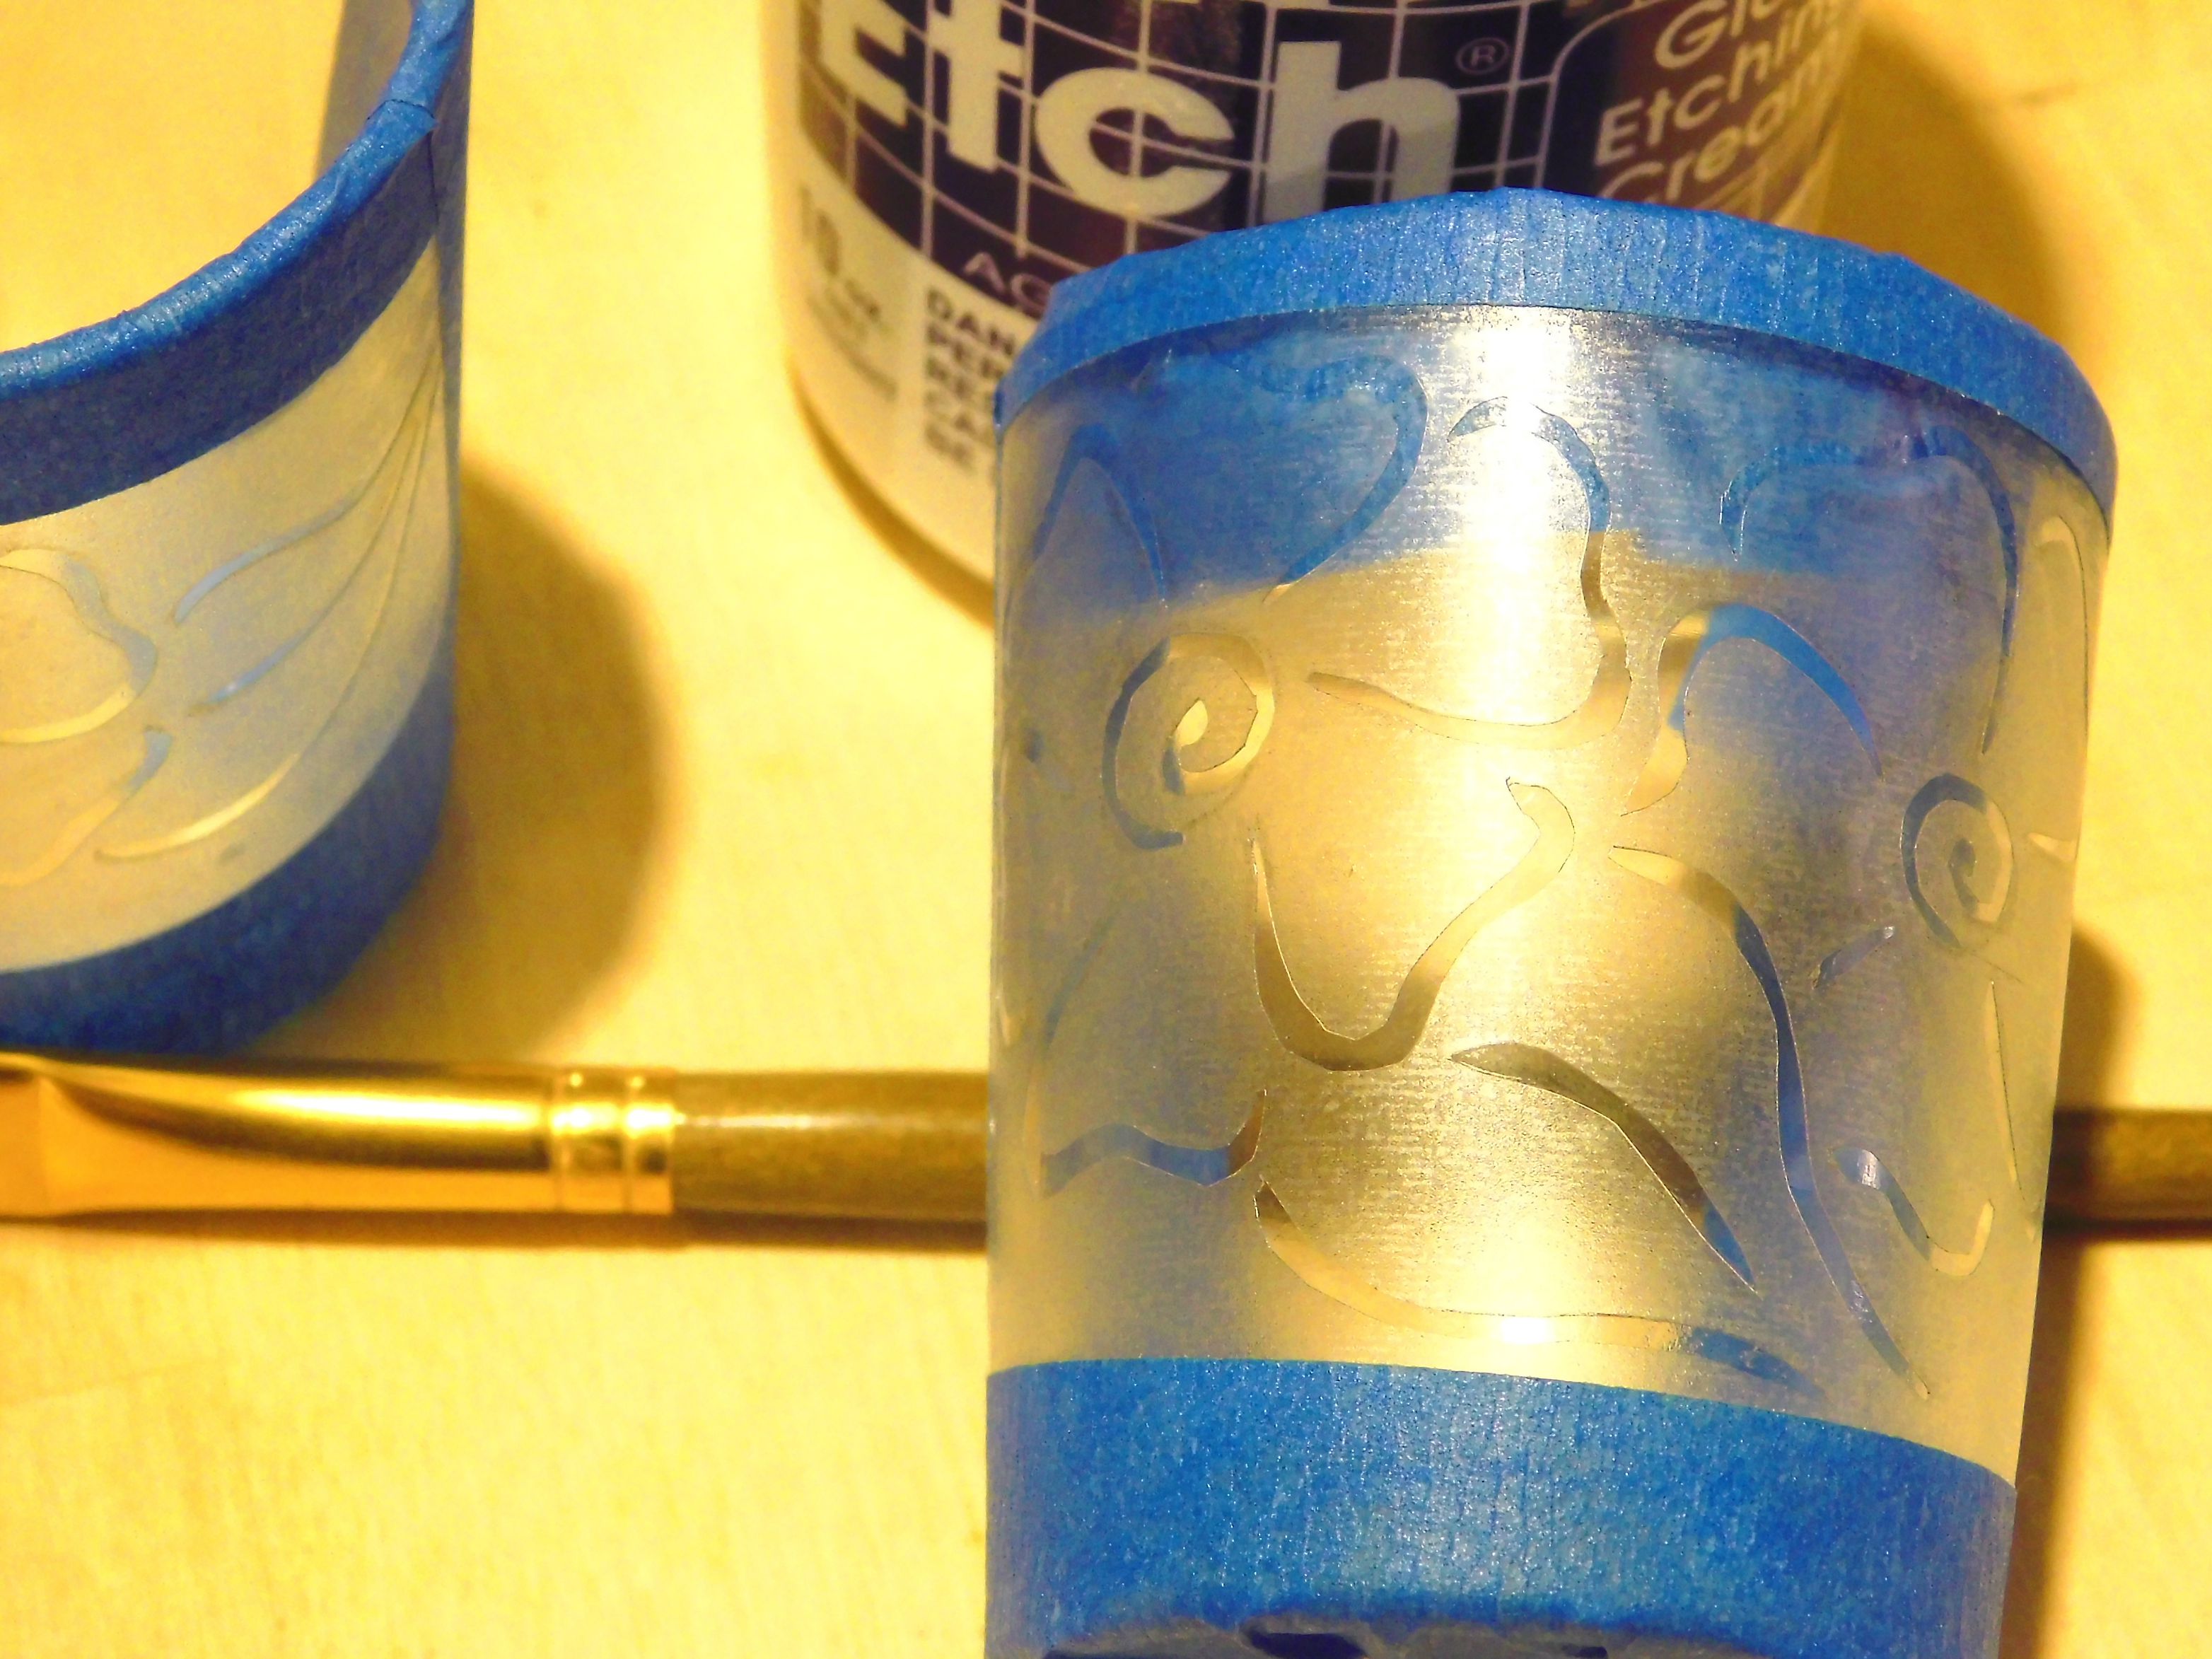
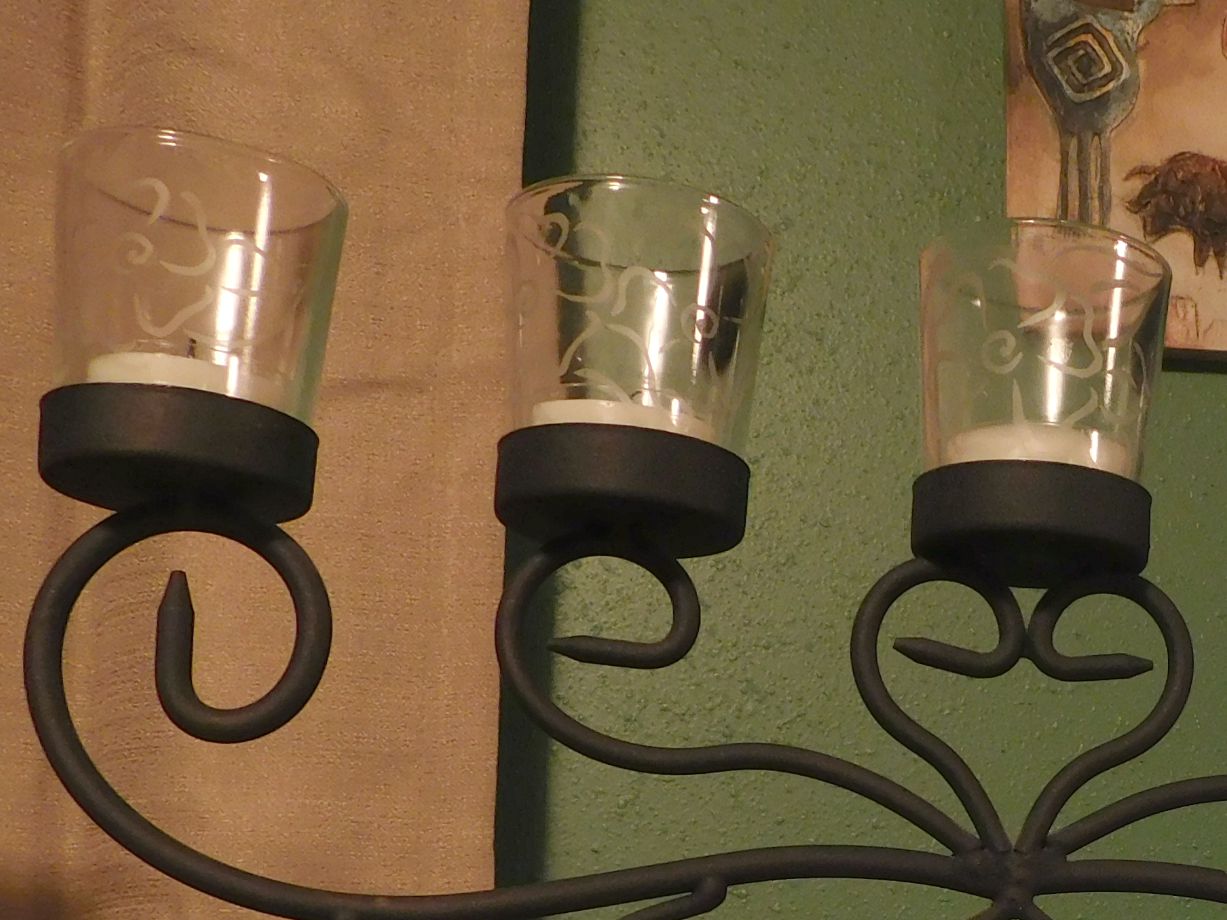
I only took pictures of two out of the five while they were in progress, but they all looked pretty similar. This is the part that I had some difficulty with is earlier practice pieces.
The first attempt was one a spare wine glass. After sketching out a simple floral design, I cut out the design and then tried to transfer it to the glass. It would not line up, no matter what I did! I figured it was the curve of the wine glass, called it a learning experience and moved on. I then tried another practice design on a straight glass and had the same problem.
Overall, both of these practice attempts showed that to successfully transfer the design, I had to apply the vinyl to the glass after I sketched it but before cutting it out. Once I learned this lesson, it worked much better!
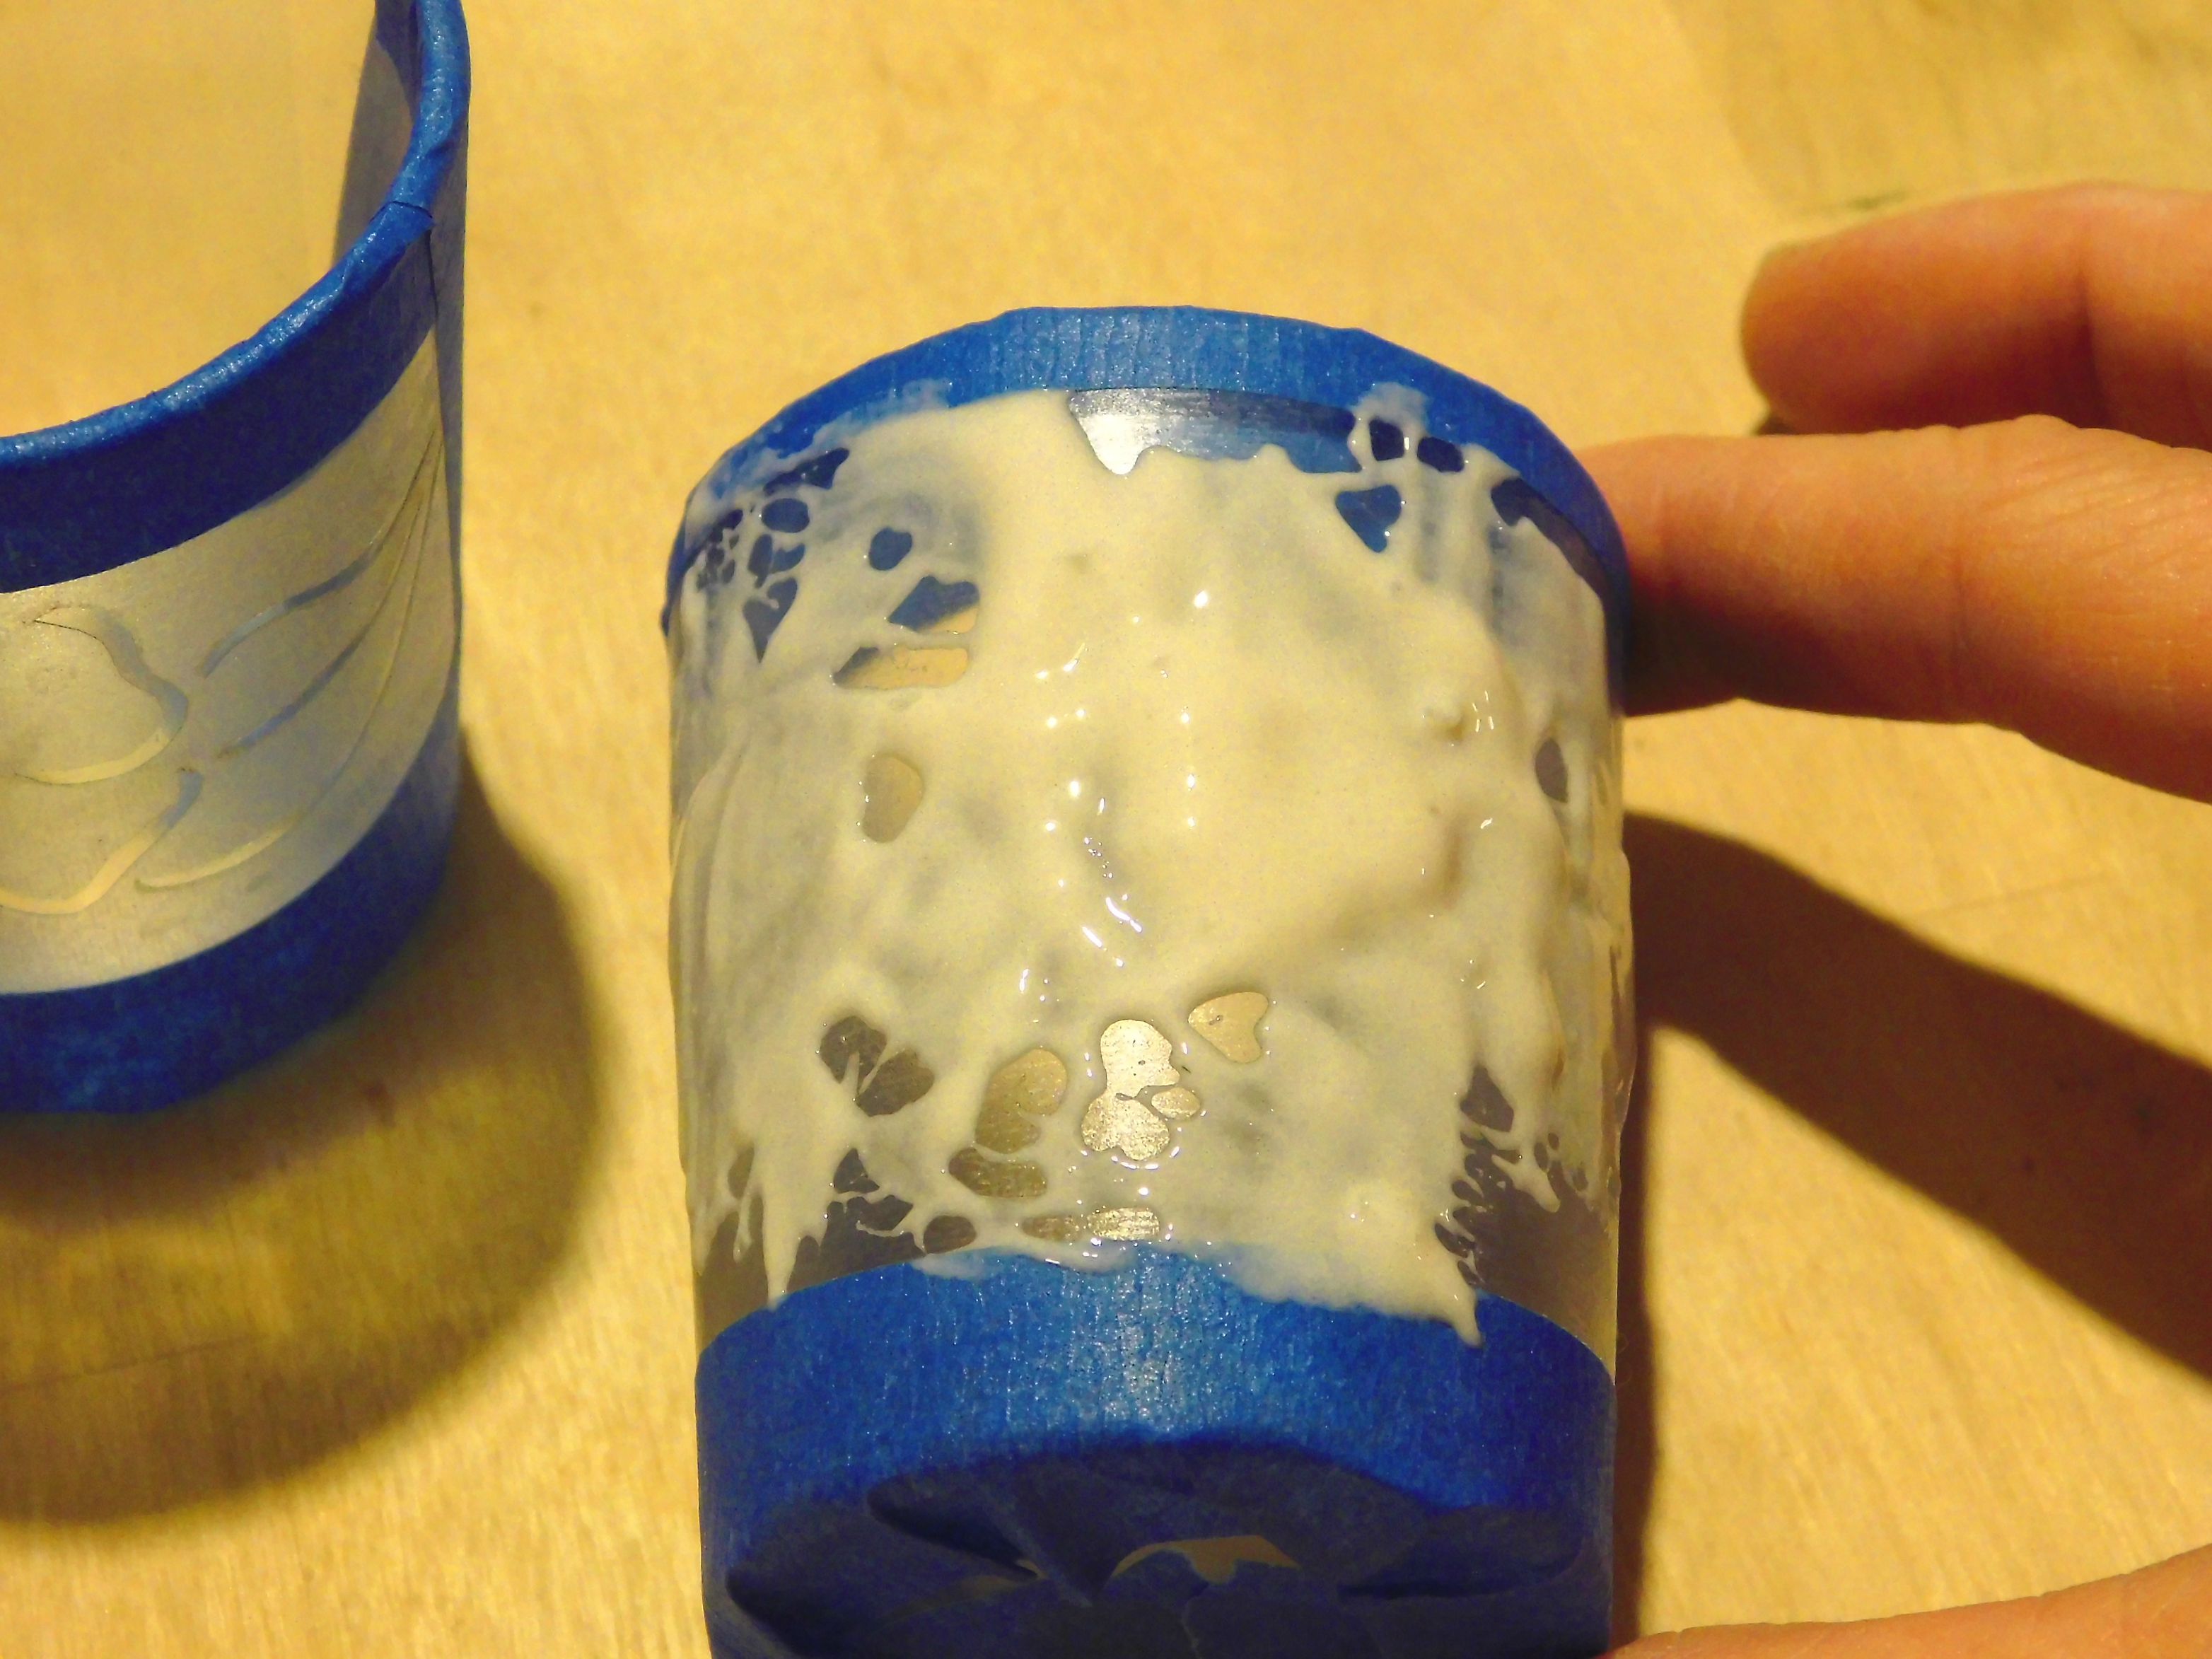
After cutting out the design, I applied a coat of the Armour Etch with the paintbrush. While the directions on the bottle say 5 minutes for custom stencils, I found that leaving the Armour Etch for closer to 7 minutes seemed to work a little better.
Once the 7 minutes was up, I washed the Armour Etch off, removed the vinyl and wiped down the glass with a paper towel.
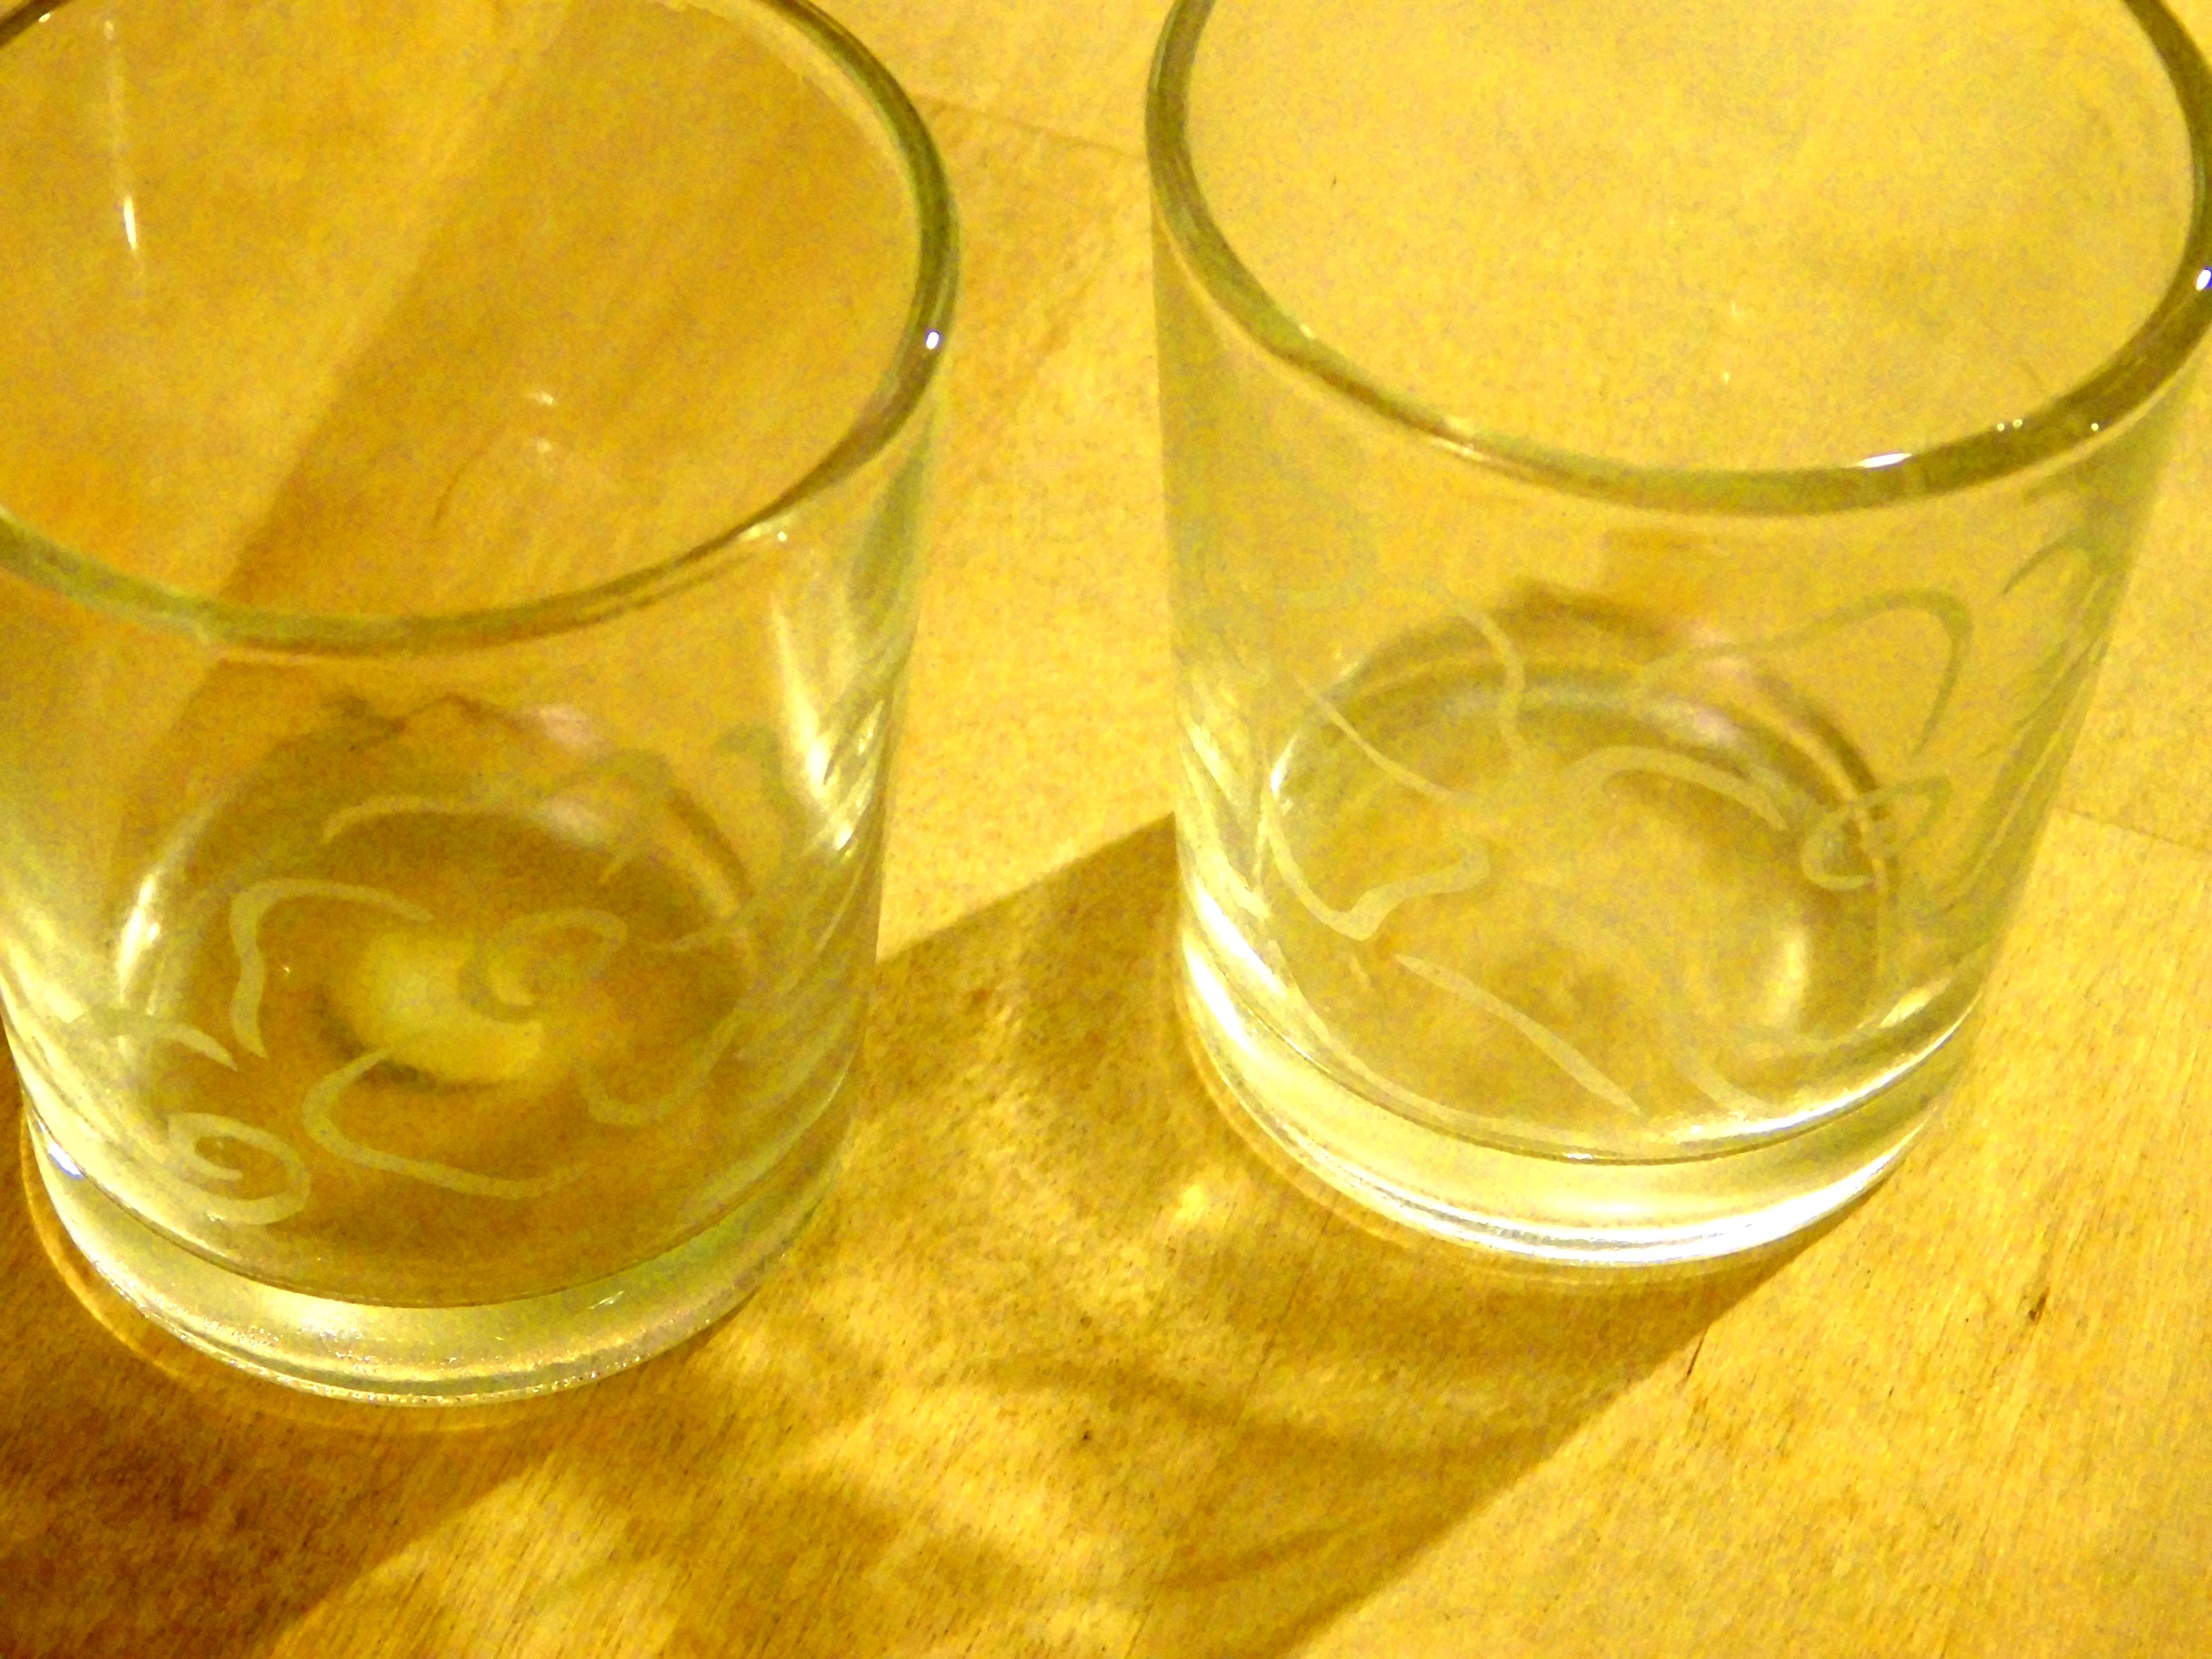
I am really happy with how they turned out! I love being able to personalize the decor in our home!
What do you do to bring your personality into your home? Do you like adding your own touches and DIY decor projects?
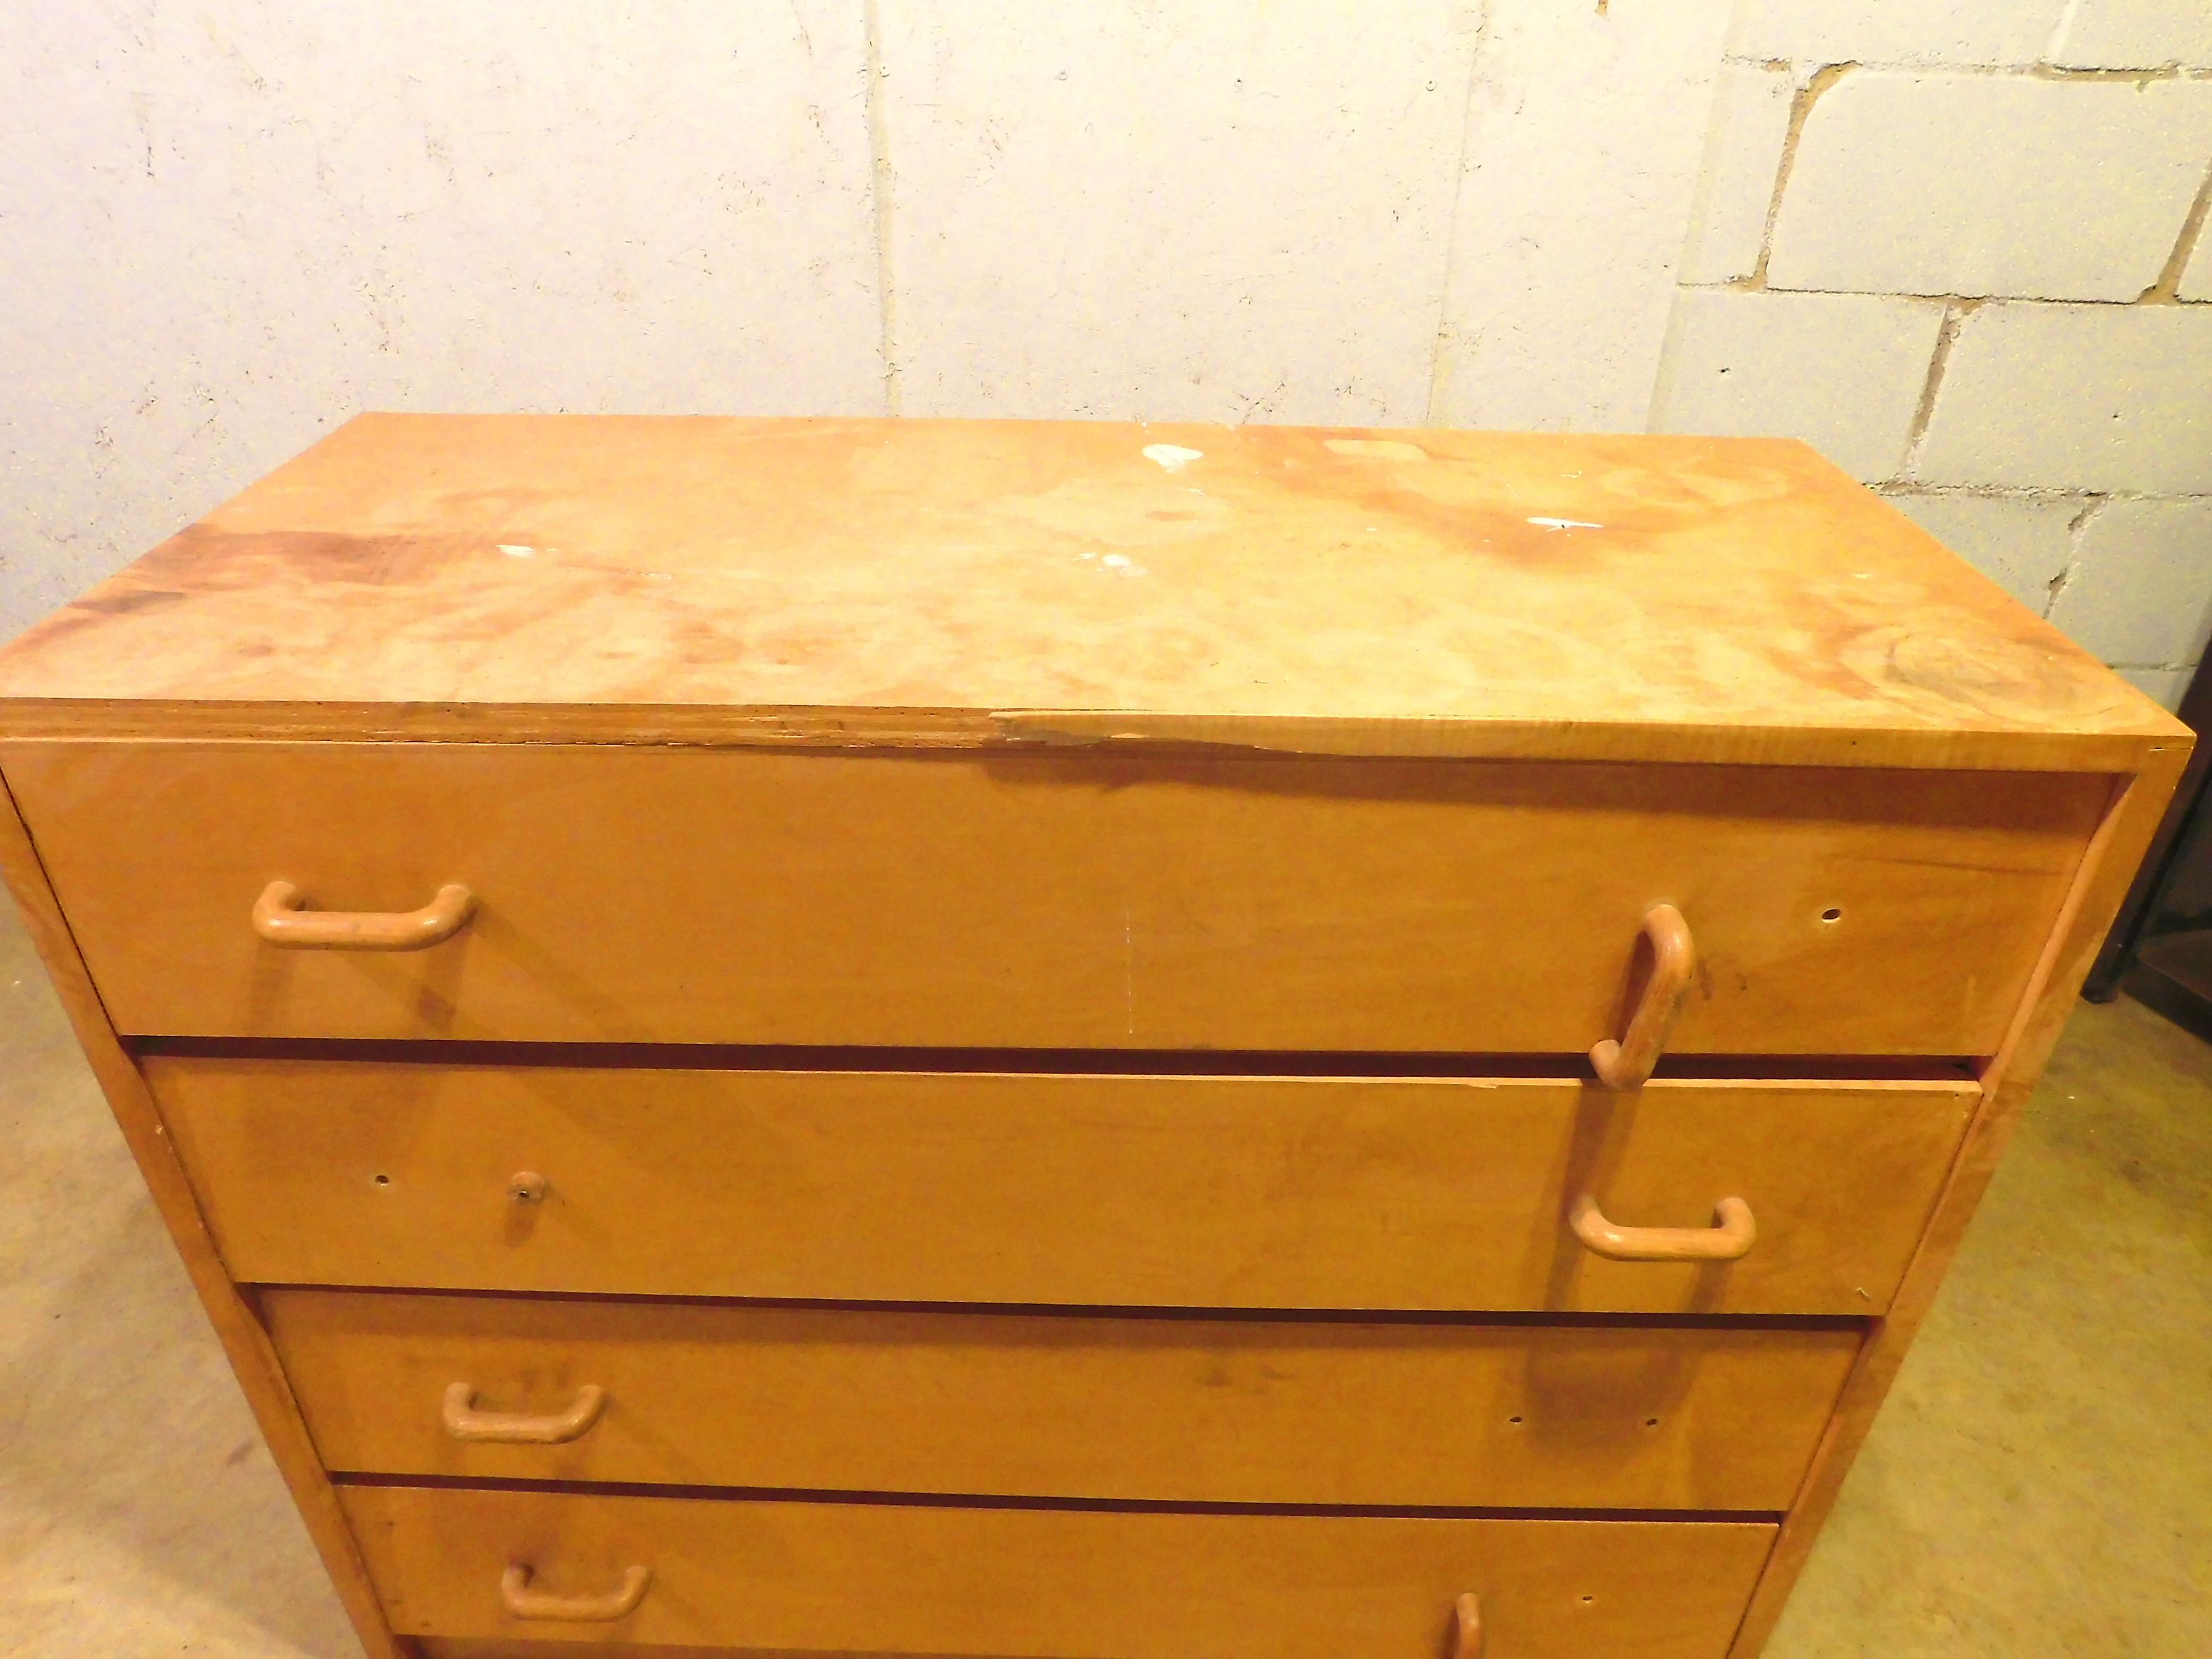
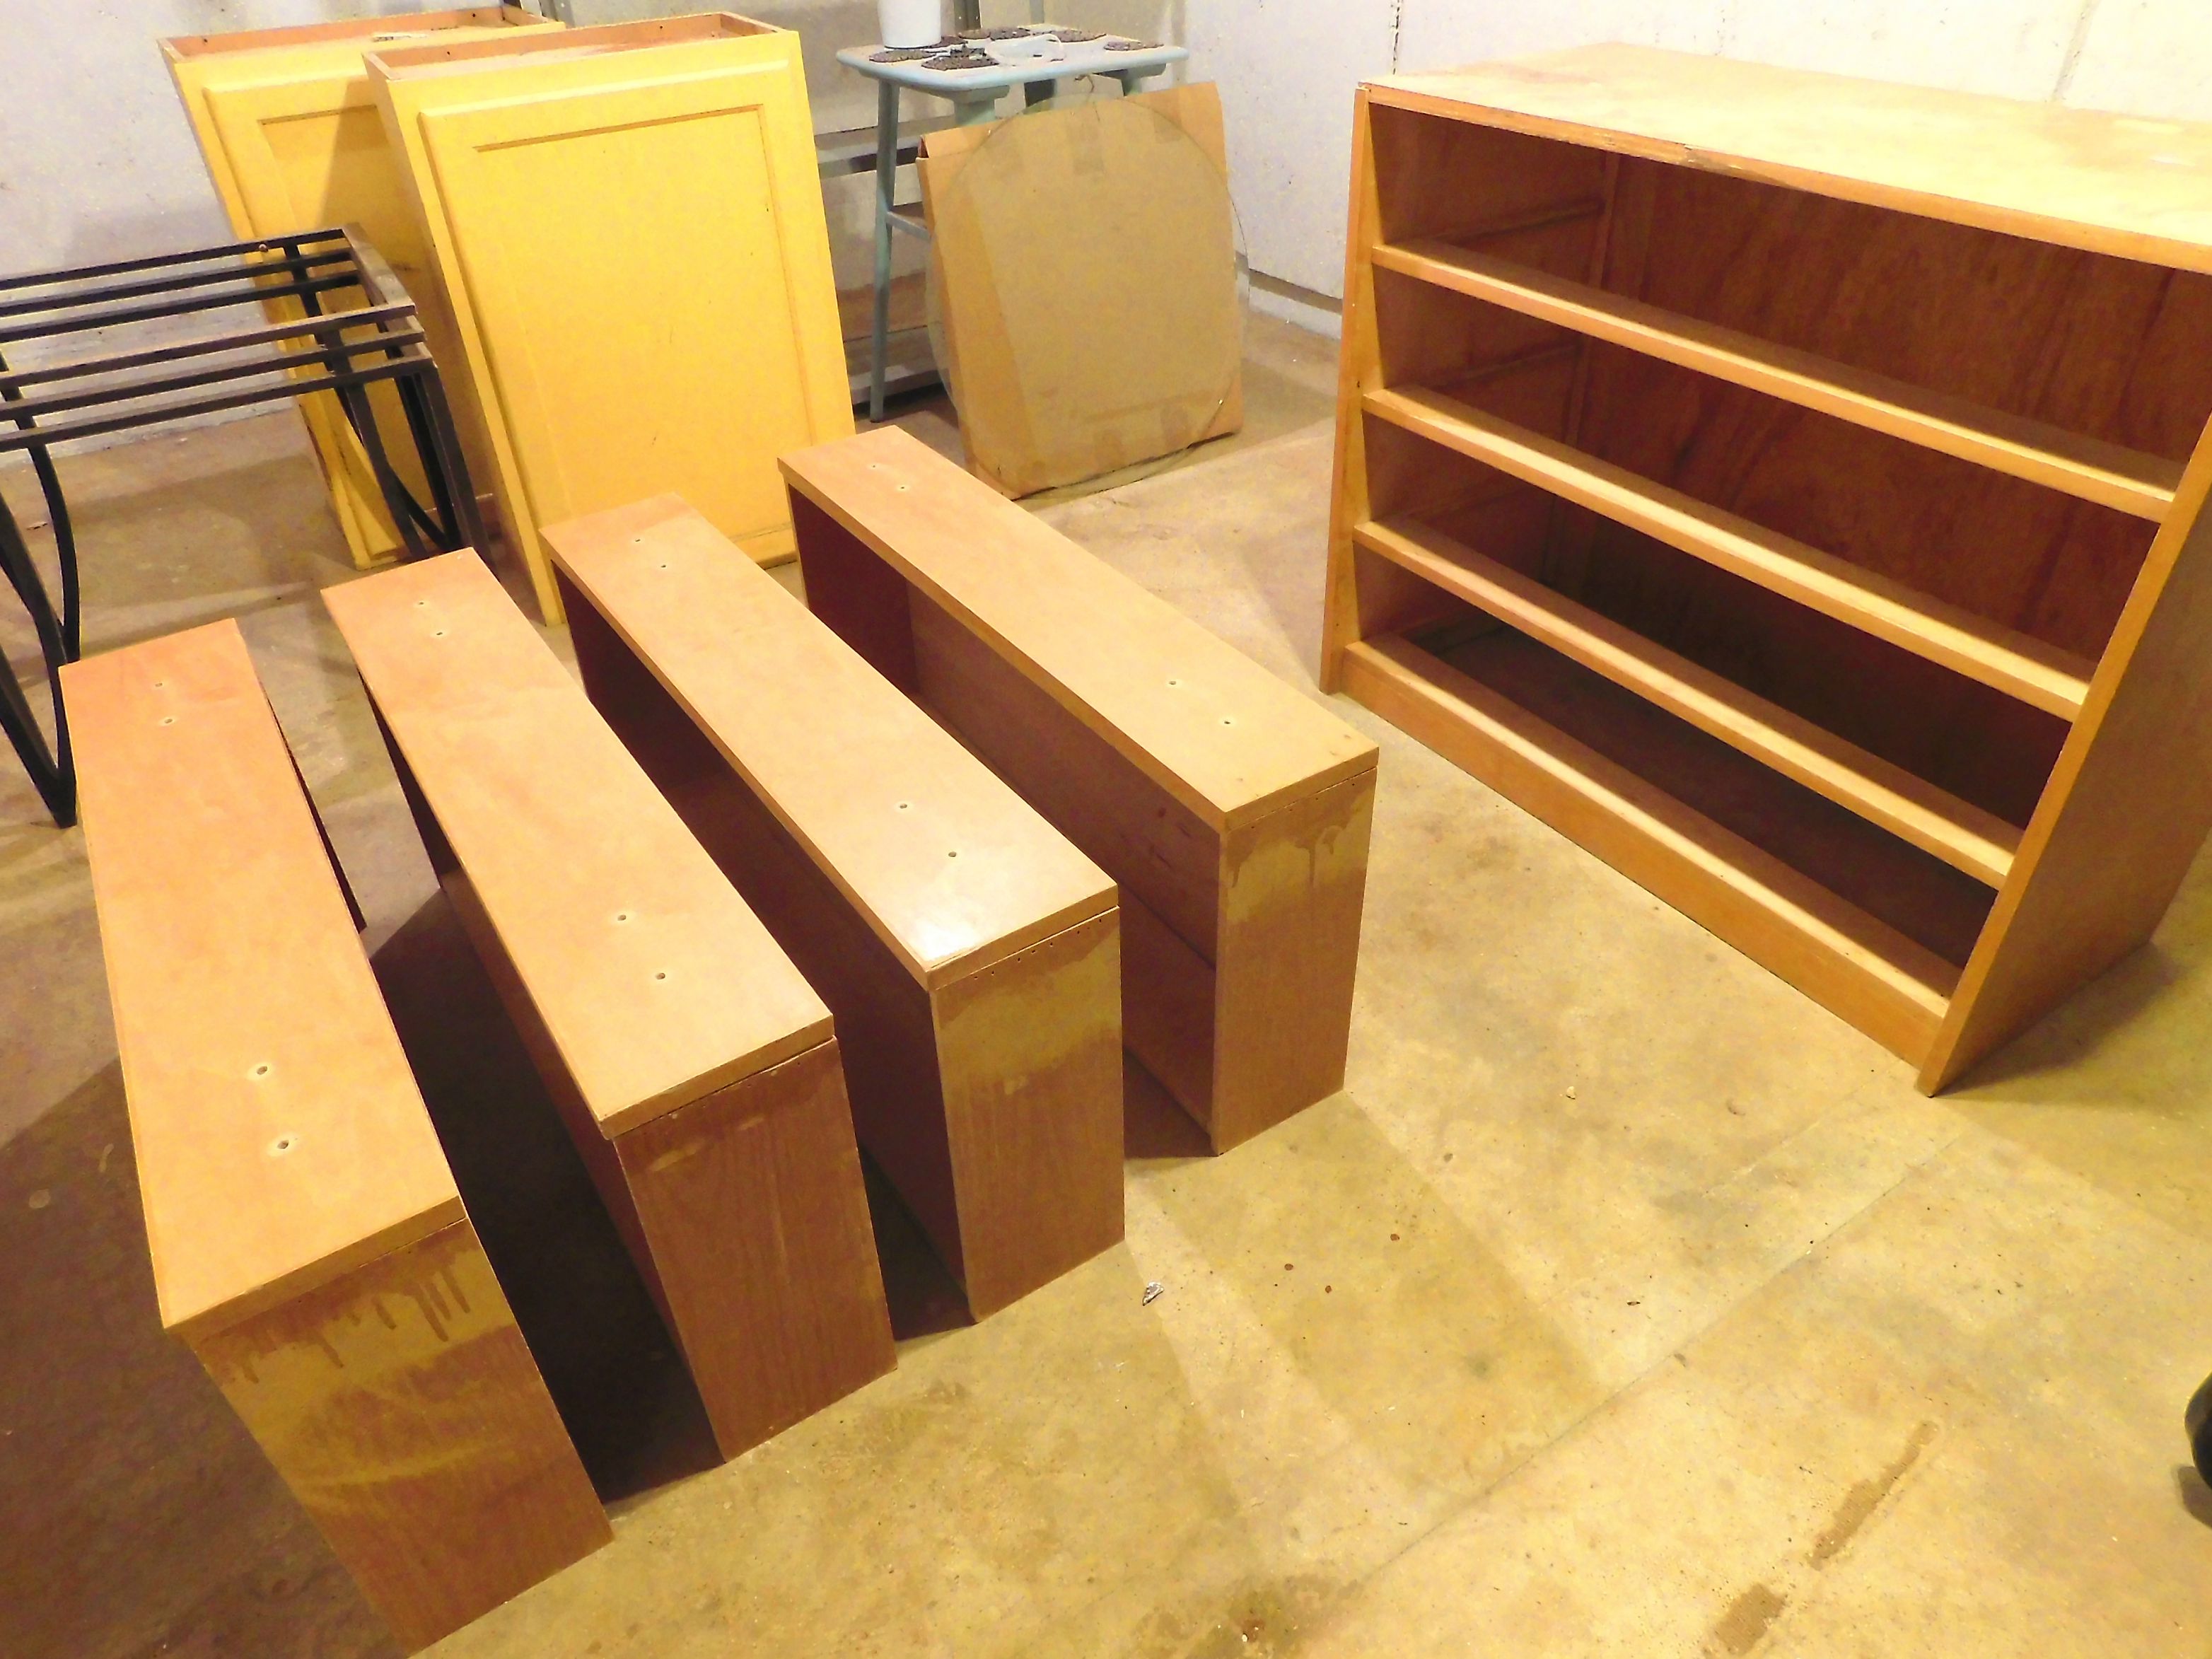
Hey everyone! I am really excited to bring you this DIY project: a painted dresser for my basement art studio! I am currently working to pull together different pieces of furniture (mostly stored in my basement) and making them nicer for my in-progress studio. These pieces are mostly left over from old roommates and a lot of them were originally from thrift stores.
I could go on, but basically what I am trying to impress upon you is that these are not nice pieces of furniture 😛
Beautiful, am I right?! 🙂
One of the reasons I picked this dresser is that I am trying to get my studio set up and need more storage. But probably the main reason I picked this for my first project learning to paint furniture is that it’s a pretty simple dresser. No carvings, straight lines, etc. It’s a good piece to learn on!
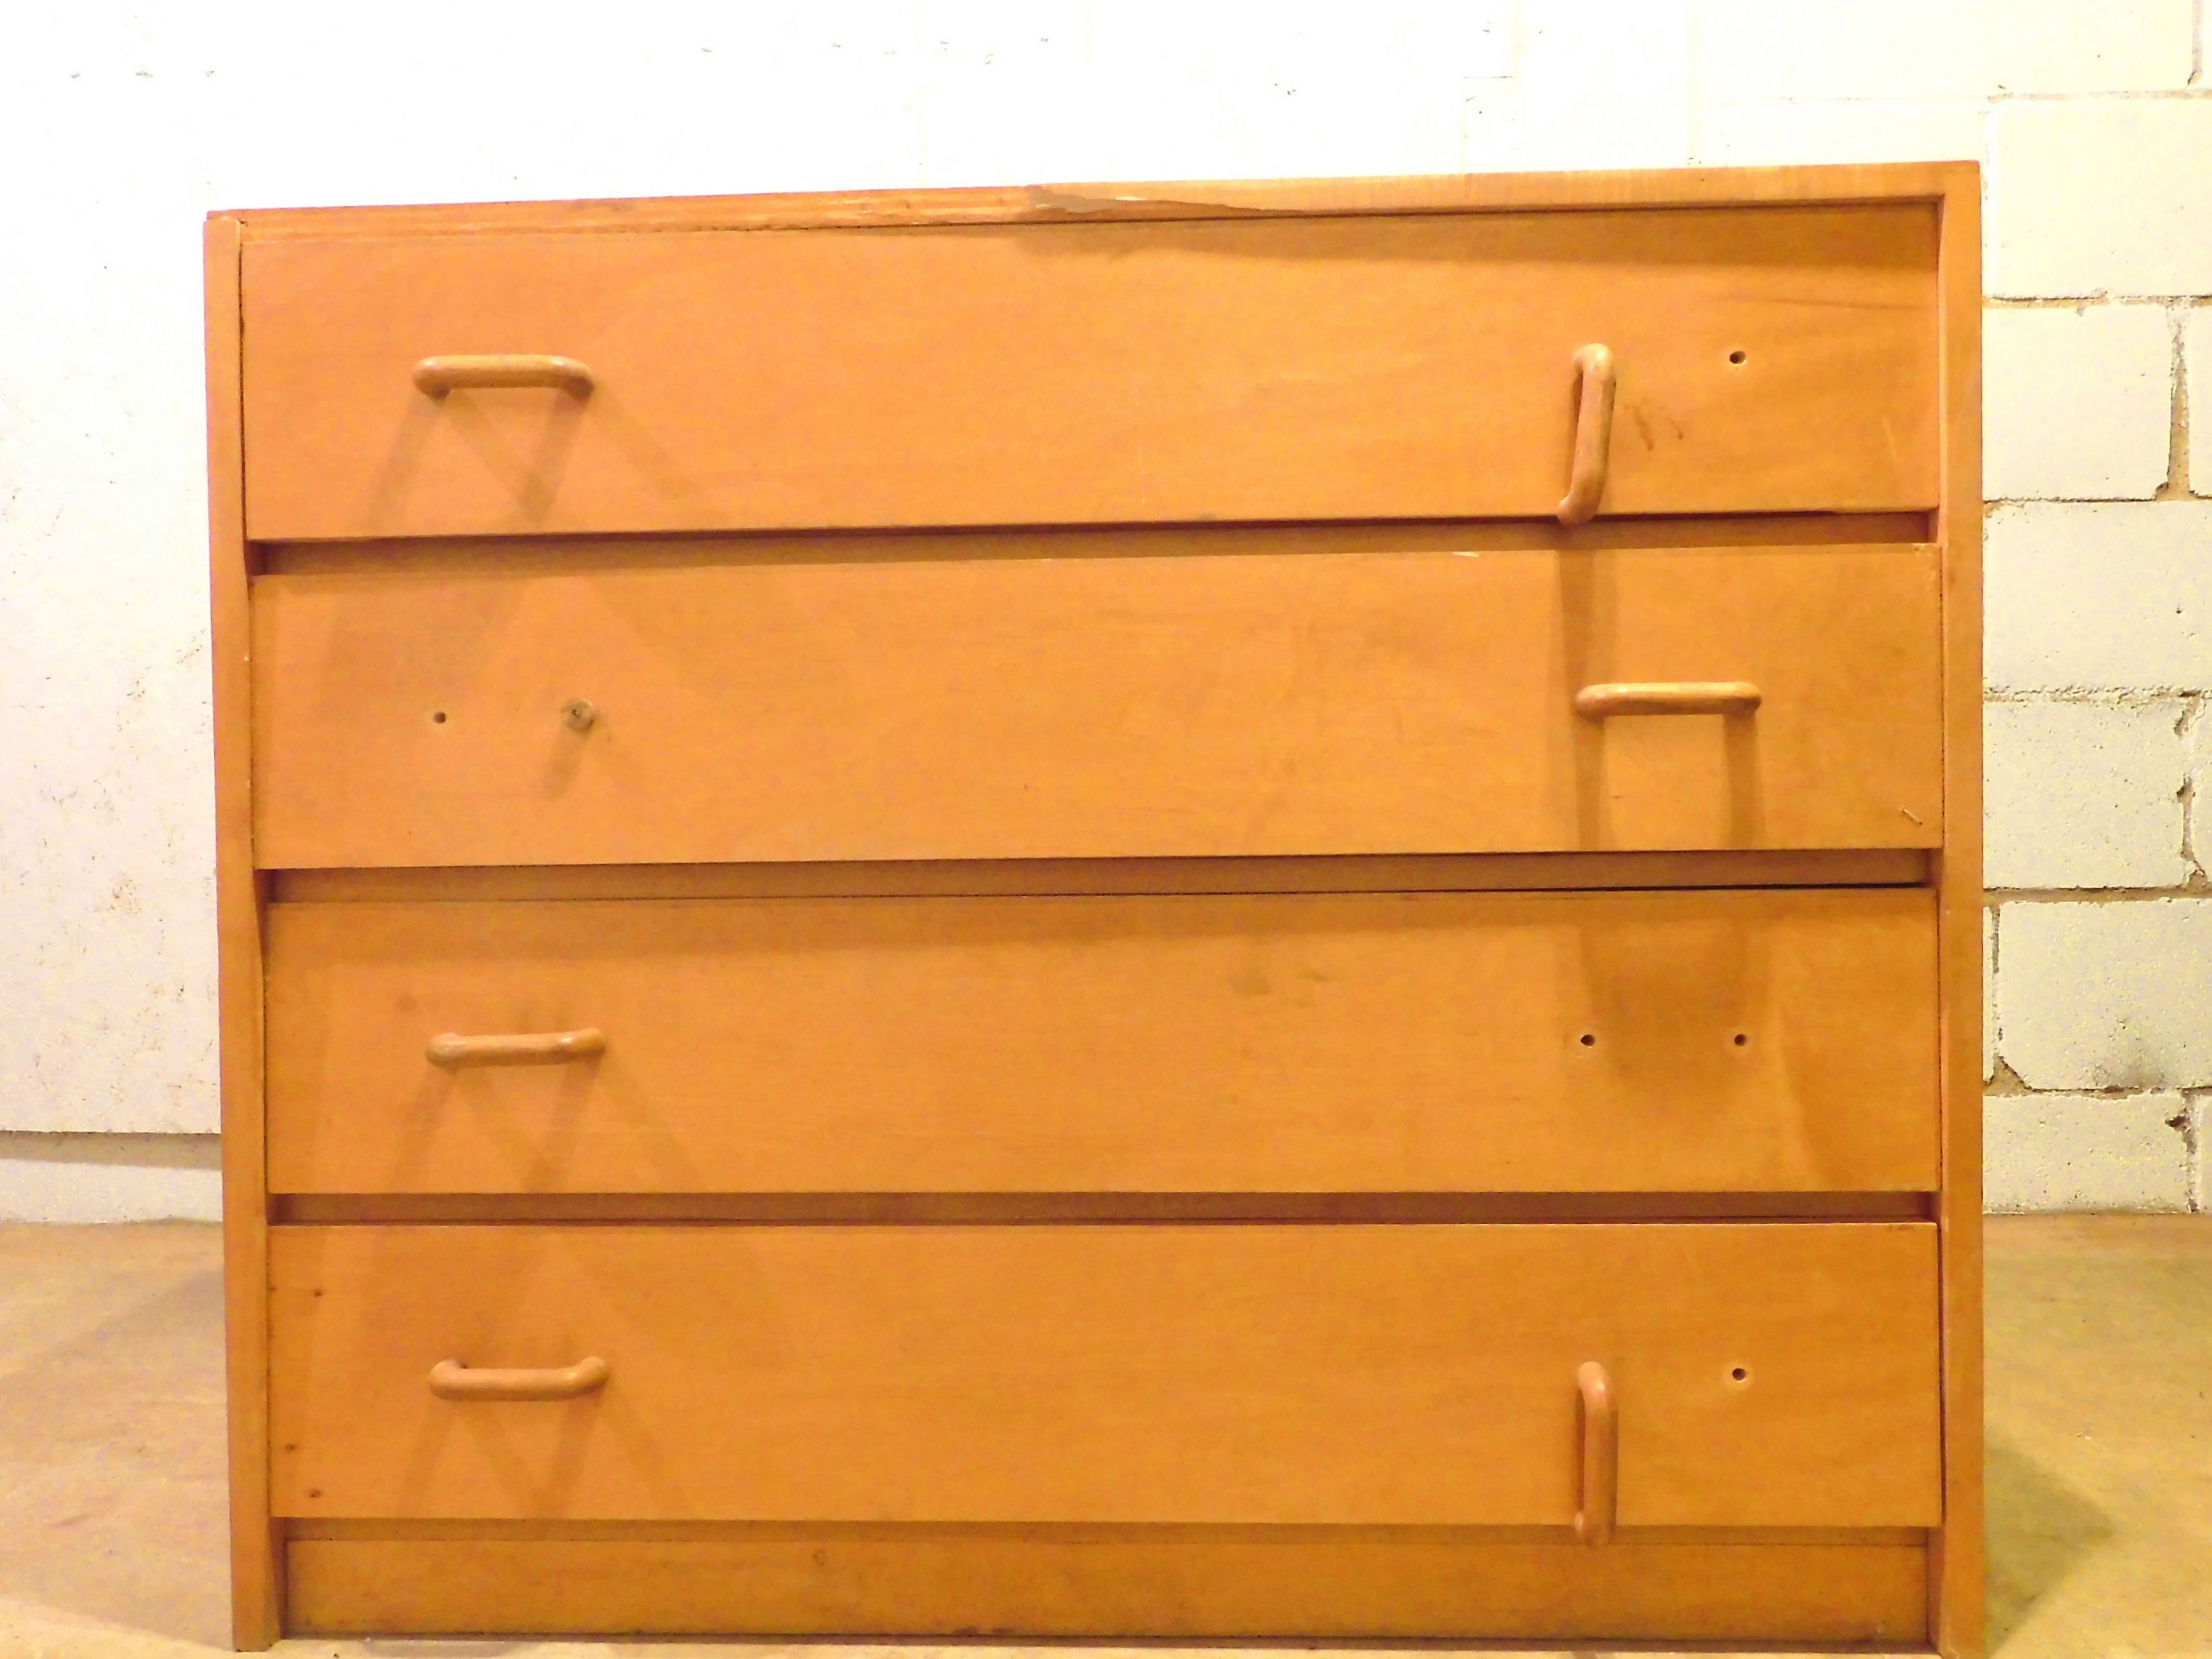
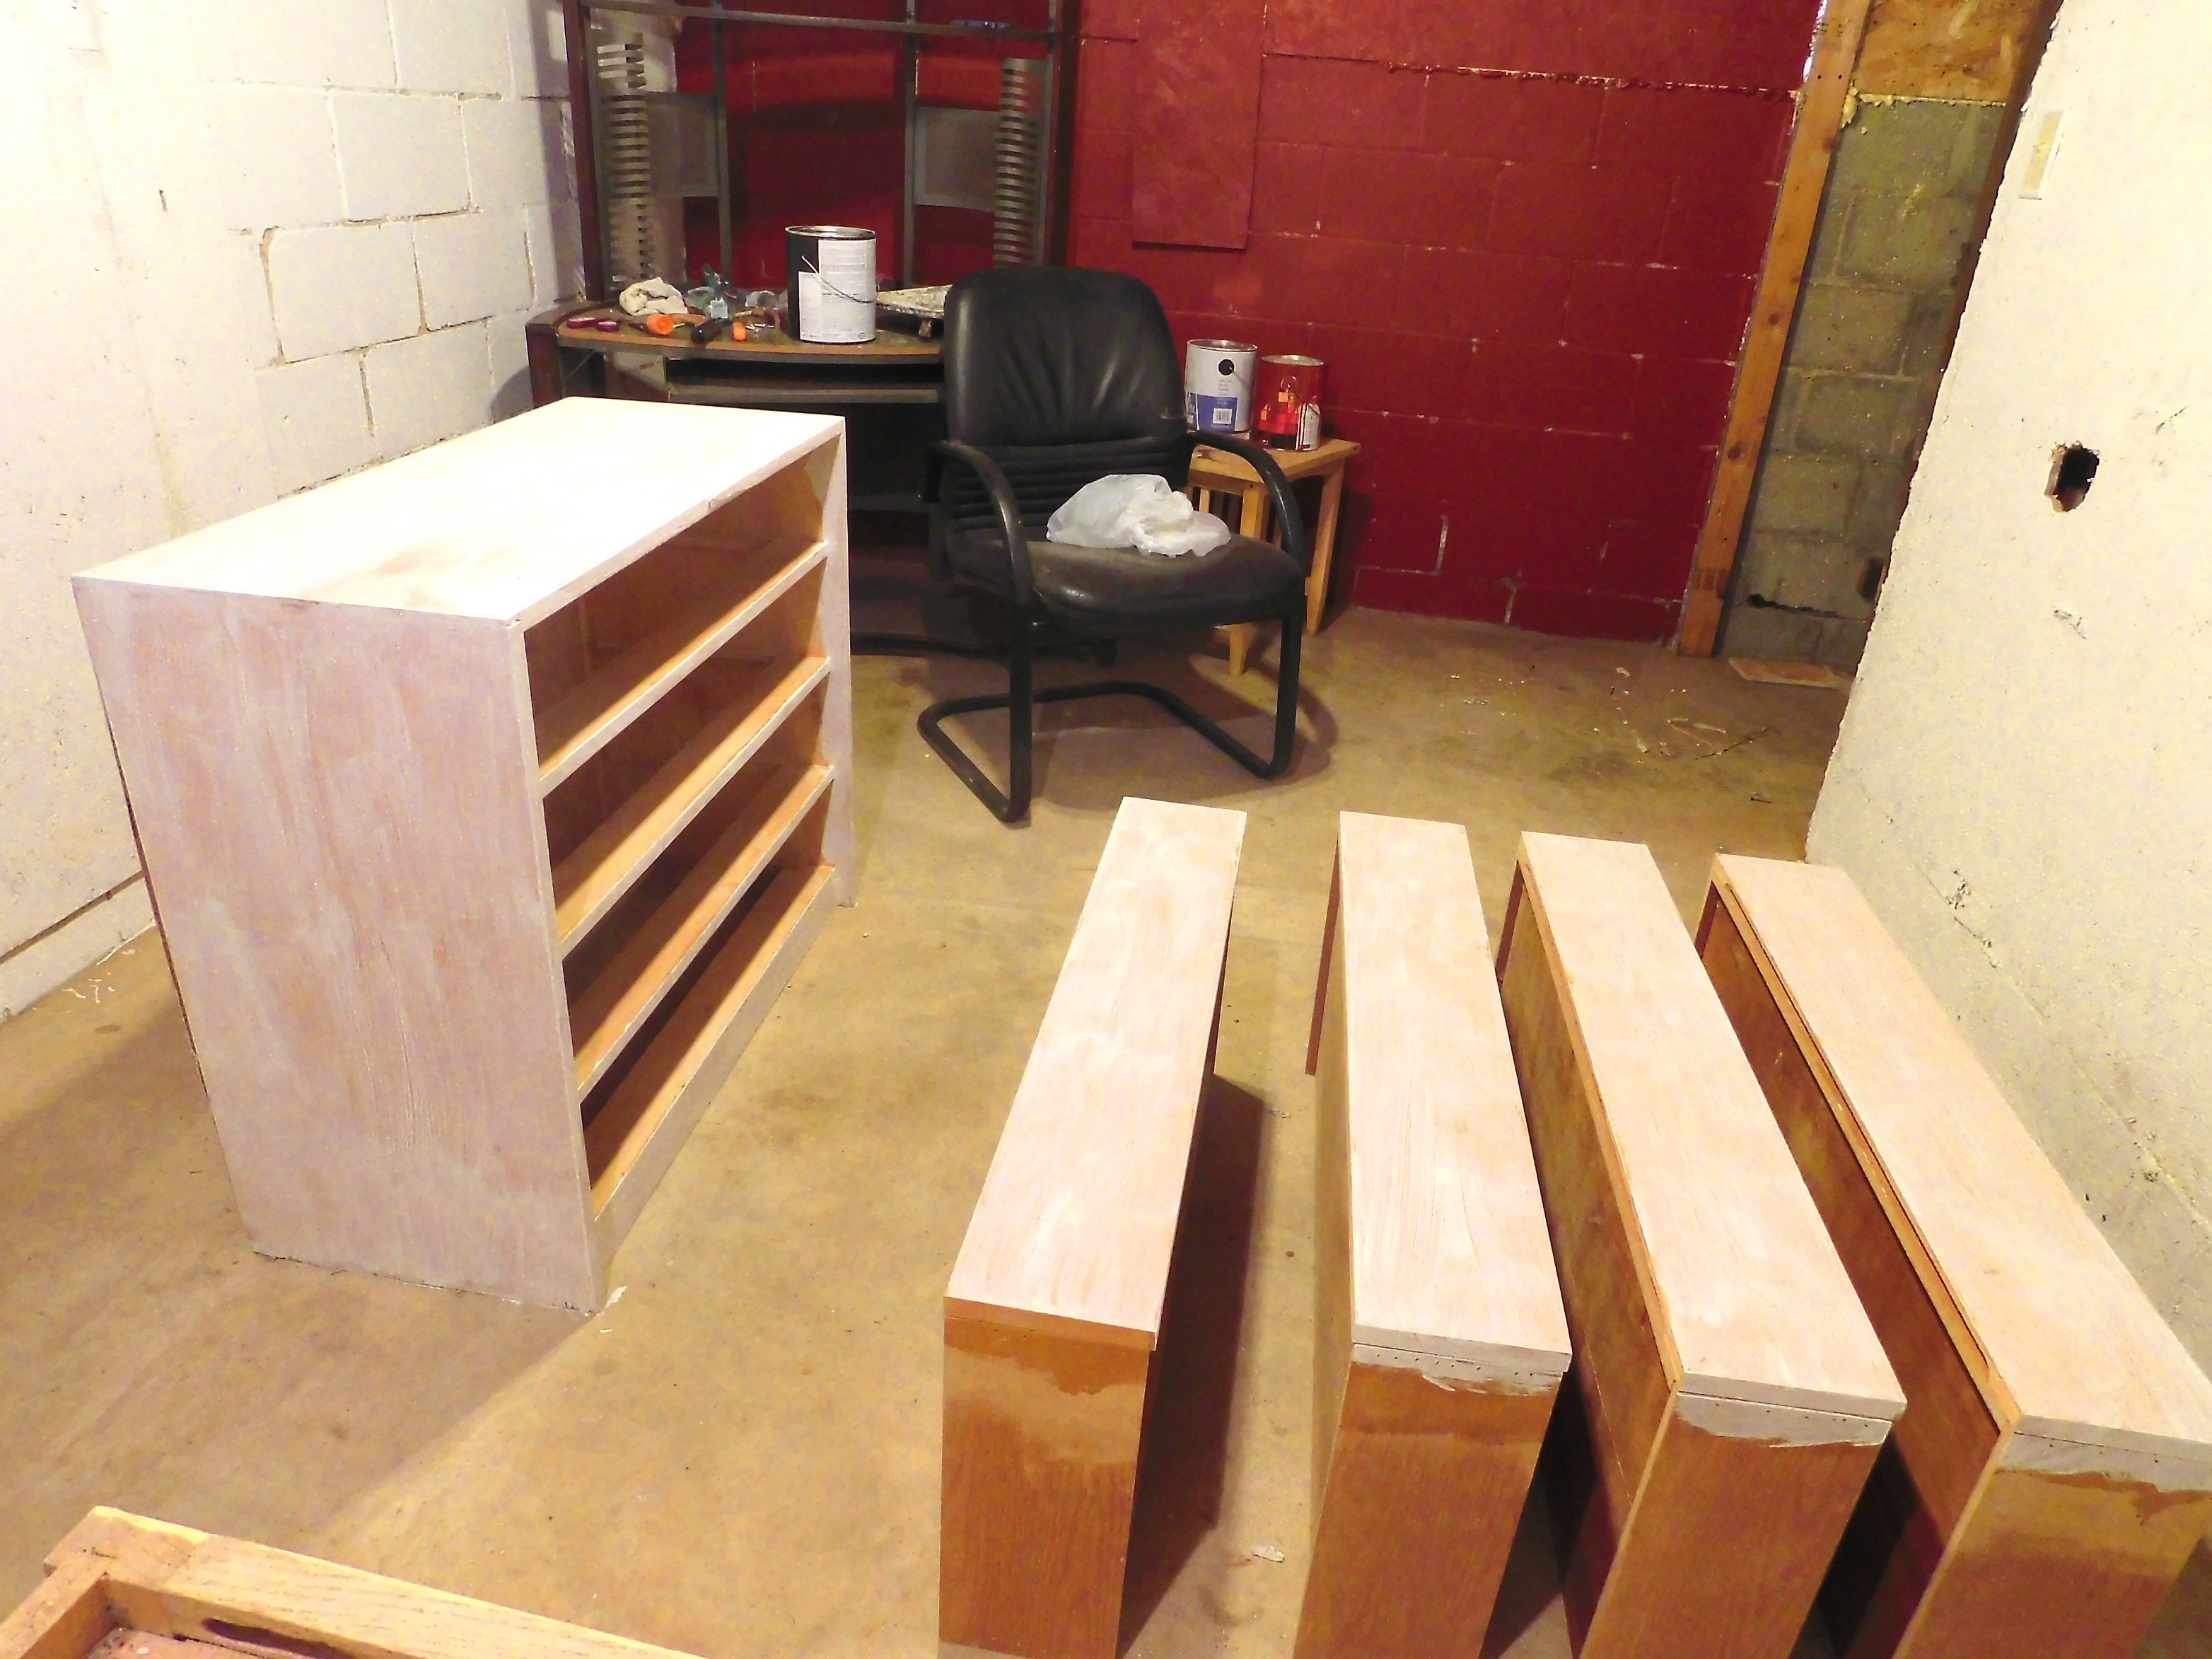
I started out by taking out the drawers and removing the handles. (What of the handles were left to be removed) As you can see, I have plenty of projects to work on after these are done too!
I sanded down all of the surfaces I planned on painting, then moved on to filling in the original handle holes with wood filler.
Once the wood filler was set, I sanded the filled areas down, wiped down the dresser with a clean cloth and then painted it with primer.
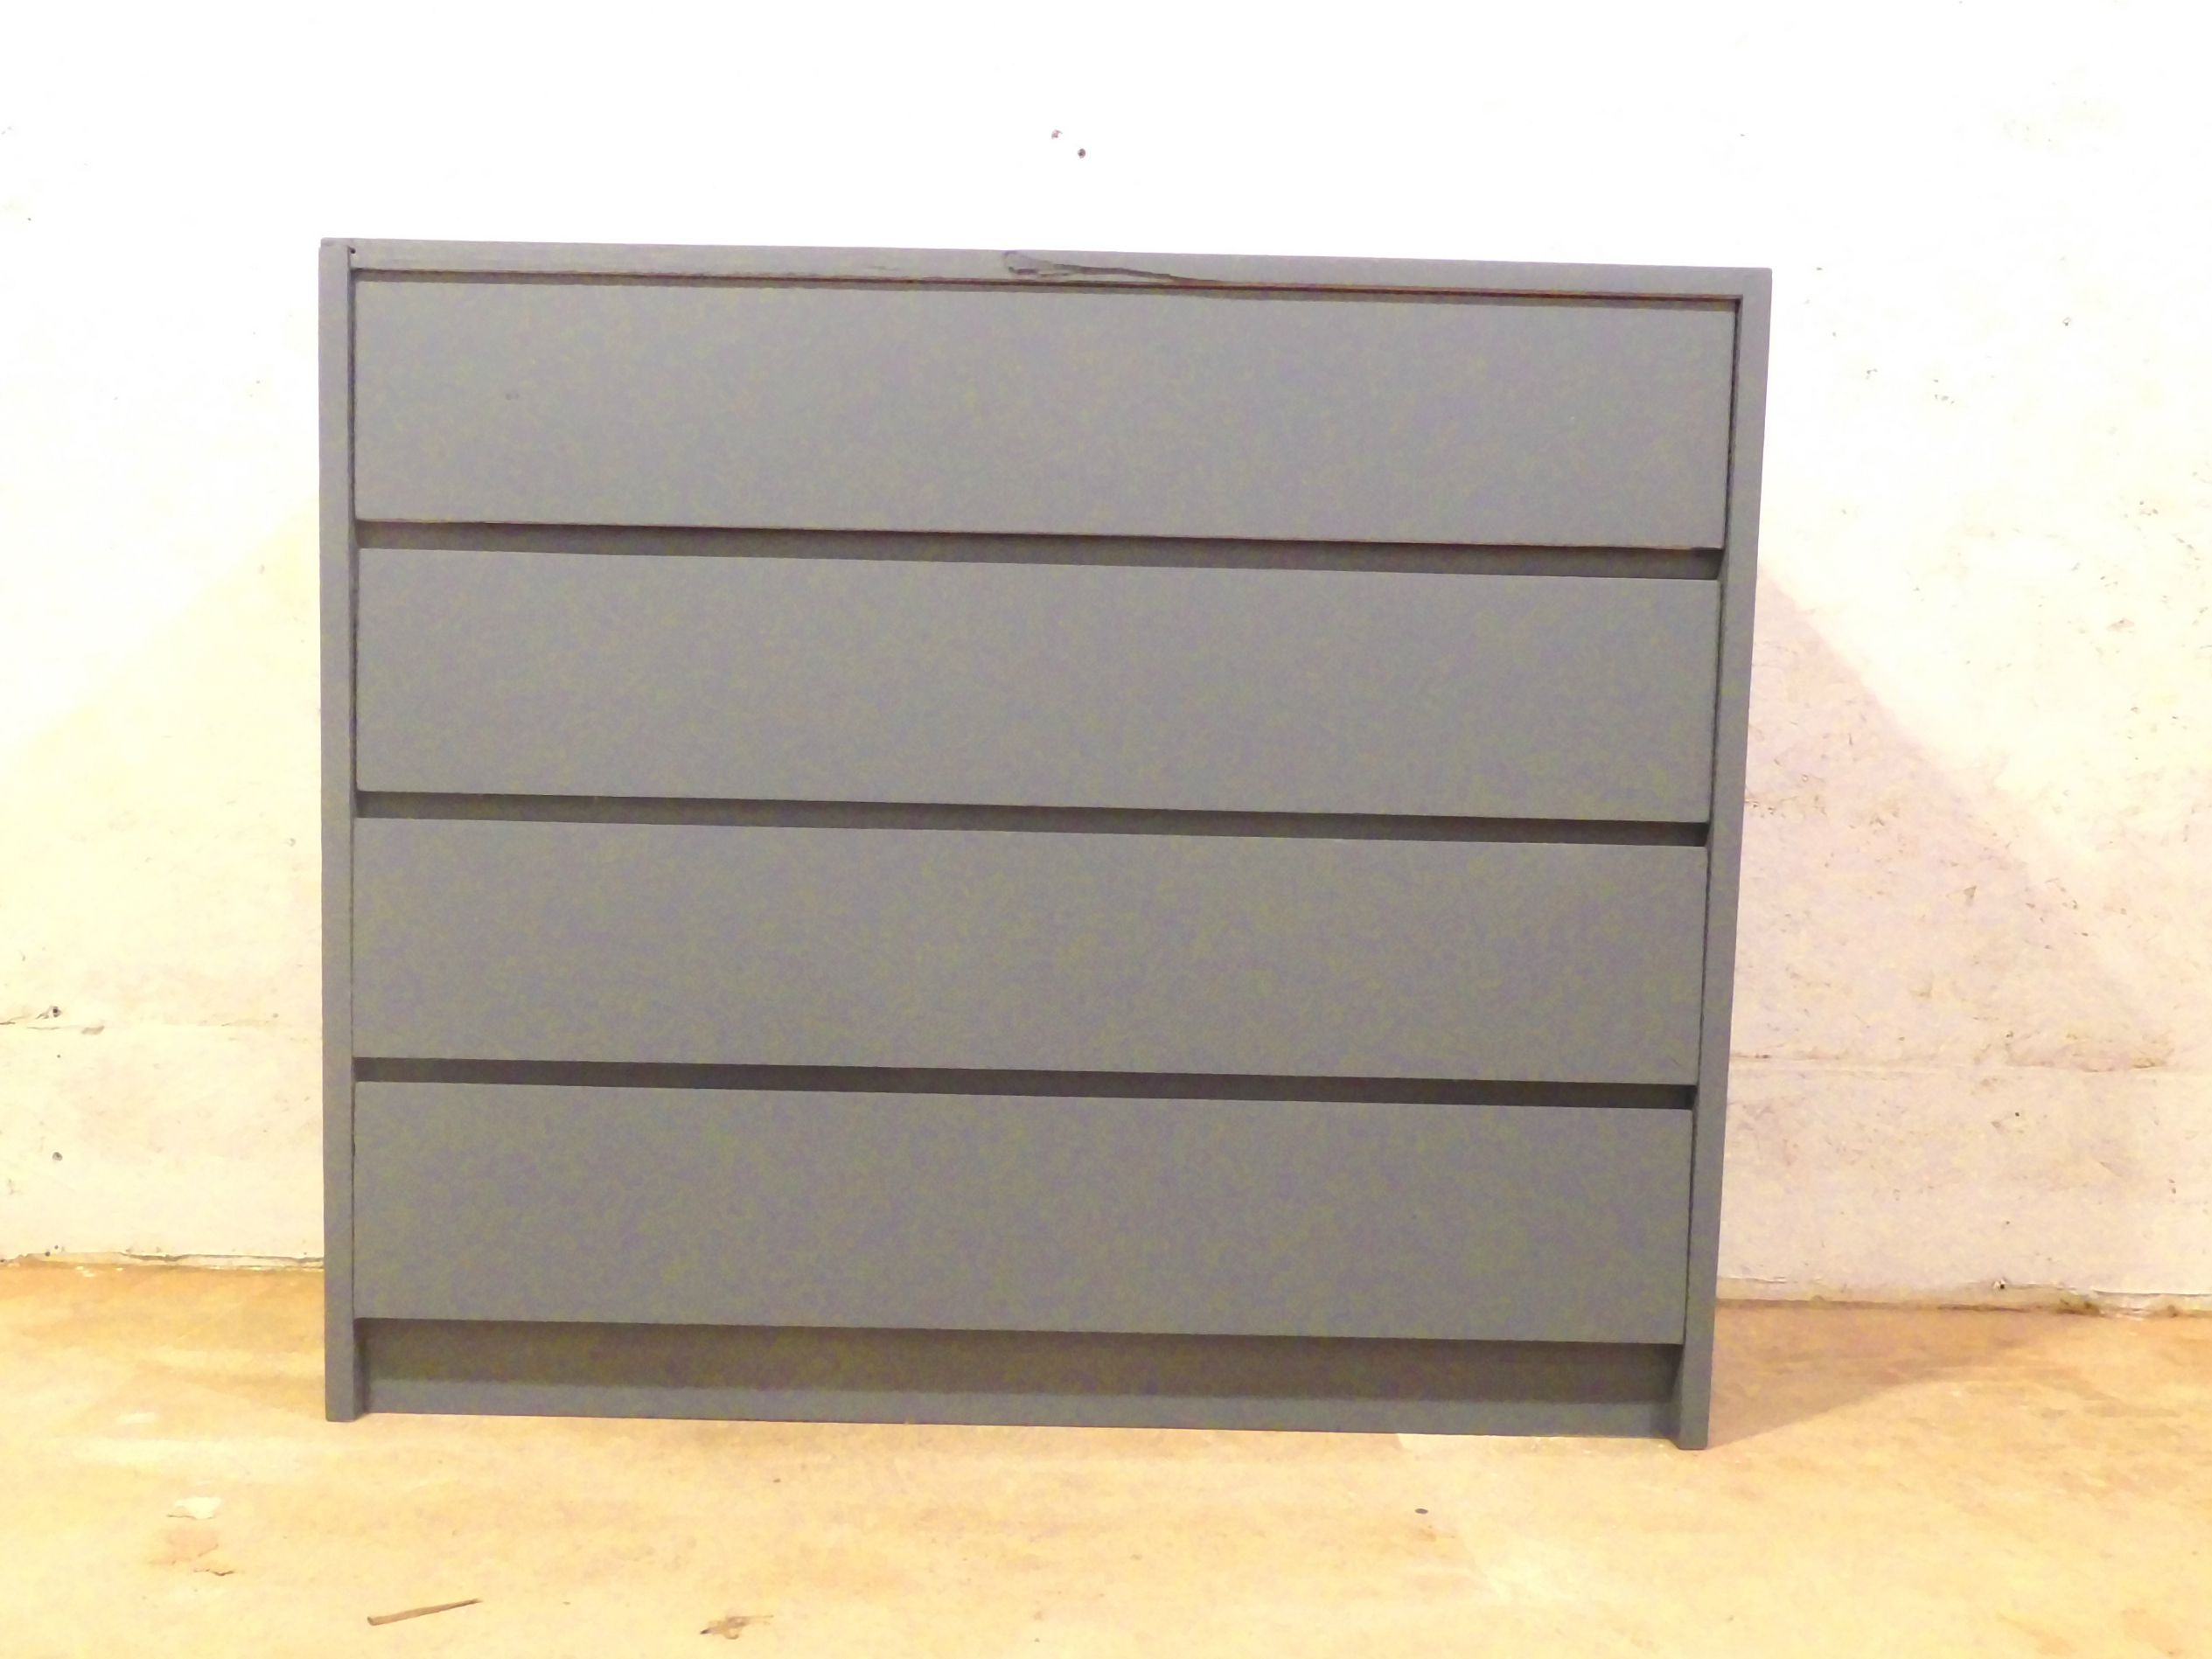
The day after the primer was painted, I painted the dresser a deep grey. I ended up putting on two layers, using a fine paint roller, with a paintbrush for the few tricky spots.
While it still needs hardware, it ended up looking pretty nice! Not bad for my first project trying to paint furniture! It’s pretty plain, so I’m trying to find some colorful, fun hardware to install. Maybe a trip to Hobby Lobby is in order? 🙂
Do you have any projects you are thinking about trying that are new for you? Have you ever painted furniture? I still have a lot to learn about this and would love to hear some tips and tricks!
Family traditions can come from just about anything, and in this case it started over 10 years ago at a (different) paint-your-own pottery studio in Des Moines, Iowa. One of my cousins was getting married and the women on my mom’s side of the family decided that we would go have a pottery painting party as a different style of “bachelorette” party. Except instead of painting for ourselves, we painted things for the happy couple! It was so much fun! And when the next cousin was getting married, we decided to do it again. Voila, a family tradition was born!
Hey all! I’ve got a quick and easy DIY spring decor project that I think you are going to love! I know I do!
Decorating for the seasons is something I only just started really doing in the last year or so. It’s something I always wanted to do more of….it just has a way of making a house feel more homey to me. Growing up, my mom would always pull out the seasonal decor as soon as she possibly could when the season started changing. Each room throughout the house would get at least a few touches and the house always was warm, inviting and beautiful. I never really thought much about how the decor played a part in that until I moved out, but she put so much effort into making our house into a lovely home. Now she is my inspiration in many ways, and was the motivation for me creating this wreath! Continue reading “DIY Spring Wreath”→