
Hey all! I’ve got a quick and easy DIY spring decor project that I think you are going to love! I know I do!
Decorating for the seasons is something I only just started really doing in the last year or so. It’s something I always wanted to do more of….it just has a way of making a house feel more homey to me. Growing up, my mom would always pull out the seasonal decor as soon as she possibly could when the season started changing. Each room throughout the house would get at least a few touches and the house always was warm, inviting and beautiful. I never really thought much about how the decor played a part in that until I moved out, but she put so much effort into making our house into a lovely home. Now she is my inspiration in many ways, and was the motivation for me creating this wreath!
DIY Spring Wreath
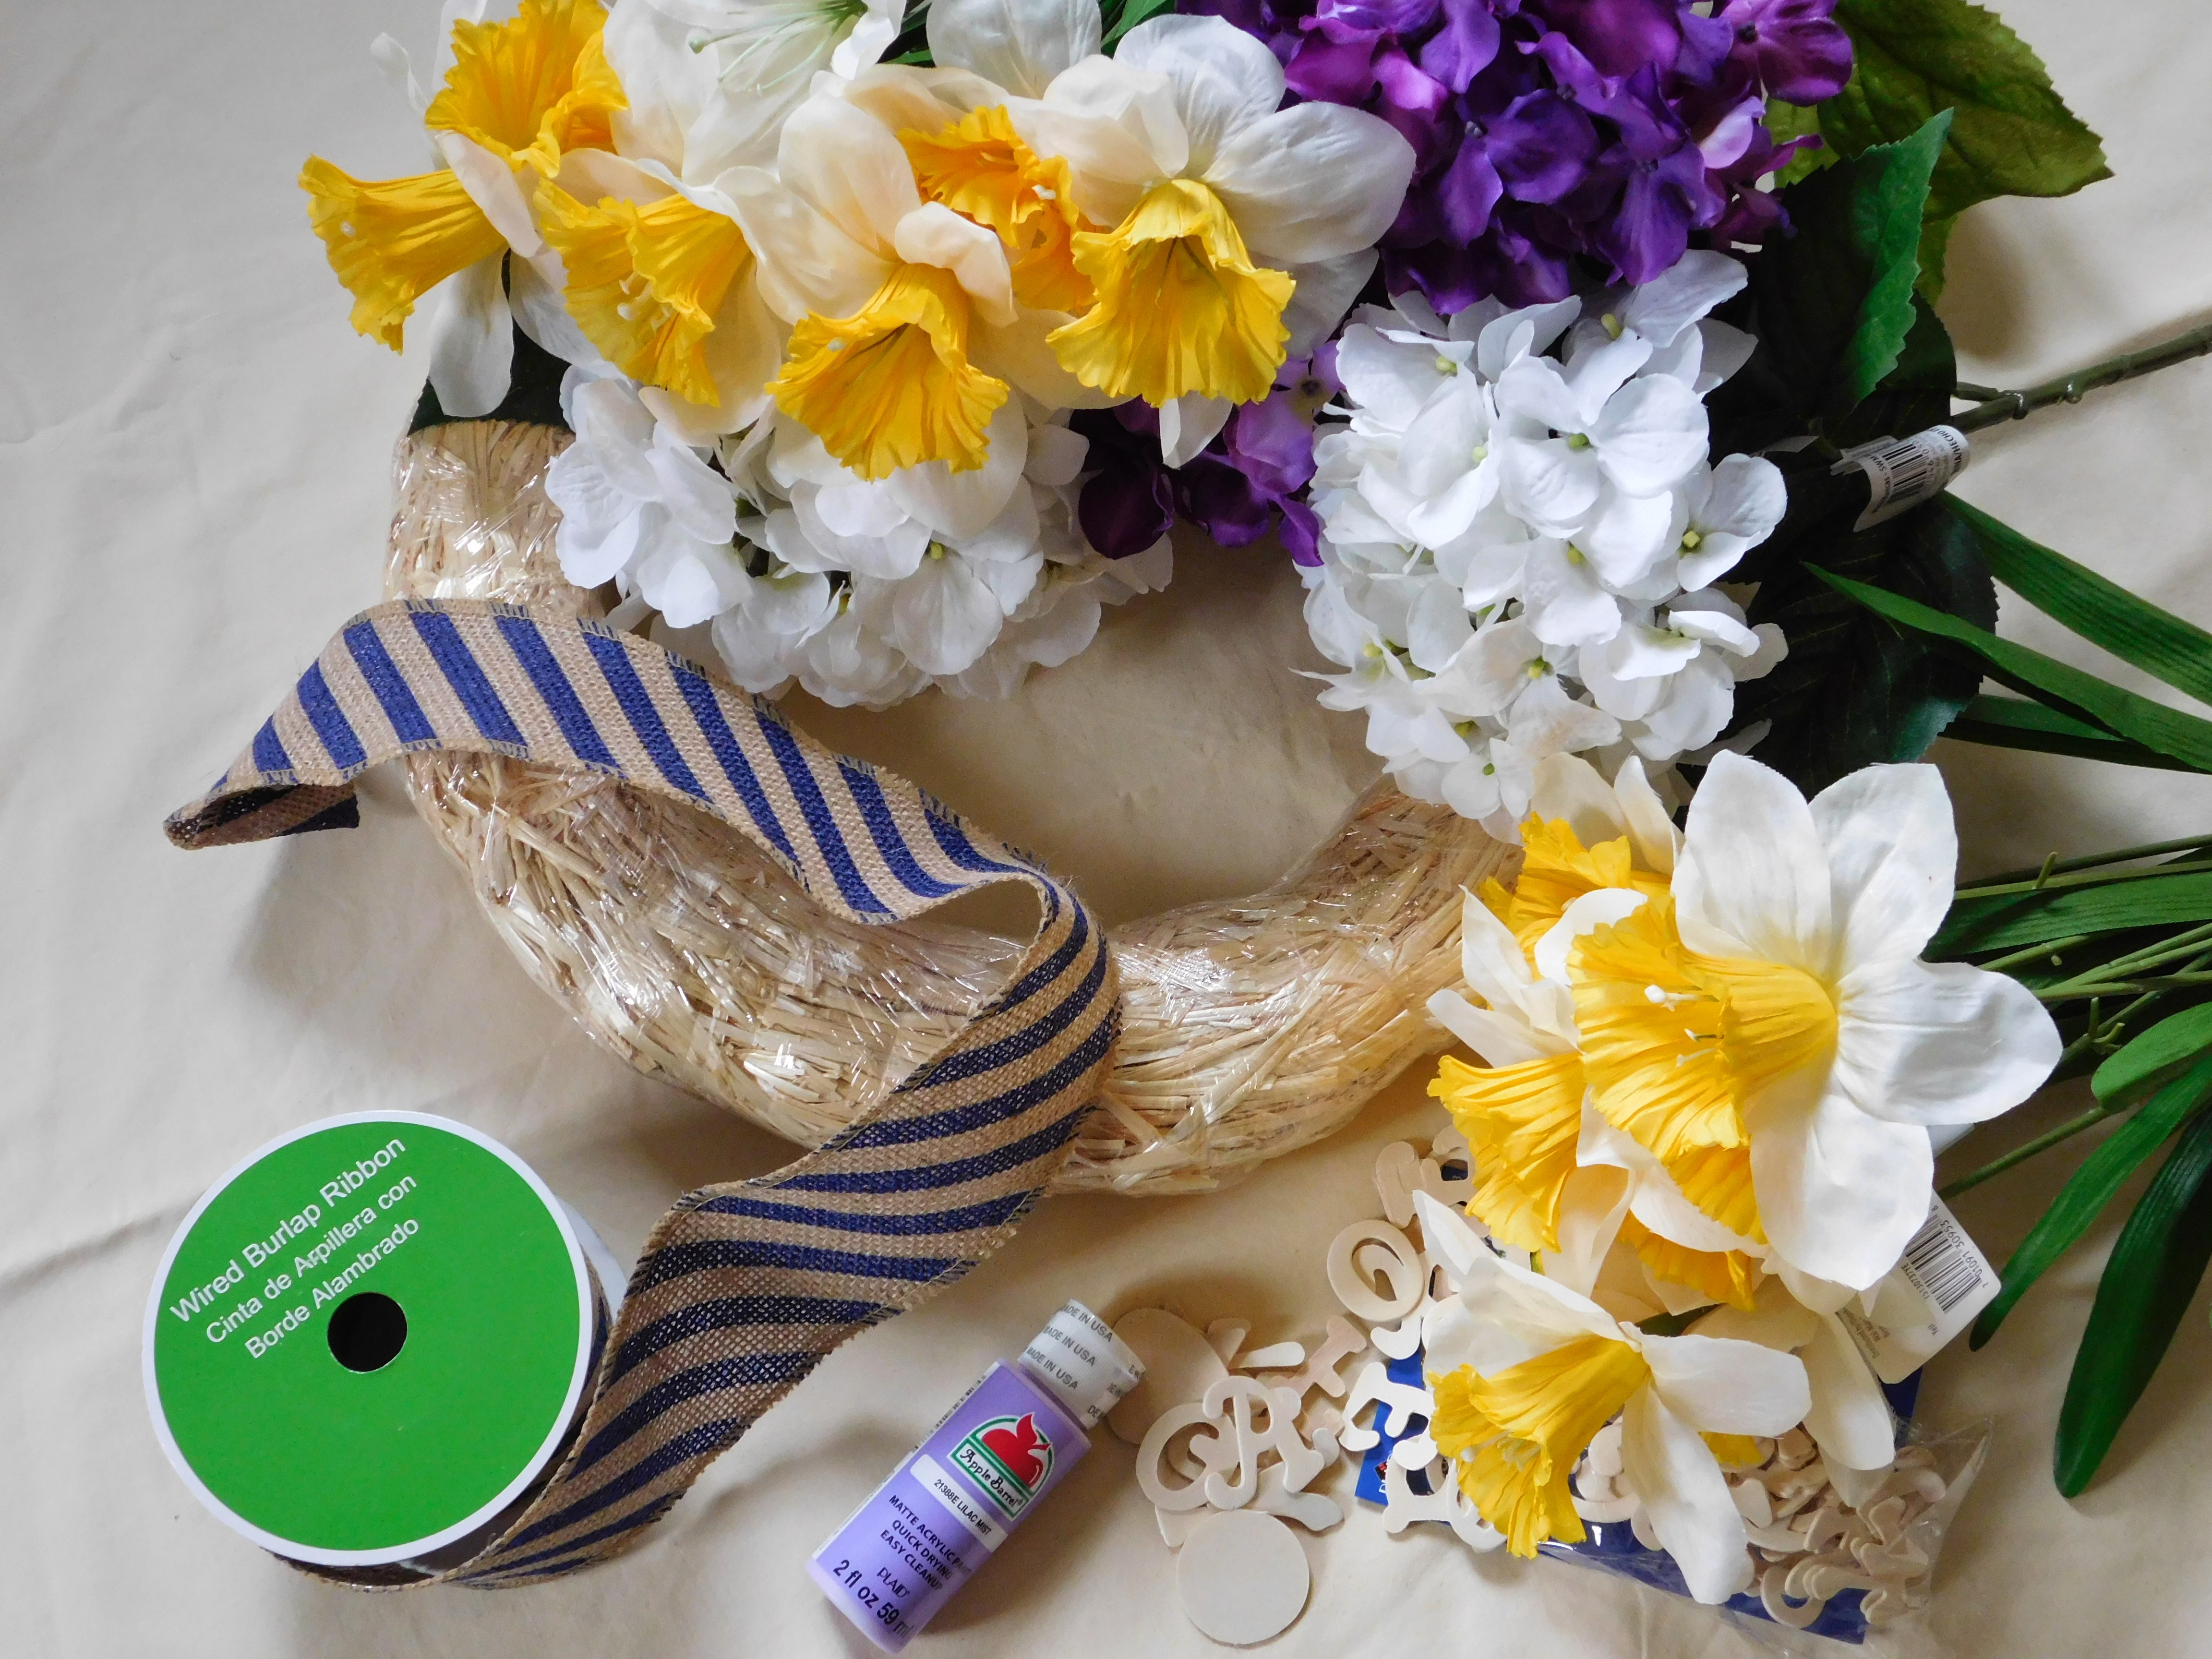
Materials:
Cost:
- Straw Wreath: I already had one, but I’m pretty sure it was around $3
- Fake Flowers: $11
- Burlap Wrap, 2 rolls: $6.94
- Wood Letters: $2.97
- Paint: $0.50
Total Project Cost: $24.41
Other Materials Needed: hot glue gun, small paintbrush, twine or some other material to hang wreath with
Creation:
Before starting the wreath itself, I painted the letters needed for “spring” so that they would be dry by the time I needed them.
Glue down the end of your burlap roll on to the straw wreath and make sure it is secure. I left my wreath in the plastic. I find it less messy and easier to work with. If you prefer not to use straw, or can’t find one, I am pretty sure a styrofoam wreath would work just as well.
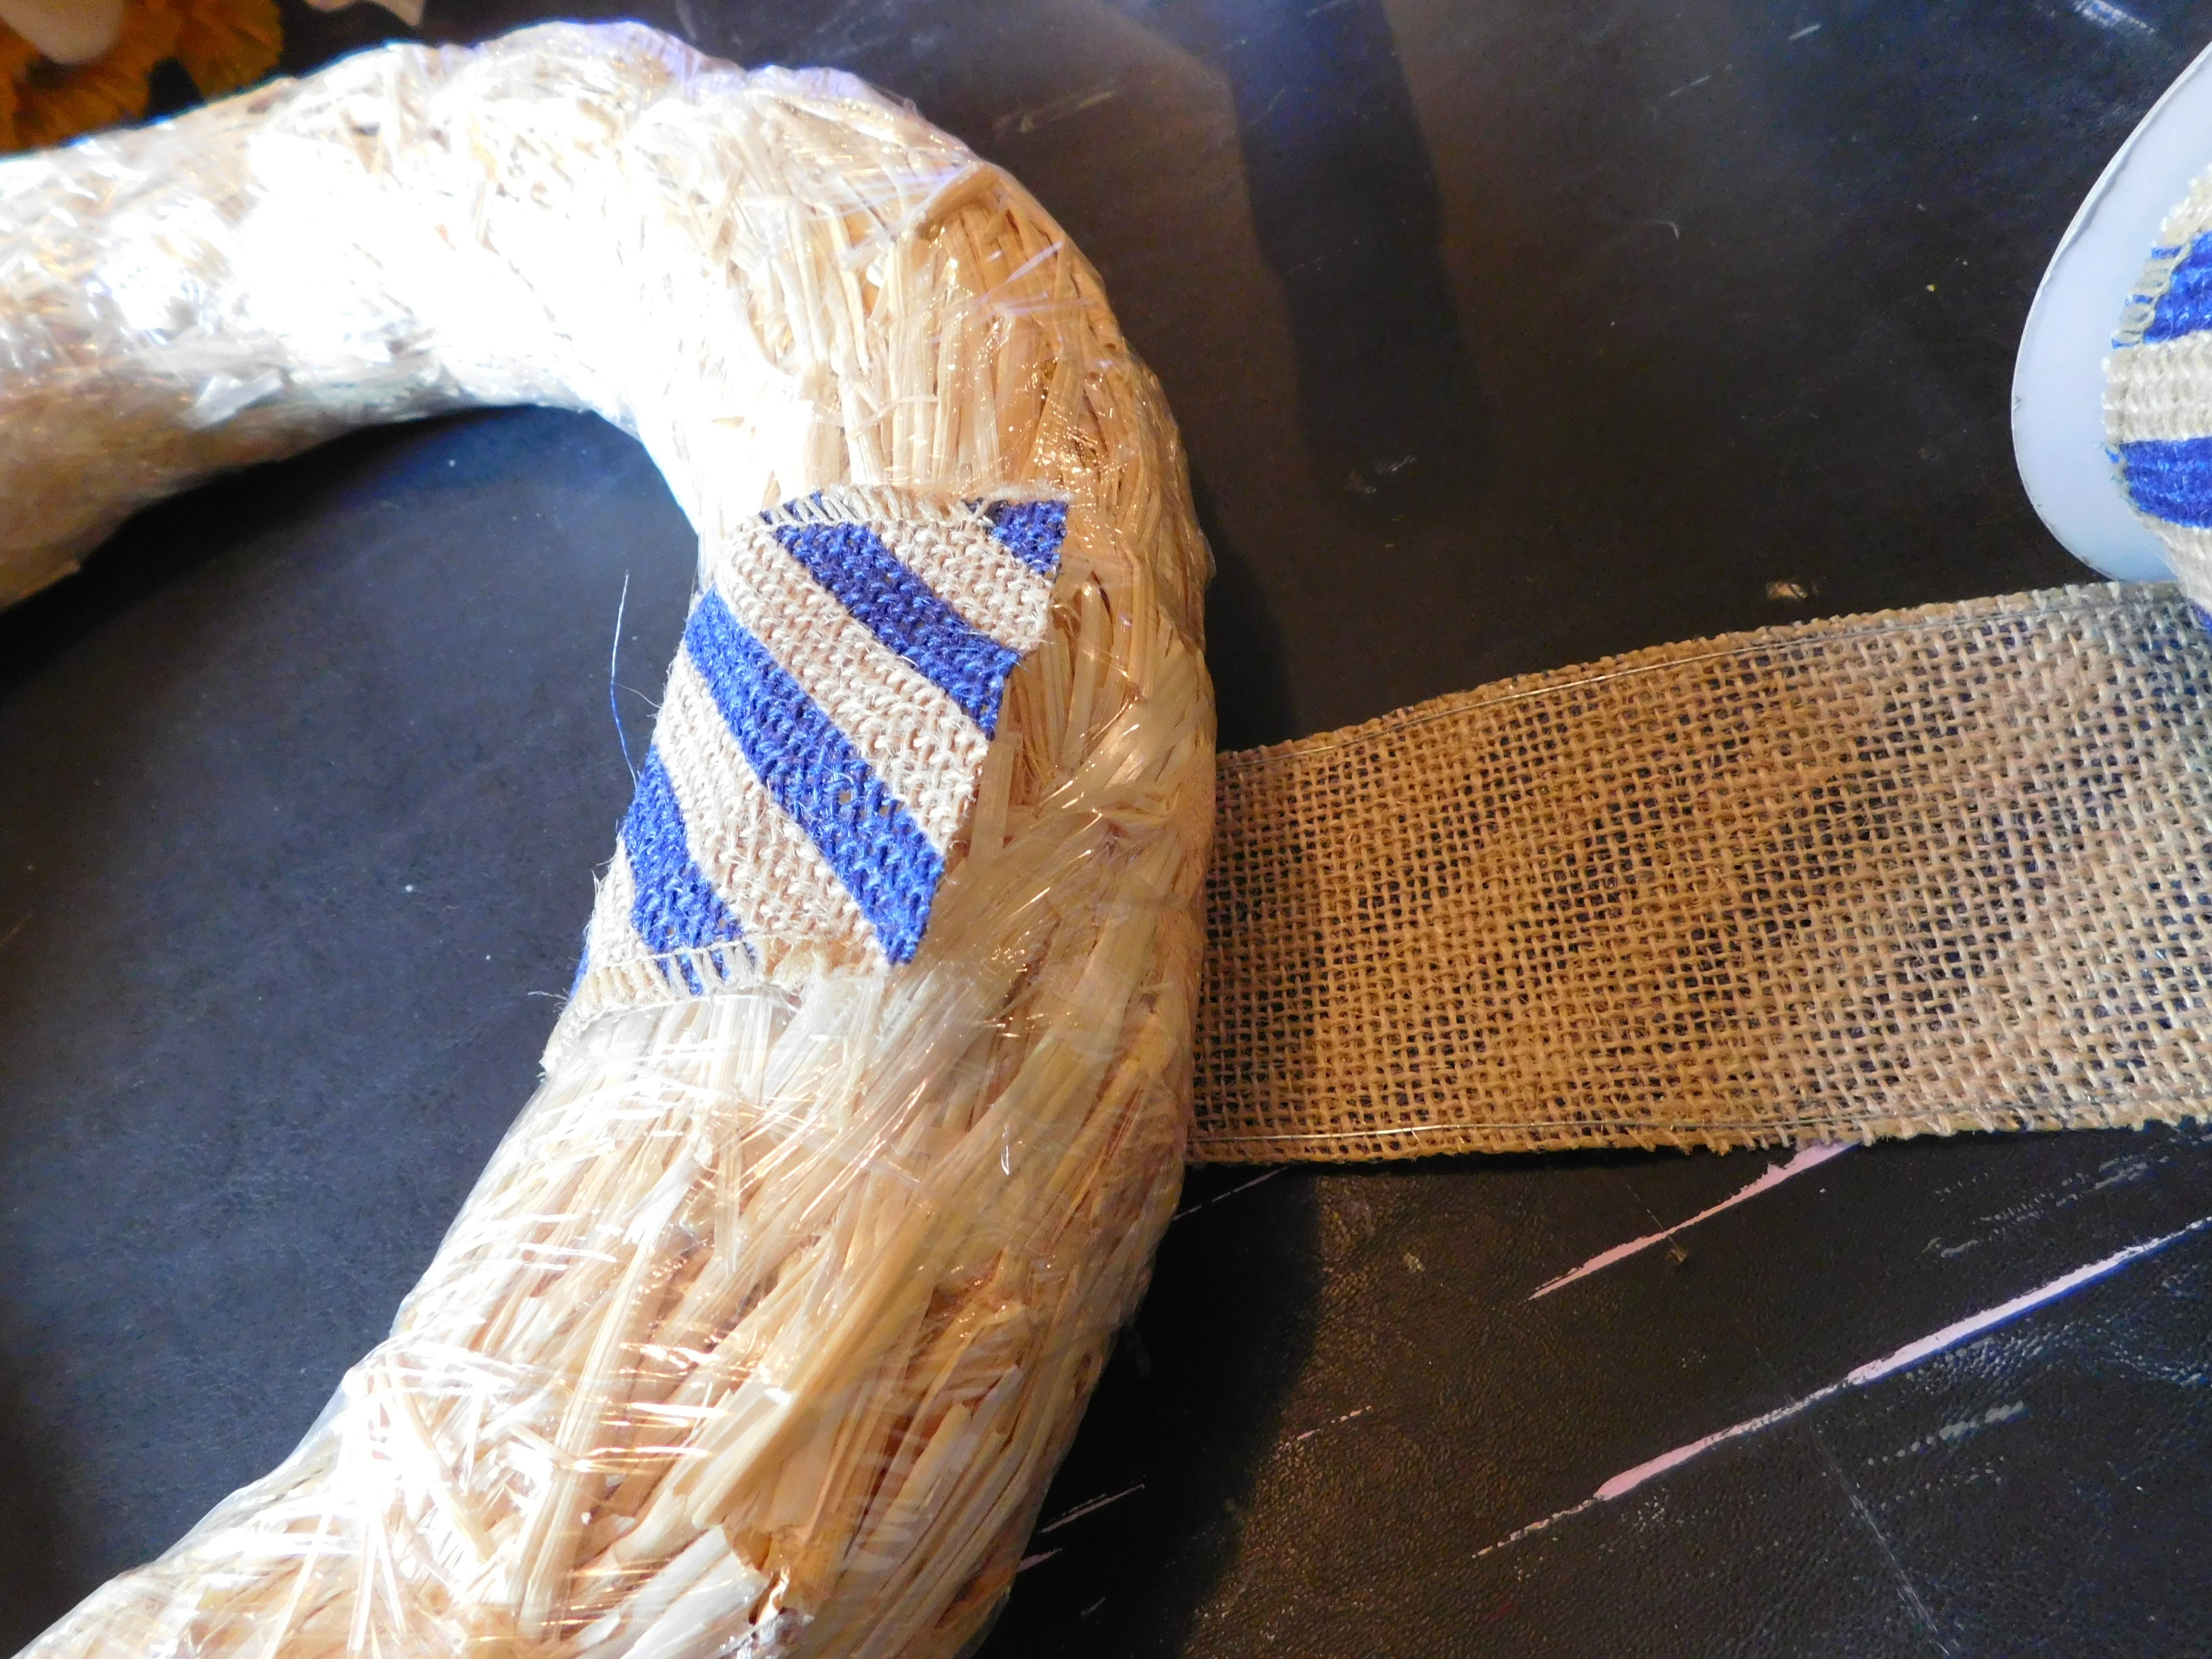
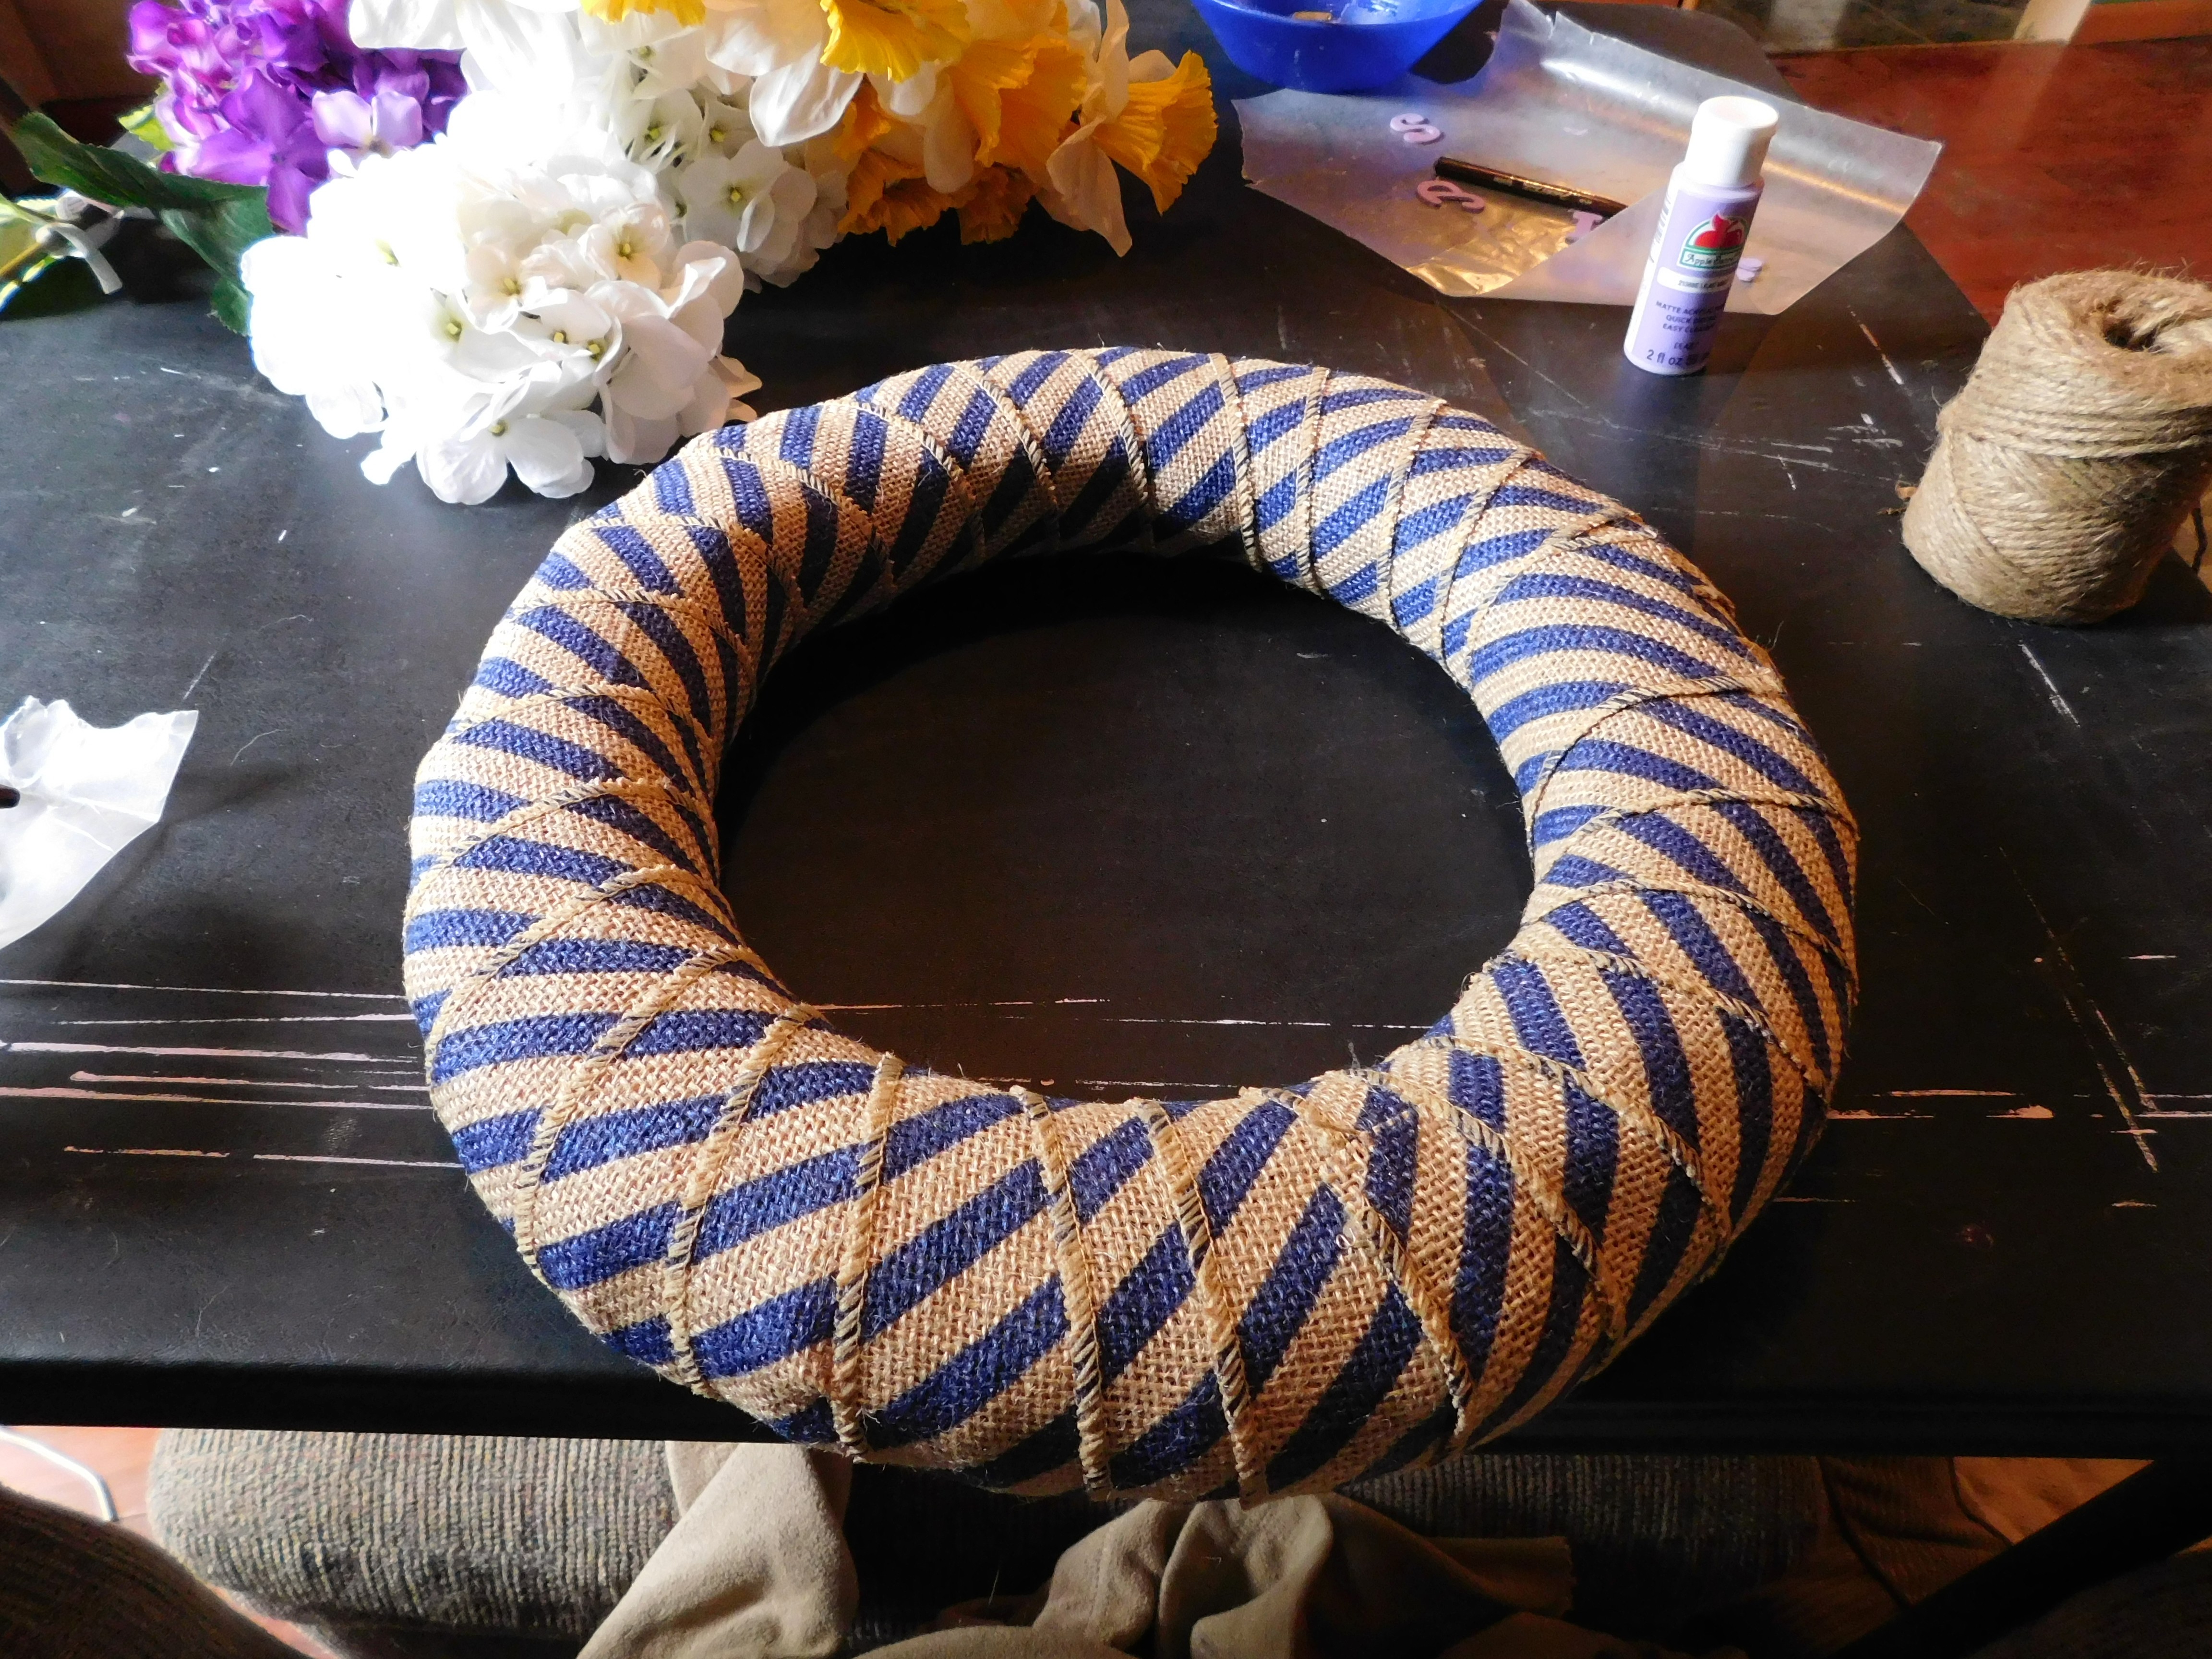
Start wrapping the burlap around the wreath. This can be as narrow or as wide of overlapping wraps as you like. I liked how this one was looking with the wraps more close together and ended up using 1 1/2 rolls of the burlap. I would guess that you could probably make your wraps overlap less and use only one roll. I glued down the burlap every 4-5 wraps or so, just to make sure the burlap doesn’t shift over time.
Now on to the flowers! I arranged mine to be off-center when hanging and asymetrical. Have fun with this! I like to lay mine out before gluing any of them down and playing with the arrangement some. I cut the stems off of the flowers so that only the flower part is left and use the hot glue gun to secure them to the wreath.

The last step in creating this wreath is to glue on the letters. I kept mine pretty simple.

That’s it! Pretty simple, right?! I love how easy this wreath was to make and yet it still makes quite an impact! 🙂 I made this wreath to give to my mom for Mother’s Day and I am thrilled with how much she liked it and how beautiful it looks hanging on their door!

I hope you enjoy this quick and easy project to add a pop of spring color to your door! Have fun!
Questions? Comments? Leave a message below or send me an email! I would love to hear how your projects turn out!
